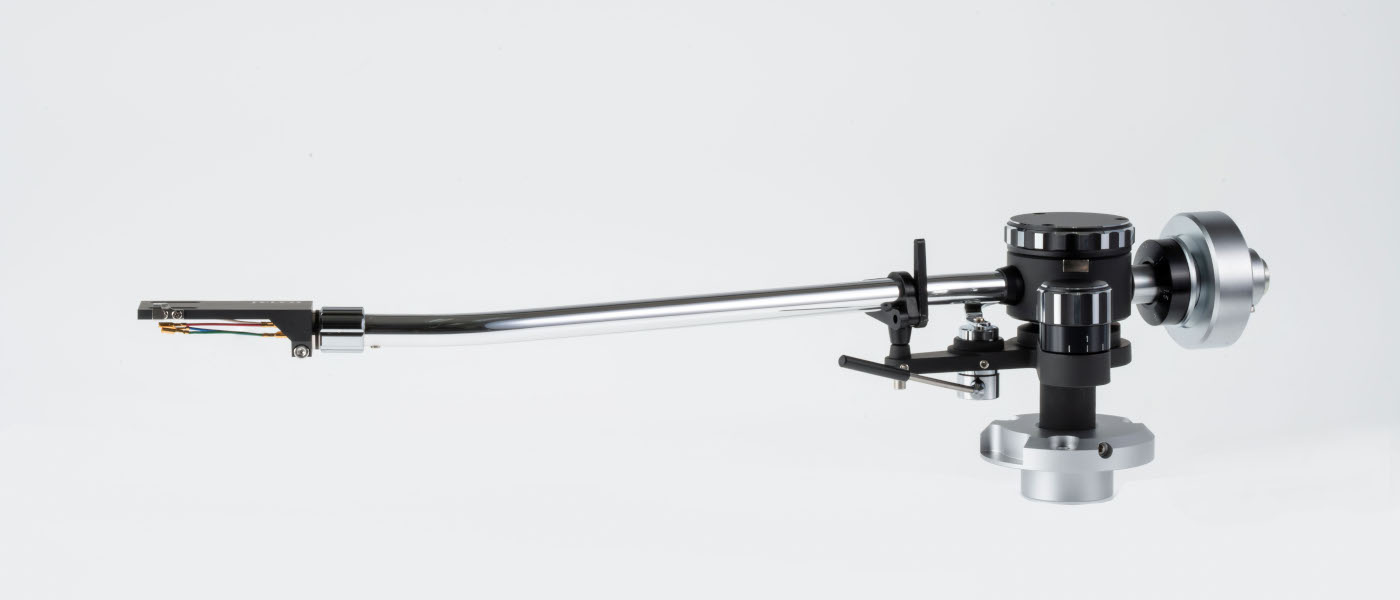
The company has been in continuous operation in Tokyo, Japan since 1920. Their new TK-850S MKII tonearm improves on their already relatively new MKI knife-edge bearing tonearm with upgraded internal wiring and electrical connectors. Jelco tonearms have a cult following of in-the-know vinyl enthusiasts and turntable manufacturers looking for the best “bang for the buck” tonearm. A couple of years ago, they came out with a new line of tonearms using a knife-edge bearing, the TK series. Just this year, they have made some refinements to the TK series tonearms, creating the new MKII series. This review concerns the new TK-850S MKII tonearm, the static-balance 9” length tonearm in the series. Jelco doesn’t really advertise their tonearms and they don’t rely on fancy materials or manufacturing. But they do make good, solid tonearms for a reasonable price. The TK-850S MKII I reviewed transformed my vintage Linn LP12 for the better in every way.
The new Jelco TK-850S MKII is a static balance knife-edge bearing tonearm with upgraded high purity silver-plated copper internal wiring. This is a relatively simple tonearm without any complicated mechanisms, exotic materials, or flashy advertising. But it sounds fantastic and is definitely a bargain.
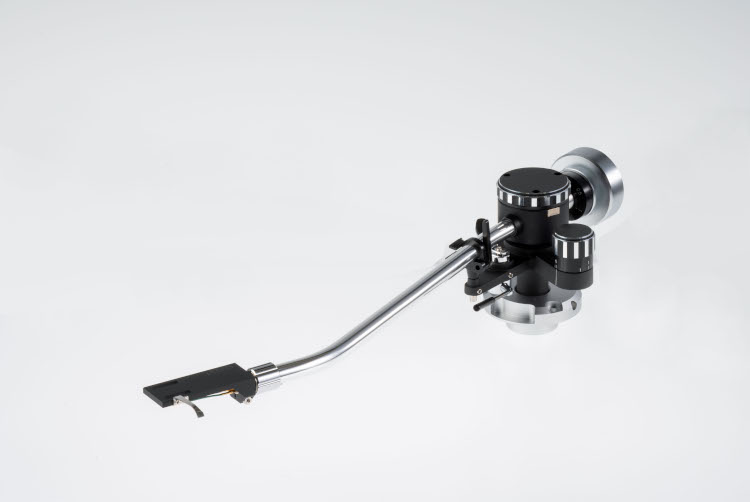
Jelco TK-850S MKII Tonearm
- Excellent sound quality, far better than what it replaced.
- Superb build quality, as good as anything out there.
- Lots of adjustments, including cartridge azimuth.
- Removable headshell, with included cartridge leads.
- Excellent value.
The inspiration for this review came from a desire to revitalize my “vintage” turntable. Back in the early 2000s as I was getting into Hi-Fi and before my time at Secrets, I bought a Linn LP-12 turntable with Valhalla power supply manufactured in about 1986 according to the serial number. I bought it for a bargain price on that new auction website eBay that I had just started using. The only catch: it was just an unassembled box of parts. They were all there, but I had to put it together myself or get it put together.
As a funds-challenged graduate student at the time, it wasn’t going to be the latter. Plus, one thing I had always found off-putting about some of the legends surrounding LP12s was that only a Linn High Priest could be allowed to touch the Sacred Mechanism otherwise all would be lost. I set about doing research, finding Linn setup guides, tips, and tricks and proved to myself that indeed those legends were hogwash.
I successfully put together and tuned my LP12 by myself and ended up with an analog rig that sounded very good. Yes, it took lots of fiddling, adjustments, and experimentation, but I like that sort of thing. I do it for a living designing and building radio receivers for radio astronomy.
That original LP12 came with a Linn Ittok LVII tonearm installed from the factory, and I equipped it with a Grado Reference Sonata moving magnet cartridge. And it’s been that way ever since. I got the idea to do some upgrades to the old rig, and this review is the first of those.
Vinyl is becoming more and more popular again, especially with young people. And a good quality vintage high-end turntable is definitely not a bad way to go compared with some new direct-drive piece of mass-market junk. I also plan to tackle the cartridge and some LP12 specific items like chassis suspension and power supply upgrades in the future, with a few of these reviews already in the works.
As part of my process of figuring out what to test, I wanted to focus on equipment that might not be very well known to the public, while offering good “bang for the buck.” I’m sure I’m like a lot of you. I am not going to dump giant amounts of money into upgrading my almost 35-year-old turntable. You certainly could mind you. Just look sometime at the Linn price list for the upgrades to bring a 1986 LP12 up to the maximum available in 2020. You could buy a nice new car for what that would cost.
One name I ran into quickly was Jelco. George Merrill of GEM Dandy products equips all of his new PolyTable turntables with Jelco tonearms and sells them a la carte as well. There are many happy customers around the world, but you can find few if any reviews in professional publications. This is for several reasons. Number one is that Jelco doesn’t really advertise their tonearms, they rely on word of mouth for their home-branded tonearm sales. Second, they have no distributors or press agents. Anyone who wants to resell Jelco products has to order them directly from Jelco in Japan.
It took quite a search for me to find a contact at Jelco to arrange a review. But eventually, I successfully contacted Mr. Tomoyuki Tsukamoto at Jelco and was able to arrange a review. Tsukamoto-san told me about their new MKII series tonearms and offered a TK-850S MKII to review.
Bearing System:
Knife Edge
Effective Length:
232mm (9.13”)
Pivot to Spindle Distance:
214mm (8.43”)
Overhang:
18mm (0.71”)
Offset Angle:
23.75 degrees
Tracking error:
+1.96 degrees / -1.03 degrees
Inner cabling:
PCUHD copper, silver plated
Compatible cartridge mass:
17-35g
Effective Mass:
13.4g
Height adjustment range:
38-60mm (1.50” – 2.36”)
MSRP:
¥170,000 ($1,580 at current exchange rate)
Website:
Company:
SECRETS Tags:
Jelco, Ichikawa Jewel Co. LTD, Tonearm, Analog, Vinyl, Tonearm Review 2020
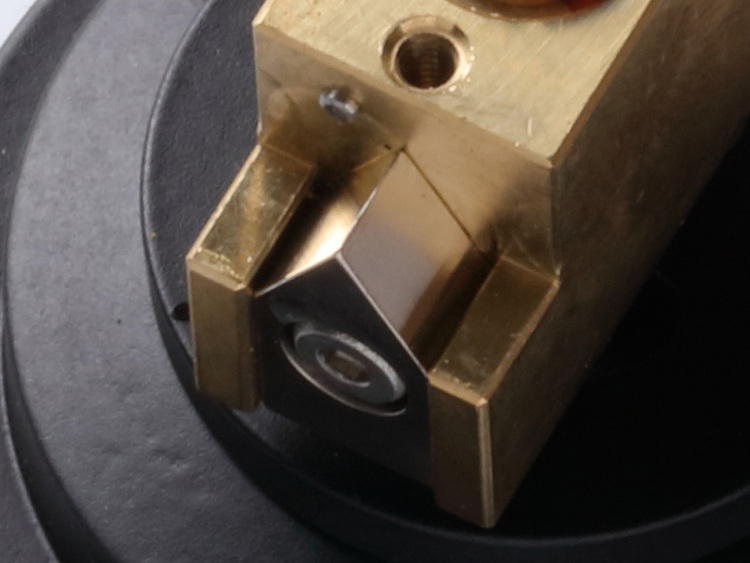
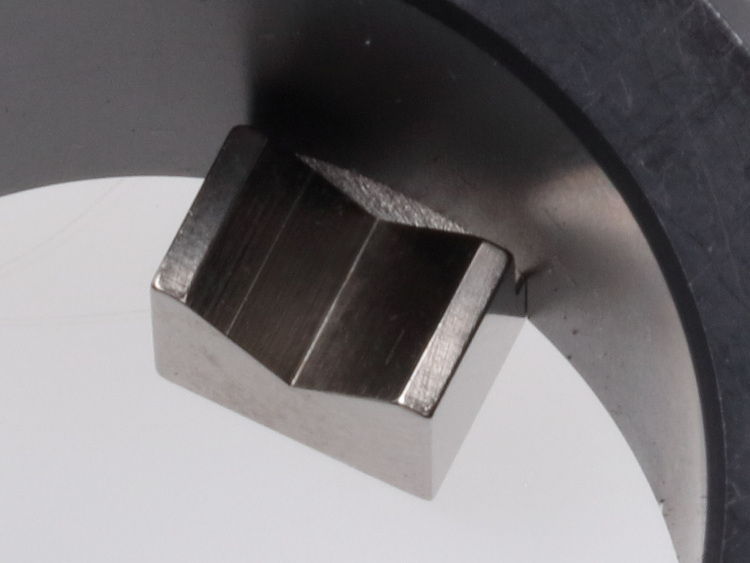
The TK-850 uses Jelco’s knife-edge bearing mechanism as opposed to the gimbal bearings of the previous SA-750D tonearm. Lots of people waste lots of bits on the internet arguing about the pros and cons of different types of tonearm bearings. This, in my opinion, is a waste of time. Differences in implementation are bigger than any intrinsic differences in the bearing type.
The TK series from Jelco uses a proprietary hardened steel knife-edge bearing for vertical motion and a single point bearing for horizontal motion. The TK-850 is a “static balance” tonearm, meaning the stylus force is set by adjusting the counterweight. The slight imbalance in the arm results in the tracking force at the stylus. The slightly more expensive TK-950 adds a dynamic balance mechanism. In a dynamic balance tonearm, the counterweight is set to perfectly balance the tonearm at zero tracking force, and then a second adjustable spring mechanism applies the force to the stylus. The TK-950 is designed so that the tracking force mechanism can be disabled so the tonearm can be operated in static balance mode if the user desires.
The TK-850 that I tested has that mechanism left off, resulting in a simpler and slightly less expensive tonearm. The expectation is that the dynamic balance mechanism will track a little better because the spring will compress when the tonearm is pushed up by the cartridge and will then rebound when the stylus drops back down in the groove. But there’s also something to be said for simplicity. The 850 just works by gravity, with tracking force always remaining relatively constant.
The “S” version I tested is the 9” length version that would fit my LP12. It’s 232mm effective length is only 3mm different from the 229mm effective length of the Linn Ittok. Plus, the mounting pattern is the same, or at least close enough to the same to not require any modifications. Jelco also makes “M” and “L” versions with 10” and 12” effective lengths if that’s what your turntable requires. In general, longer tonearms should sound better because of reduced geometric distortion, but of course, your turntable needs to fit the tonearm.
The MKII series of tonearms recently introduced has a few subtle improvements over the earlier versions, mainly focused on the internal wiring. The internal wiring is Pure Copper Ultra High Drawability (PCUHD) wire with thick silver plating. The copper itself is of 4N purity and is plated with 5N purity silver.
This improved wiring is also extended to the included Litz type headshell leads supplied with the tonearm. The DIN tonearm connector, headshell quick disconnect connections, and headshell lead connectors are all rhodium plated. The tonearm comes with a very nice magnesium headshell with a quick disconnect. This connector is especially nice for setup since the headshell and cartridge can be easily removed during setup operations that could be dangerous to the cartridge. Plus, it will allow you to have multiple cartridges all set up and ready to go, needing only to adjust the tracking force and Vertical Tracking Angle (VTA) when changing them.
The headshell also offers adjustable azimuth with a simple clamp screw. Tracking force is adjustable using a fine adjust rotating mechanism on the counterweight, with a freely rotating indicator ring you can set after getting the tracking force set and measured with a balance scale. The counterweight also has a two-position setting for the main weight for maximum cartridge mass compatibility. Very lightweight cartridges may require the use of the included headshell weight.
VTA adjustment is made with a simple set screw on the tonearm mounting shaft, although both Jelco and at least one aftermarket company make threaded or micrometer adjustable VTA mounts should you want one. This is unnecessary in my opinion unless you have multiple cartridges and like to switch back and forth between them often.
A spring-powered anti-skate mechanism is adjustable with a knob calibrated against the cartridge tracking force. The tonearm rest and lock are integrated into the base, and a nice hydraulic tonearm lift mechanism is also present.
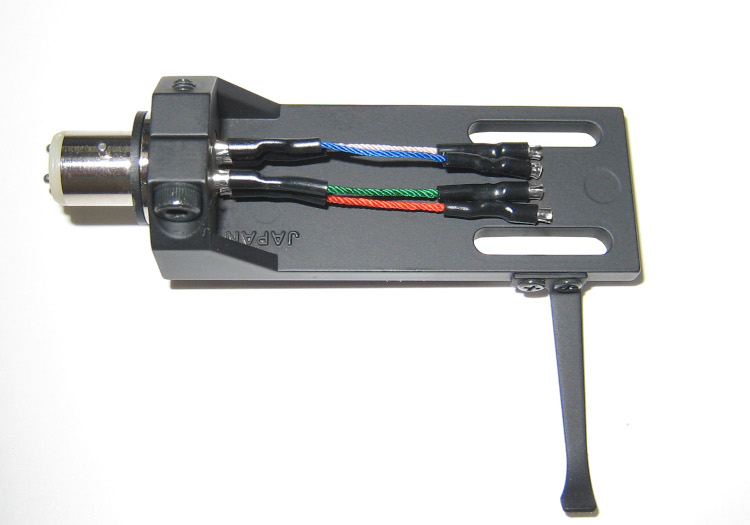
Unlike some higher-priced tonearms, the TK-850S MKII doesn’t use any super exotic materials or manufacturing techniques. Just aluminum, steel and magnesium, and good, solid engineering with the benefit of lots of experience. So your money is all going to the tonearm, not fancy materials, exotic manufacturing or lots of advertising. That’s my sort of product.
I made “setup” a separate section because this is a tonearm. This is basically in lieu of a “measurements” section since I don’t have the equipment to do any objective measurements on a tonearm.
Replacing a tonearm on a turntable requires a significant amount of adjustment and fiddling. None of it is hard, though, as long as you take your time. Any Hi-Fi shop that deals in analog could also do this for you if you are uncomfortable. But, the best way to learn is by doing. I’ll tell you here how I set up the TK-850S MKII and include some pictures. Before you start, you’re going to need some setup tools. A bubble level, stylus force gauge, and a cartridge alignment protractor are essential. You cannot set up a tonearm or a new cartridge without them. Some optional, but highly valuable tools are a setup record with tracks to set anti-skate and cartridge azimuth, and a USB microscope to measure and set Stylus Rake Angle (SRA), the thing you’re actually changing when you set VTA.
Secrets Sponsor
I used the venerable Shure SFG2 stylus force gauge, a simple balance with a calibrated sliding weight. I also used a DB Systems Protrac cartridge setup protractor to properly align the cartridge. I have a HiFi News and Record Review Test LP, which has tracks to set anti-skate and cartridge azimuth. I also recently bought an inexpensive USB microscope online for $23 (the Jiusion 40 to 1000x Magnification Endoscope). Some websites and authors recommend some very expensive USB microscopes for measuring and setting SRA, but I found that this cheap one did the job for less than 1/10 the price. The essential tools will cost you about $100. The test LP and the microscope will cost another $75.
The first step is to carefully remove the cartridge from the old tonearm. I had to be extra careful because I lost the stylus guard for my Grado cartridge a few years ago, and replacement guards are not available, believe it or not. I undid the headshell leads with small needle-nose plyers, removed the two cartridge screws, and stored the cartridge upside down in a safe place while I proceeded.
Linn LP12 Valhalla power supply boards have 380 VAC on their capacitors inside the turntable, so I unplugged the turntable and let it sit for a while before opening it up. Removing the outer platter unloads the suspension and keeps it from bouncing around. The inner platter just slides into the oil-filled bearing cup. To work underneath, you can prop the turntable up on a makeshift stand (using two kitchen chairs is a popular method, I used 4 soda cans on a table) so you can get underneath and remove the bottom cover. You can also just remove the inner platter and cap the bearing with the rubber cap you should still have so you can just turn the deck upside down. But I’m always paranoid about that cap coming off and leaking the bearing oil all over the place, so I just prop the thing up and work from underneath when I can.
I unplugged the tonearm cable from the tonearm DIN connector and then loosened the VTA screw to slide the tonearm out the top. I then undid the three Allen screws and nuts to remove the mount from the armboard. Since the cutout was the same and the effective length was so close, I first tried to just drop the new TK-850S MKII right into the Linn armboard. It fit perfectly, but when I got farther into the process I found that I didn’t have quite enough play in the headshell slots to properly align the cartridge. I had it back as far as it would go but needed to go farther.
This was with my particular cartridge, though. You could be fine, but you should be prepared to get a new armboard with Jelco specific geometry. Do not be tempted to say “it’s close enough.” Cartridge alignment needs to be correct or else you won’t get the sound you paid for. I bought a pre-drilled acrylic armboard on eBay for an LP12 and Jelco tonearm. The tonearm also includes a jig and a template to drill your own blank armboard. Even an OEM Linn blank armboard is relatively cheap, so don’t skimp on this step if you can’t get the cartridge to align properly. Most people seem to make it work with the standard Linn cutout, so I think I got unlucky with my cartridge.
Anyway, once the tonearm mount was bolted to the armboard, I slipped the tonearm in the mount and temporarily secured the VTA screw. The clocking of the DIN connector was 180 degrees from the old tonearm, so I had to loosen and adjust the tonearm wire clamp so that the connection could be made and the tonearm wire didn’t bind and mess up the suspension motion.
I then brought the turntable over to the stand and leveled the suspension with a bubble level on the platter. I had to turn the locknuts quite a bit to level the sub-chassis since the total mass was quite different from the Ittok. Be sure to make certain your platform is level before this step. If you tune it on a level platform, you can move it to any other level platform and it won’t need any adjustment. Tune it on a tilted platform, and you’ll have to retune every time you move it.
Luckily, I needed to do little to the suspension to make it bounce nicely and evenly after this adjustment. The Linn sub-chassis is suspended from three springs, which can have their heights adjusted with locknuts to level. They can also be rotated to adjust their relative stiffness. The name of the game in tuning the turntable is to get the platter to bounce smoothly without binding and perfectly up and down without any side to side motion when you bounce it with a poke at the sub-chassis center of mass, along the line between the spindle and the tonearm pivot. I had to make only minor adjustments. Always remember to check the tonearm cable; if it’s tugging on the sub-chassis or binding as the sub-chassis bounces, you’re going to have a problem.
There’s a very good Linn LP-12 setup guide you can find on the interwebs that gives a step by step process to LP12 suspension tuning. Or you could take it to one of those High Priests and pay your tithe of many hundreds to do this for you. You’ll just need to find one who will work on an LP12 that doesn’t have all Linn parts on it.
Another rumor about LP12s that’s bollocks: A well set up LP12 doesn’t just randomly go out of tune even if you move it, as long as it’s always set up on a level platform. If you move it carefully and correctly with the outer platter taken off, you won’t mess up a thing. I moved houses three times over 15+ years and never had to adjust the suspension once. I just needed to make sure it was on a level platform each time, and everything was fine. I think this rumor started from people who didn’t level their platforms when they moved the deck or had their platform go out of level and fixed it by retuning the deck rather than just leveling the platform. This is important. Make sure your equipment rack, table, shelf, or whatever the LP12 is on is perfectly level to start with, and all will be well.
Once the turntable was level and bouncing nicely, I could put the bottom cover back on and start on alignment. First, I carefully mounted the cartridge in about the middle of the headshell. I used a medium thickness record on the platter and carefully set the stylus down on the stationary record to check coarse VTA. I adjusted the VTA setting to approximately level the arm tube by eye, returning the tonearm to the rest and engaging the lock each time before making any adjustments.
Don’t try this with the arm not locked. You will almost certainly destroy your cartridge if you do that. If you never make any adjustment without first locking the tonearm in its rest, you’ll always be fine. I then got out the stylus force gauge and set the tracking force to the 1.9g I know my cartridge likes. Grado recommends 1.5-2.0g. The TK-850S MKII has an adjuster built into the counterweight. Rotating the counterweight on the shaft moves the weight back and forth slightly for fine adjustment. Coarse adjustment is done by just sliding the whole mechanism back and forth on the shaft.
The main counterweight also snaps into one of two positions either closer or farther from the pivot. I set the coarse alignment to more or less balance the tonearm, and then used the turning mechanism to dial in the correct tracking force. I then set the little moving scale on the counterweight to match the force I measured. This scale just rotates freely, so you NEED the gauge to set the tracking force. Keep in mind you can ruin your cartridge, your records, or both with tracking force that is either too low or too high, so get a gauge!
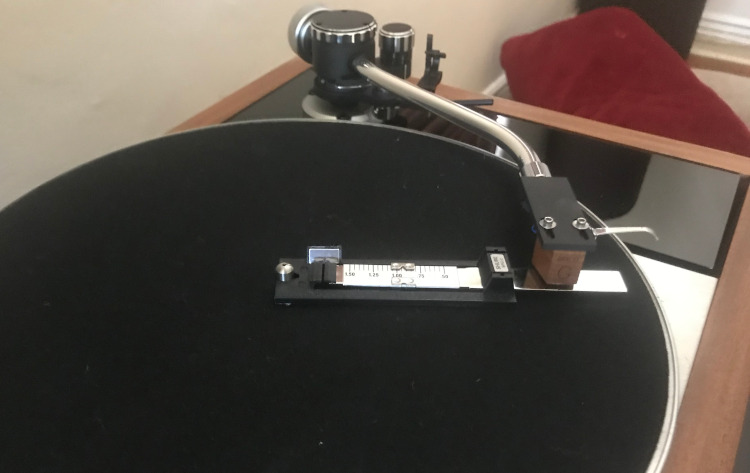
I then set the stylus rake angle using the microscope method. Records are cut with the cutting lathe point set at 92-degrees (2 degrees past perpendicular) from the record surface measuring from the “upstream” direction towards the cartridge and tonearm.
The idea behind the microscope SRA method is to set your stylus to match this 92-degree angle the record was cut with. The other method is “by ear”. I’m a scientist, so I like a process with some rigor behind it, so I use the microscope method. In the end, I think it sounds better than just shooting in the dark.
To do this, you use an old CD or DVD on the platter shiny side up and carefully set the stylus right at the edge of the CD. You then take a photo from the side with the USB microscope and measure the angle of the stylus right from the photo.
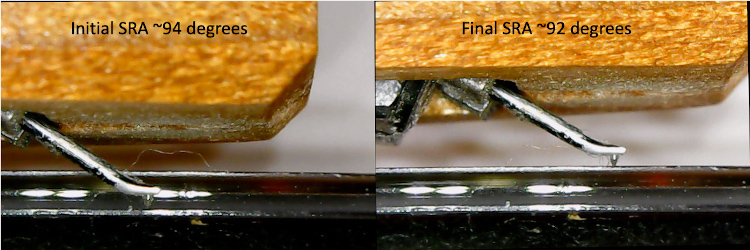
It takes a little bit of experimentation to place the stylus right at the edge of the CD so you get a clear photo of the stylus tip and to get the photo in focus. It took me about 1 hour to get good at it the first time. Once you get a good photo, you can use the measurement tool in Photoshop or its free equivalent Gimp to measure the angle of the stylus to the CD surface. You then just need to adjust the height of the tonearm such that the SRA is 92 degrees.
I show before and after photos here in the review. Depending on your stylus and the lighting this can be a little tricky because of reflections off the diamond stylus, but it’s not too hard to get it right to better than one degree and then tune by ear after that. Lower SRA (tonearm down) sounds darker with more bass, higher SRA (tonearm up) sounds brighter with less bass.
You can find more about this process all over the interwebs by Googling “setting stylus rake angle”. You’ll have all the youtube videos and articles you can handle. You only need to make this measurement once if you use that new-fangled thing called math. To calculate how much you need to move your turntable VTA adjuster up and down, just multiply the sine of the angle you need to go by the tonearm effective length. For example, if you measure an initial SRA of 90 degrees, and you want to be at 92 degrees, you need to move the VTA adjuster up by Sin(2 degrees) * effective tonearm length. For my tonearm effective length of 232mm, that amount would be 8.1mm! That’s a lot, almost a third of an inch.
This shows that tiny changes in the tonearm height up or down won’t do much to SRA. You just need to get it close. Plus or minus 1/16” in height only changes SRA by plus or minus 0.4 degrees. You can measure that with a decent ruler or pair of calipers. When you’ve made the change, take one more photo and see if you got it right. If you are careful, you will get it right on the first try, but you can repeat it to your heart’s content.
Since you just moved your tonearm up and down, you probably changed your tracking force a little bit, so remeasure and tweak. You can then use your stylus protractor to align the cartridge. LPs are cut with a lathe that is always perfectly tangent to the groove. But a pivoting tonearm traces an arc on the record so cannot be always perfectly tangent. The protractor is designed to align the cartridge to be tangent at two points near the beginning and end of an LP, minimizing the distortion overall. Note this is why longer tonearms are better. The longer arc radius of a long tonearm deviates from the ideal geometry less than a short one.
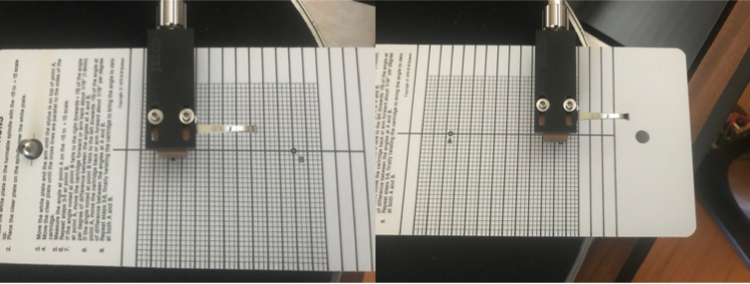
There are multiple schemes to do this that optimize the distortion level across the record in various ways. A given protractor will be designed to use one of them. My DB Systems protractor is a gauge that sets on the record spindle and has two labeled marks for the stylus. The protractor allows you to measure if the cartridge body is twisted relative to the alignment markings when the stylus is at each point. You then move the cartridge back and forth in the headshell according to the directions that come with the protractor until this misalignment is zero at both stylus locations.
It was at this step I found I could not align my Grado cartridge with the Linn armboard cutout. I had already moved the cartridge as far back in the headshell as it would go but it needed to go farther. The new armboard fixed that, and I was able to align the cartridge correctly. With a different cartridge, there might have been enough room. I only needed another millimeter of travel to get it right.
I marked the VTA setting with a sharpie before switching armboards so I didn’t have to reset that, and I was careful to not bump the counterweight, so my tracking force stayed put. Although I did check. As with the other adjustments, you need to return the arm to the rest and lock it each time you adjust the cartridge in the headshell, or you’ll be sorry. It takes a while and is a bit fiddly, but it’s not hard.
Here, I show photos of the cartridge on the protractor at the “A” and “B” positions after alignment, where you can see the cartridge body is perpendicular to the gauge markings. Ideally, you’d measure the stylus cantilever itself, but this is very hard to do without a mirrored custom protractor, which you can get if you’re sufficiently OCD. For me, the DB systems method is good enough. And now that it’s all set up, we can finally play a record.
The first record to play is a test LP. I set the anti-skate dial to 1.9 to match the tracking force and played the tracking test tracks on my Hifi News and Record Review test disk. I tweaked the anti-skate setting to get the best tracking performance. I was able to get very good tracking on all but the hardest, highest level test track.
Secrets Sponsor
I also checked cartridge azimuth by setting my preamp to mono (actually using a stereo to mono RCA adapter since my Rogue RP-1 preamp doesn’t have a mono setting) and playing the azimuth test track. It’s designed such that perfect azimuth will result in no sound coming out of the speakers when played in mono mode. The screw and clamp method on the Jelco allows adjustment of azimuth, but it’s hard to make small changes. I fooled with it for a while but I’m not sure I made it any better than it was before I started.
Once that was done, I could sit down to listen. This might all sound daunting, but you too can do all of these settings in one careful, relaxed afternoon. Or you can pay someone to do it for you, but where’s the fun in that?
When I listened to the first record with the Jelco installed on my old LP12, it sounded like someone replaced the whole deck with something much better. Every facet of sound was better with the new tonearm, and not just by a little bit.
Most of my vinyl is jazz, much inherited from my mom and my aunt who bought the records new back in the 60s, 70s, and 80s. I chose Stan Getz’s Big Band Bossa Nova for the first album, one of my aunt’s favorites. The thing that immediately struck me was how “alive” the music sounded. This is the area where vinyl smashes even high res digital every time, in my opinion. I think it’s the microdynamics, small changes in volume that get lost in digital quantization even with the higher dynamic range.
Whatever the technical cause, that album sounded the most alive, the most real sounding I had ever heard from my system. Yes, there were clicks, pops, and other noise, and yes the detail extraction wasn’t as good as if it was high res digital, but that aliveness was there in spades.

Stan Getz “Big Band Bossa Nova”
Listening closer, detail extraction was much better than the old Linn tonearm, with more sharpness and less blending together of subtle queues. Stereo imaging was better, with a wider and taller soundstage, and much better “3D” presentation of images. The bass seemed to reach deeper and was tighter, and there was more air and sparkle on the top end without sounding harsh. This newfound across-the-board superiority made it easier to hear the difference in recordings.

Ray Vaughan “Texas Flood”
I have a few 1980’s records I suspect were actually recorded in digital and then cut into the vinyl as was the fashion back in the day. These sounded like crap, as you’d expect them to sound. Listening to Stevie Ray Vaughan’s Texas Flood, which I have on both SACD and vinyl, the result was a tie.
The lower noise and better detail of the SACD balanced some of the improved microdynamics of the record. I’m pretty sure the limitation here was the original recording itself.

Beethoven “Deutsche Grammophon”
I also listened to some classical, including a few Beethoven symphonies on the big Deutsche Grammophon complete box set my mom gave me a few years ago. Normally I’m kind of underwhelmed by classical played on home stereos. It sounds so small and flat compared to a real concert. This was better. Some of that size, scale, and reality returned. Still, a “scale model” of a real orchestra, but better.
I did still run into some recognizable inner groove distortion sometimes, especially with loud recordings at the end of LPs, but the performance was better than with the Linn tonearm. The Linn had the nasty habit of resonating with loud recordings. You could mute the speakers and hear the music coming through the armtube. The Jelco all but eliminated this nasty behavior. I’m pretty confident now that all limitations in my analog system are no longer due to the tonearm, but lie with the cartridge and the turntable. The across the board improvement in sound that the Jelco TK-850S MKII delivered alone rejuvenated the sound of my old turntable, and make me eager to go farther!
The JELCO TK-850S MKII is one of the best values in analog, even at its full $1,585 MSRP. If you shop around, you can find it for less. I think I’d have to spend double that to get my hands on a tonearm I guarantee would be better. It transformed the sound of my old Linn LP12. I almost immediately decided to keep the review sample after I started to review it, the improvement was so startling and complete. I think that all is practically the definition of “bang for the buck.”
- Excellent sound quality.
- Superb build quality, without resorting to expensive, exotic materials.
- Lots of adjustments and clever design.
- Excellent value.
- Better directions. The directions that came with the tonearm were pretty basic.
- More US dealers so it’s easier to hear in person before buying.
The Jelco TK-850S MKII is indeed an excellent “bang for the buck.” The sound quality improvement I experienced with my vintage Linn LP12 was nothing short of stunning, with every area of performance improved. The main improvement of better “aliveness” for lack of a better word is what we all got in this hobby for in the first place, or at least it was for me. Having home electronics that do a better job of recreating that feeling of being at a live performance with living, breathing artists in your living room is the whole point. The TK-850S MKII did exactly that for me and at a relatively bargain price point.
I encourage you to seek out one of the few dealers in the US that stock and sell Jelco tonearms and give them a listen. If you’re in the market for a new tonearm, I expect you and your bank account will be happier for the effort.
Update
In early May, news began to circulate that Jelco had ceased operations, a victim of the downturn in business related to COVID-19. I attempted to contact Tomoyuki Tsukamoto at Jelco to confirm, but my email was returned as undeliverable. This lends credence that the reports about Jelco are correct. My MKII tonearm that I purchased at the end of the review might now be as rare as hen’s teeth. Many retailers still have a stock of Jelco tonearms, and they are still every bit as good a value as before. And tonearms aren’t really something that break or wear out unless you really abuse them. My 25-year-old Linn Ittok is a testament to that. So if you’re interested I suggest you get a Jelco tonearm from a distributor with stock soon before they become worth more used than they were new, something I fully expect to happen now that the number of tonearm manufacturers selling a la carte is dwindling. Note I expect very little difference between the MKI and MKII TK-850 tonearms, given the main upgrades were the wiring and connector plating.


