I have had a VPI HRX turntable for many years. I have installed several cartridges on it, and each time, there have been difficulties. I want to discuss those issues and how I solved them, in order to save you the hassles that I went through.
Recently, I obtained a new Sumiko Starling cartridge ($1,899). It is an MC (Moving Coil) design. I decided to try this one out, comparing it to my existing Sumiko Palo Santos Presentation cartridge ($4,499) which is also an MC design.
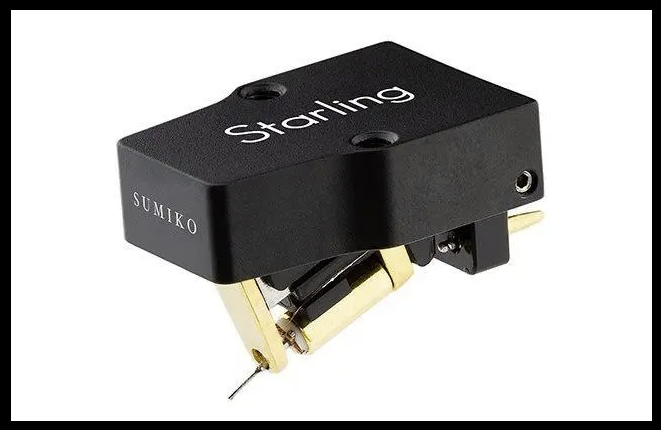
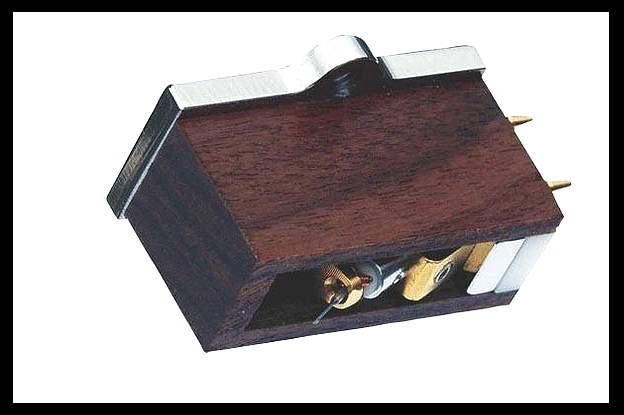
As you know, there are two basic phono cartridge designs now, Moving Coil (MC) and Moving Magnet (MM). There is also Moving Iron, but those are made by just a few companies. Their technology and performance are in between MC and MM.
Secrets Sponsor
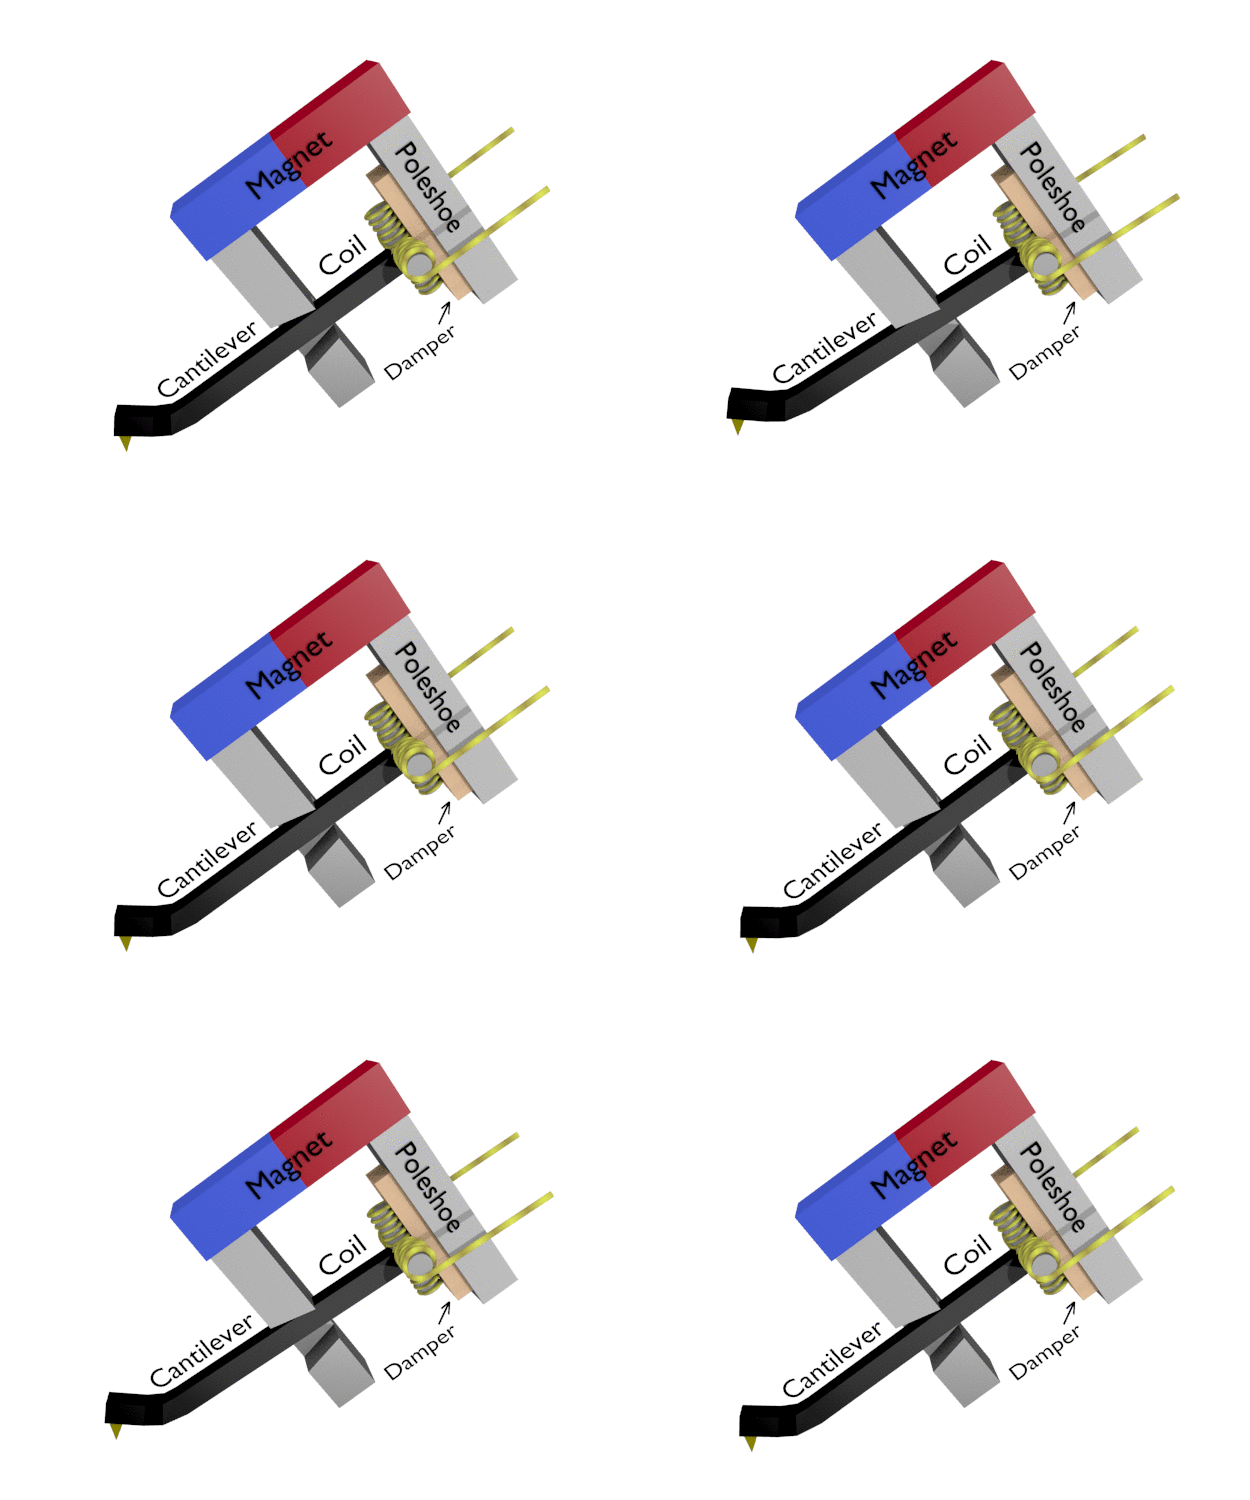
Moving Coil cartridges have two small wire coils attached to the rear of the cantilever, 900 to one another. They are in line with the 450 ridges that represent the music in the vinyl groove. A fixed magnet is nearby, and when the coils move from the cantilever’s vibration produced by tracking the ridges in the groove, a small voltage is produced in the coils for each channel. Moving Magnet cartridges have two small magnets attached to the rear of the cantilever rather than coils being attached to the cantilever. So, the cantilever moves the magnets, and nearby fixed coils are where the voltages are generated. MC cartridges deliver more detail because of the lower mass of the cantilever and coils. MM cartridges deliver more voltage. If your receiver has a built-in phono preamplifier, it is likely for MM only, so if you want to save money, you would buy a MM cartridge. If you can afford to buy an outboard phono preamplifier, and they usually have both MC and MM inputs, I would suggest getting an MC cartridge for the improved detail in the sound.
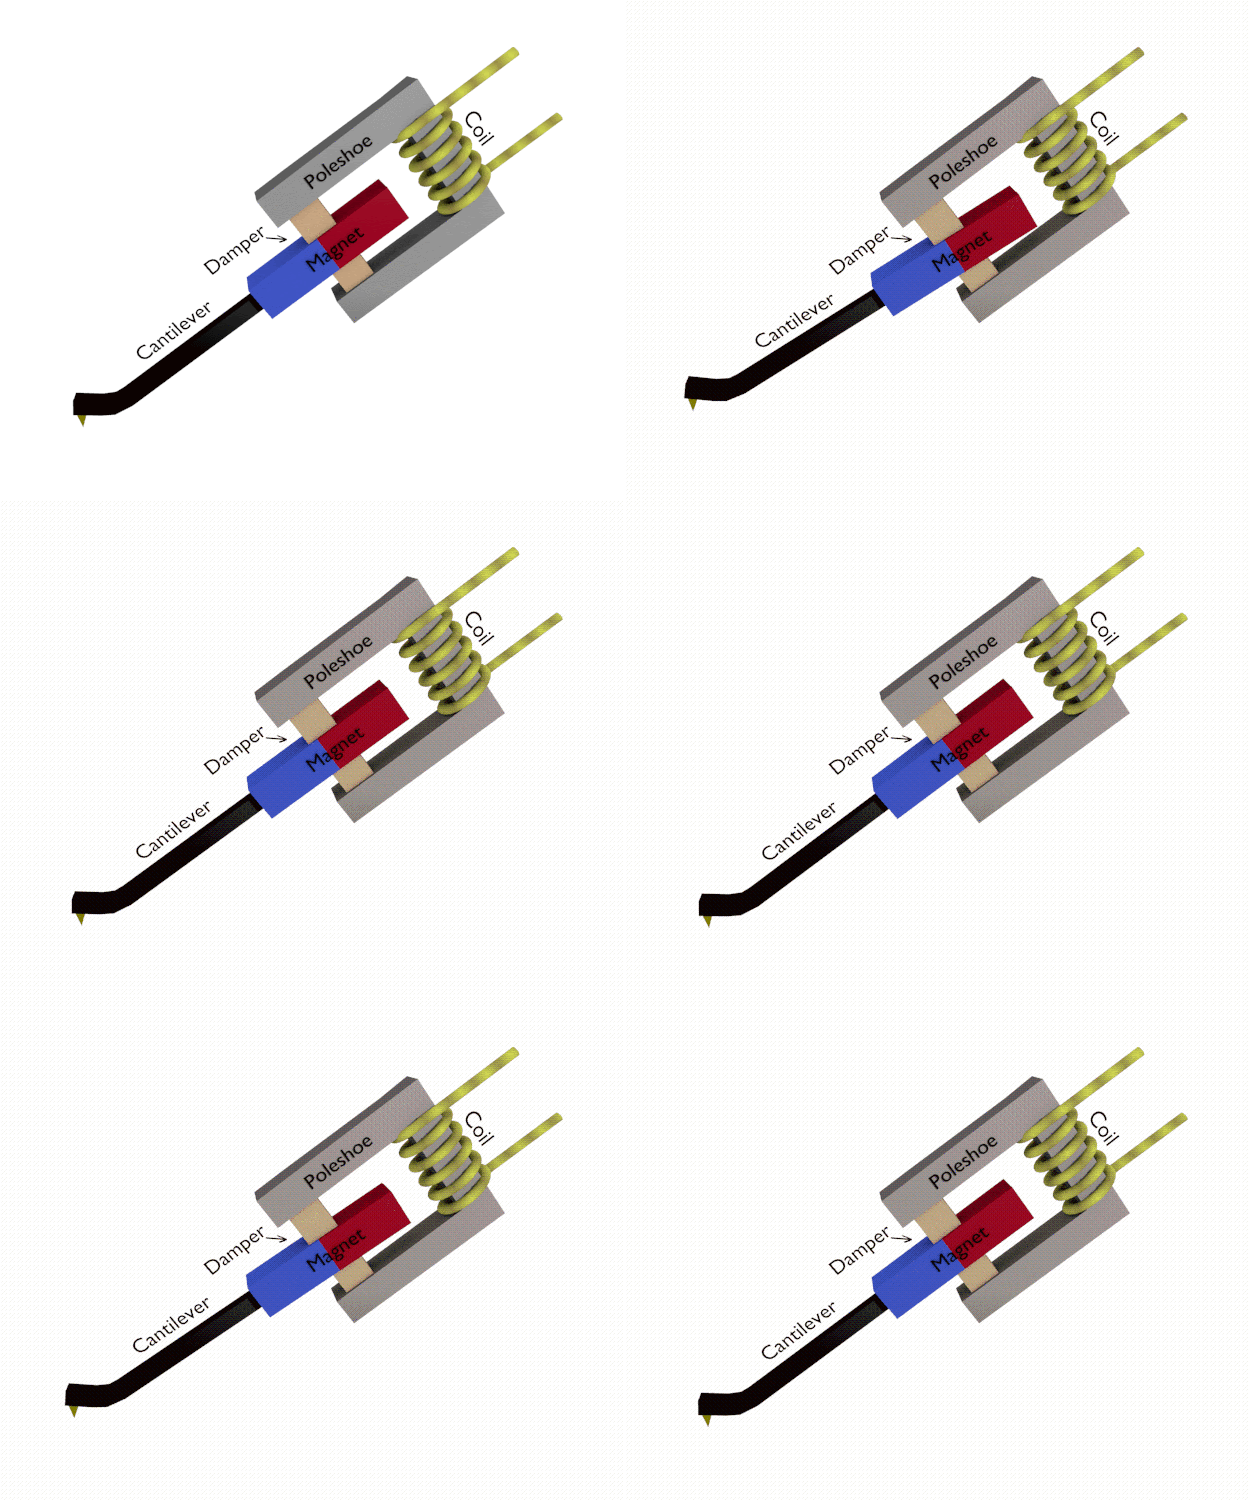
https://www.goldring.co.uk/bauyersguide
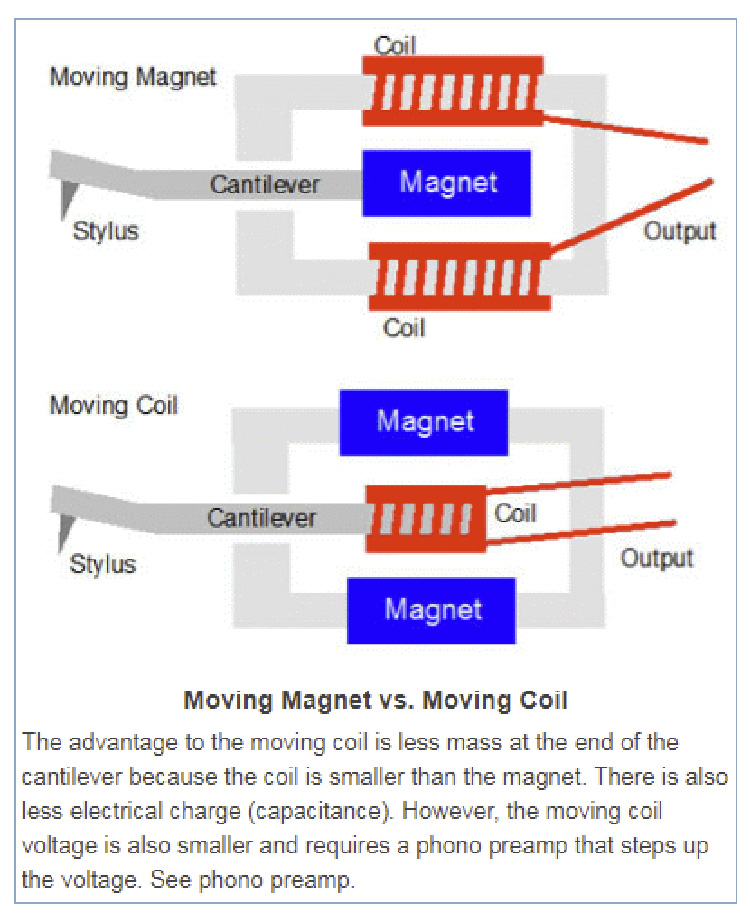
https://encyclopedia2.thefreedictionary.com/Moving+Coil
If you just purchased your turntable and cartridge, mounting the cartridge is not difficult, but it is not easy either. You must be very careful or you can damage the stylus, and once it is damaged, you may have to just purchase a new cartridge because not all styluses can be replaced. Even if it can be replaced, the new stylus will likely be expensive. For MC cartridges, the cantilever has coils mounted at the upper end. The output wires of these coils have soldered wires connecting them to the output pins. So, it is not a simple matter to remove the cantilever and replace it with another. For MM cartridges, magnets are on the upper end of the cantilever. No soldered wires are connecting that cantilever to the outputs so the cantilever is easier to replace.
The stylus is the diamond tip on the end of the cantilever (see diagrams above). This tip is what goes into the grooves on the vinyl record. It is pushed sideways at 450 angles, to the left for one channel and to the right for the other.
Manufacturing the diamond tip is arduous and secretive.
There are several designs to the tip.
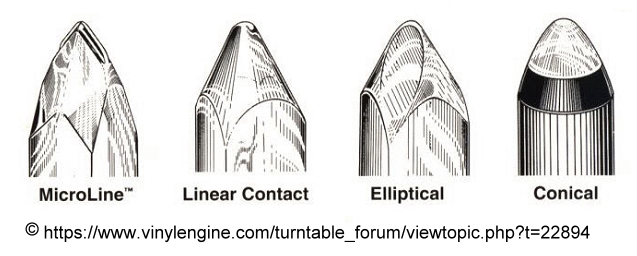
The Conical design is the oldest. The problem with this design is that it does not fit exactly into the vinyl groove – close but no cigar. The Elliptical tip has flat sides set at 900 to one another. This matches the 450 left and right channels. Linear Contact is a further improvement, and Microline is the latest. Another name for this is Microridge; it just depends on the manufacturer. The Microridge is a very small flat sliver on the end. This fits exactly into the groove that was cut by the recording stylus when the lacquer for the vinyl was engraved. This allows more surface area of the stylus to contact the vinyl groove during playback, sort of like making a key fit tighter into the keyhole. How the manufacturers create that sliver of diamond which is only a few microns (µm – micrometers) in edge size is an amazing secret. To put that in perspective, a human hair is about 70 microns in width.
Here (below) is a micrograph (photo taken through a microscope) of the Microridge stylus on my new Sumiko Starling phono cartridge. I took this photo with one of the inexpensive (about $40) USB microscopes that are now available. They are kind of difficult to use, but I would suggest getting one so that you can examine the tip of your cartridge stylus from time to time to check its cleanliness and also the wear.
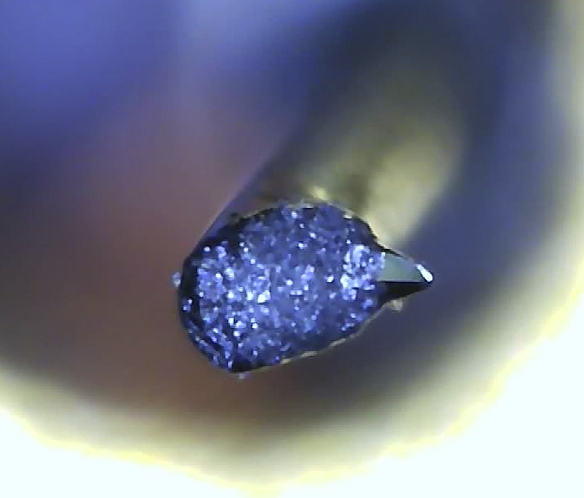
You can see the end of the cantilever coming down from the top right area of the photo to the center. Then, the blue region at the end of the cantilever is the cement that holds the stylus tip on the right edge. The diamond tip is on the right side of the cement and is very small. You can see the polished flat right angles, and the Microridge is near the very shiny small area on the end.
The Starling was a new, unused stylus when I photographed it. In other words, there was no dirt or other debris on it. This stylus (Microridge) is 75 µm (microns – micrometers) x 2.5 µm. The Palo Santos Microridge stylus is also 75 µm x 2.5 µm.
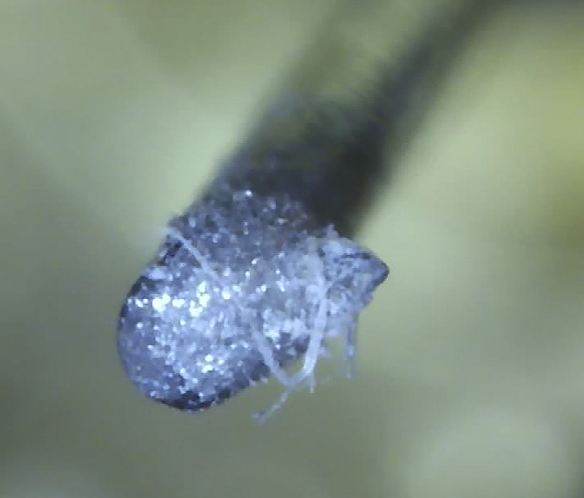
Here (below) is a micrograph of the stylus from my Sumiko Palo Santos cartridge that I was replacing with the Starling. Notice that it has fibrous debris on it.
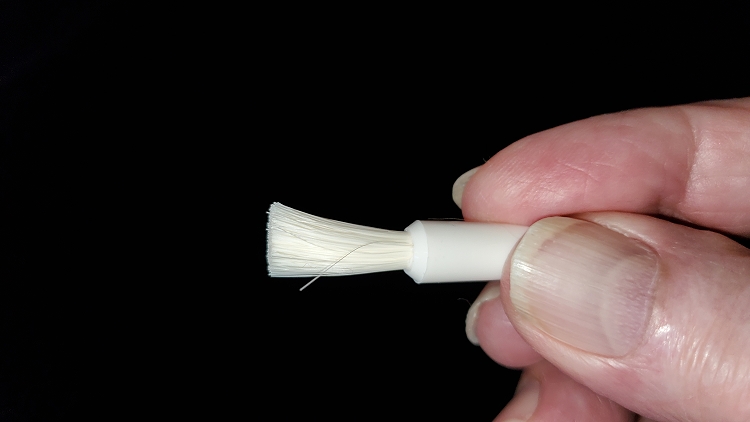
I used a soft brush to clean it, the photo shown below.
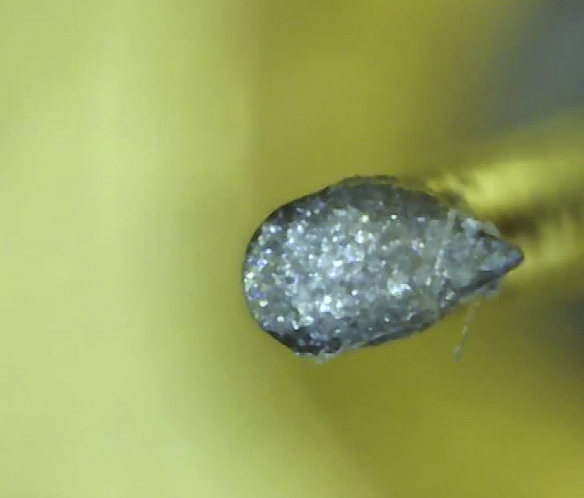
There was still a bit of debris, shown below.
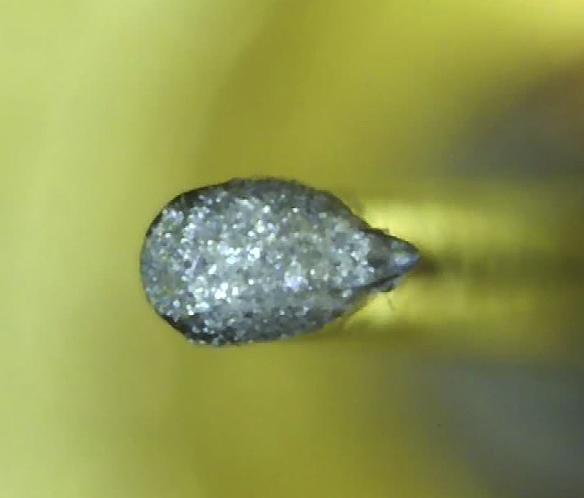
So, I cleaned it with the brush again. It now appears to be clean (below). I think it is important to clean the stylus regularly. You can get a small soft brush by going to a store that sells womens’ makeup supplies. Soft brushes that are used to apply eye shadow will work fine for this (a larger soft brush is also handy for removing bits of dust from an album you are about to play, so get one of these while you are at it). Just be careful when brushing the tip. Choose the softest brush possible, not something with stiff bristles. You are not trying to scrape the debris off the stylus, just gently brushing it off. Brush from the rear towards the front of the cartridge. This mimics the pull on the stylus that the LP groove produces. Don’t brush side-to-side as that might bend the cantilever. There is a commercial stylus cleaner called Zerodust that you can use instead of a brush. It is a gel that you lower the stylus tip onto and then lift it back up. I have not used this item, but it has good reviews. It is about $40. I plan to clean my stylus after every five LP playings, but you may want to do your own thing in this regard.
So, I removed the Palo Santos cartridge and began mounting the Starling. Here is a photo of the Starling in its box. It had a plastic cover protecting the stylus.
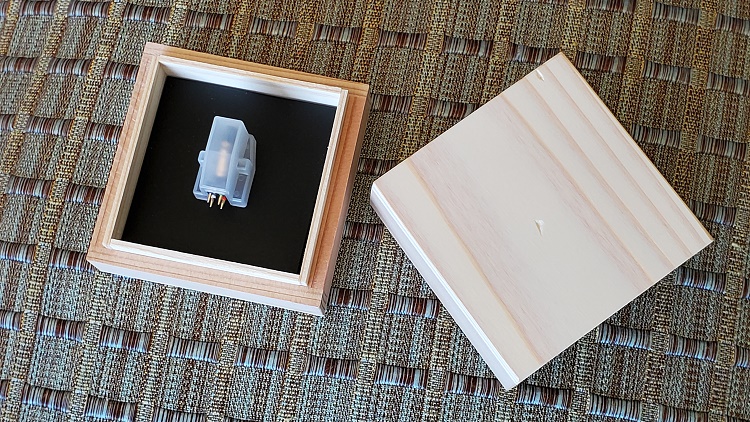
I removed the cover and pulled the cartridge out of the box It was still attached to the black cardboard, so I removed it by unscrewing the two small bolts that held it to the cardboard using a small hex wrench.
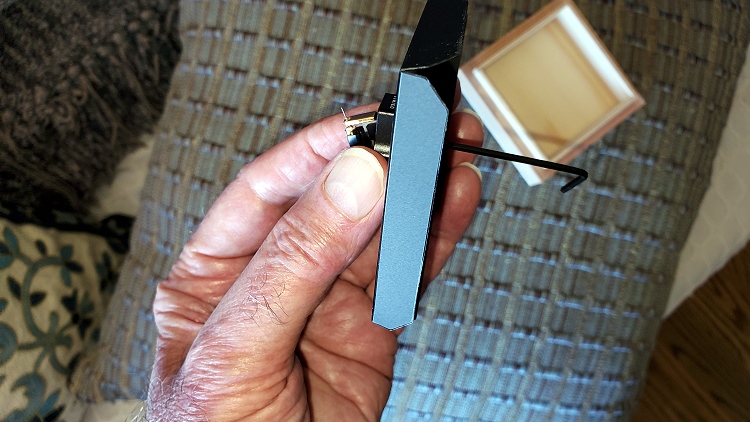
Obviously, at all times, you want to be careful to handle the cartridge only by its body, and never touching the stylus. I placed the Starling back in its box and onto a nearby bookcase shelf rather than next to the turntable where I might bump it with my elbow.
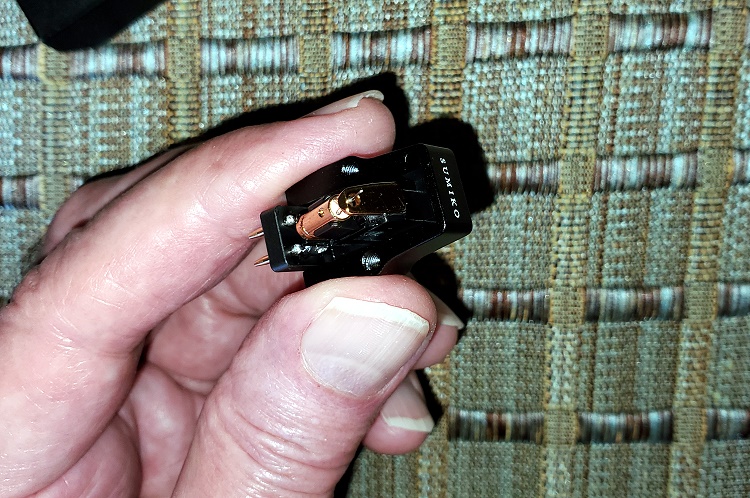
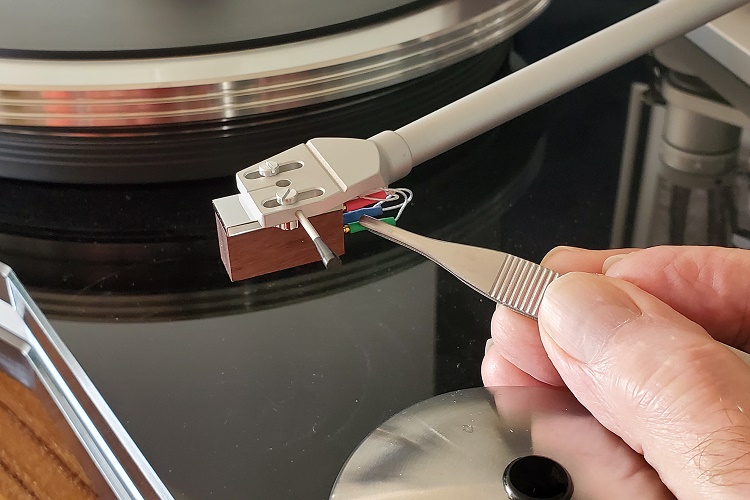
Now, it was time to remove the Palo Santos cartridge from the tonearm. First, I had to pull the connecting wires off of the cartridge pins. To do this, I used forceps (tweezers). It is important to grasp only the sockets rather than the wires. Otherwise, you might separate the socket from the wire.
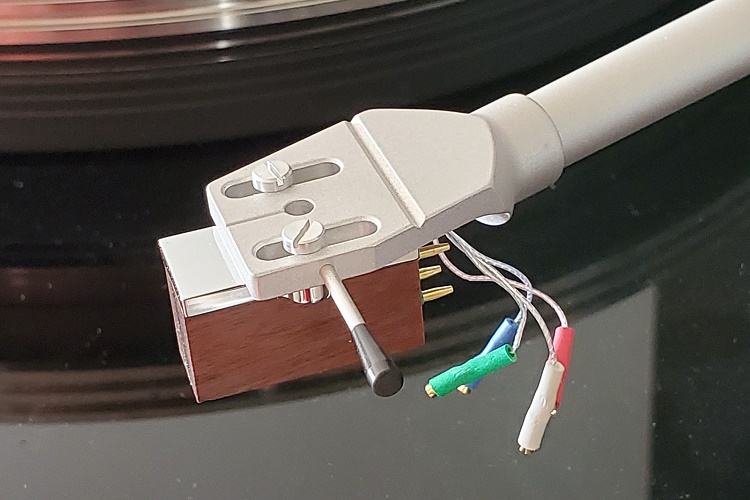
Then I unscrewed the bolts on the top while holding onto the Palo Santos cartridge. I placed the Palo Santos into its box by first attaching it to the bottom of the box with bolts. I put the cover on the box and put the box away. It is important to do this, or otherwise, if I simply put the cartridge aside, I might knock it off onto the floor with disastrous results.
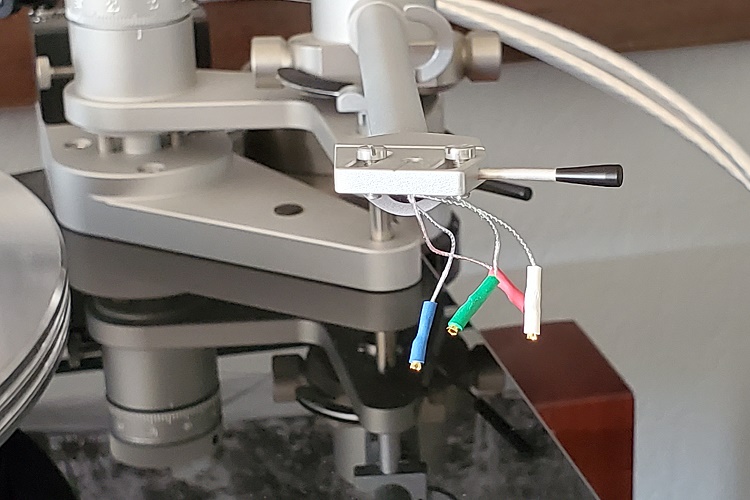
I placed the Starling onto the tonearm headshell and attached it using the bolts. My fingers held the cartridge in place but also held the headshell. The bolts here were slot rather than hex. I have a small screwdriver for this purpose.
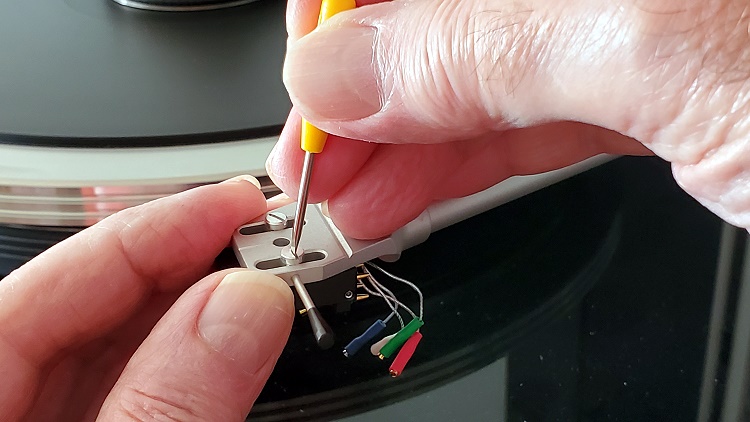
I pushed the wire jacks onto the pins, using the forceps to hold each jack and sliding it onto the appropriate color-coded pin. My tonearm uses a pivot rather than a gimbal, so I could turn the tonearm on its side for this photo.
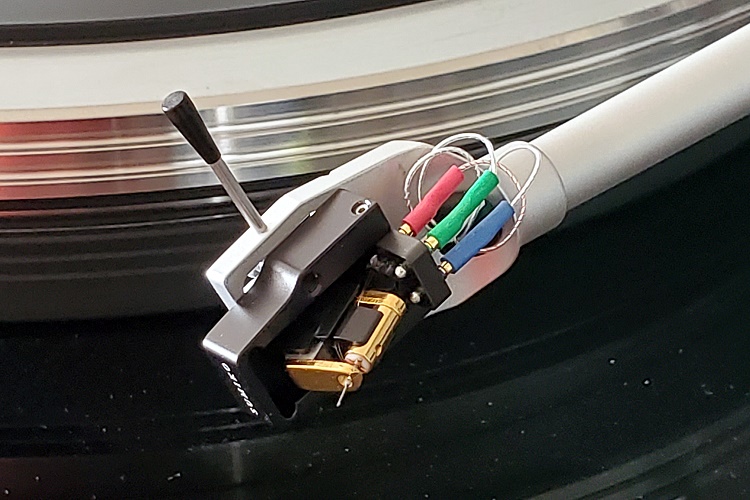
I adjusted the azimuth (rotation position of the tonearm), which is not easy with a pivoted tonearm. My VPI HRX has an off-center counterweight which uses that off-center for adjusting the azimuth. A photo of the counterweight is shown below. When adjusting the azimuth, it is easy to accidentally slide the counterweight forward or backward which then changes the tracking force.
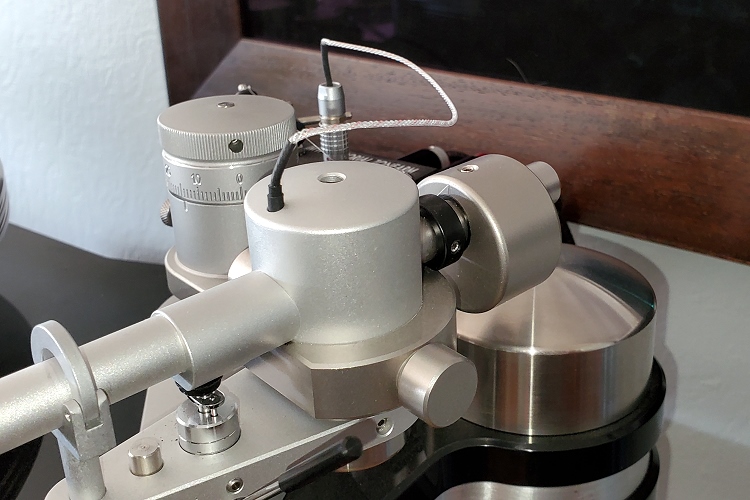
I also adjusted the lateral tracking angle. The front of the cartridge is parallel with a line drawn from the center spindle across the cartridge front.
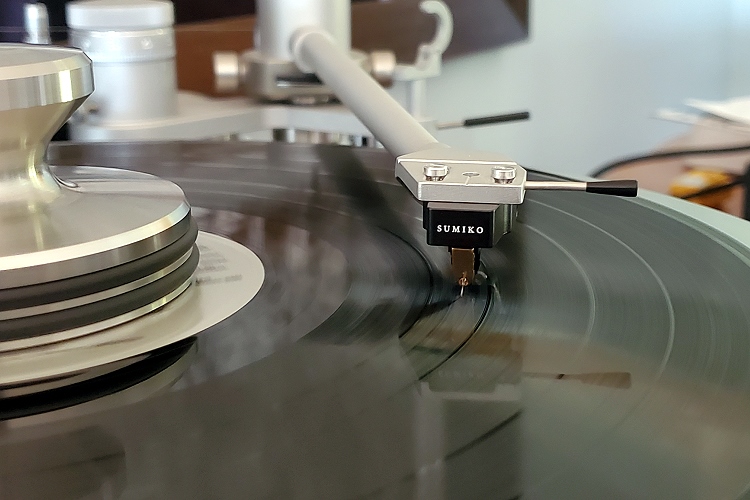
And the vertical tracking angle. The space between the tonearm and the LP is the same distance at the front of the tonearm and the rear.
![]()
I set the tracking force to be a little less than 2.1 grams. The range for the Starling is 1.8 – 2.2 grams.
![]()
I keep all my tools for mounting, dismounting, and maintaining my cartridges in a small plastic bag. These include the brush, screwdriver, hex wrenches, extra slot and hex bolts, tracking force gauge, etc.
The sound of the Starling is different than the Palo Santos. The Starling has a bit less detail, but it has more bass. Because less detail translates to fewer hard edges, I liked the sound of the Starling better. The Starling has more compliance, 12 vs 8 x 10⁻⁶ cm/dyne (could also be specified as 12 vs. 8 µm/mN which means micrometers per milliNewton), so the Starling is less stiff. That may be why the Starling has more bass, as more compliance would translate to easier movement in wide bass grooves. Perhaps it is just a better match to the tonearm mass. The output voltage is the same, 0.5 mV, and the channel separation is 35 dB for the Starling vs. 30 dB for the Palo Santos. The Palo Santos has an exotic wood (Brazilian Rosewood) body which may affect the sound. The Starling and Palo Santos both have a Microridge stylus. Both cartridges have boron cantilevers. Boron is very light, but very strong. It has an atomic number of 5, which is 1 less than carbon at 6. Boron is important for calcium metabolism in the human body and therefore, can affect bone strength. Boron is used in top-of-the-line cartridges.
Because there are so many variables, it is really difficult to say why one sounds “better” than the other. Everyone has their own sound characteristics preferences. I am sure that there are users out there who would prefer the Palo Santos. It is an excellent cartridge.
Secrets Sponsor
I used the same resistive (320 Ohms) and capacitive (200 µF) loading for both cartridges for the listening tests. Loading affects the frequency response, so I could probably fiddle around with the loading and get the overall sound to be more similar.
My conclusion on this is that I prefer the sound of the Starling. Cartridges all have their own unique sound character. That is one of the things that make vinyl so much fun.
I would like to add a second tonearm to my VPI HRX turntable so that I could use the Palo Santos for certain LPs that benefit from it, but it has been a difficult search and decision as to the design. A gimbal rather than the pivot and maybe a different mass. I would need it to attach to one of the corner posts because there is not enough room to mount it to the plinth. Any suggestions? Comment below.


