Dolby Atmos and Auro 3D: The Technology and The Reality Highlights
CEDIA 2014 was the first major showing of both Dolby Atmos and Auro 3D surround sound technologies. Secrets’ writers watched at least fifteen demos of Atmos and one of Auro 3D and came away impressed. It’s the first time we’ve seen height and overhead information added at the creation stage rather than just extrapolated from a traditional 5.1 or 7.1 soundtrack. The demos were cool but also brought up some hard questions: How much will it cost to add this shiny new tech to an existing home theater? How widely supported are the new codecs? Is there the possibility of a new format war between Dolby and Auro? I’ll explore those issues here today.
Dolby Atmos and Auro 3D: The Technology and The Reality Highlights Summary
- Dolby Atmos and Auro 3D allow sound engineers to add height information at the creation stage using object-oriented software tools.
- At a minimum, users will have to install additional speakers and upgrade their AVR or surround processor to support the new codecs.
- At present, no single product supports both technologies.
- The speaker layouts are different, requiring either a choice or a compromise for the user.
- Despite these challenges, what I’ve heard so far sounds really good with greater impact than traditional 5.1 or 7.1 surround sound.
Introduction to the Dolby Atmos and Auro 3D: The Technology and The Reality
One of the most important, and least-followed rules about home theater design is that one should spend at least twice as much money on audio as on video. I know from personal experience that this is extremely hard to do but it’s also the right advice. As I’ve upgraded my theater over the years, I put more resources into better electronics, separate amplification and better speakers. The result is a far more immersive and impactful experience than I would ever have achieved by simply buying a super-expensive projector.
One company that fully embraces that axiom is Dolby. No organization has worked harder and done more to enhance the theater experience than they. From the earliest days of surround sound to today’s massive installations of multiple speakers, subs and electronics; Dolby has always been looking for, and apparently finding, the next big thing in theater sound.
At CEDIA Expo 2014, Kris Deering, Robert Kozel, and I experienced Dolby Atmos for the first time. There were at least fifteen demos available in different configurations, ranging from a simple living-room setup to a full-blown cinema with eleven speakers and two subs.
There was another competing technology at CEDIA as well, Auro 3D. Unfortunately they only devoted a single room to it and I wasn’t able to attend the demo due to the very long wait times. However, today’s article will cover that format too.
In addition to talking about how each mixing method works, I’ll discuss the realities of putting Dolby Atmos and Auro 3D in your home. What hardware will you need? How much might it cost? And most importantly, what content is available? Let’s take a look.
A Brief History of Surround Sound
The idea of surrounding movie viewers with sound was first conceived, not surprisingly, by Walt Disney when he was working on the film Fantasia in 1940. He was inspired by Rimsky-Korsakov’s Flight of the Bumblebee and hatched the idea of having an onscreen bumblebee sound as if it were flying around the theater. Unfortunately his experiment didn’t make into the final release of the film, but the die was cast.
That initial concept called for three discrete audio channels reproduced by fifty-four speakers. One can only imagine the labor involved in setting the levels, eq and phase for so many transducers, not to mention the cabling nightmare!

The first use of Dolby Surround in a feature film was in 1979’s Apocalypse Now which employed three channels in front and two in back for a 5.0 configuration. The main audio track was stereo, and the center channel was extracted from signals that were in-phase in both the left and right channels, while the rear channel was extracted from the out-of-phase information in the left and right channels. At the time it was called “Stereo Surround”, and there was no separate LFE channel. That addition came in 1987 when a French engineer added support for a sixth bass-only channel to his custom mixing board at the famous Moulin Rouge cabaret in Paris.
From that point forward, Hollywood adopted systems from both Dolby and Digital Theater Systems (DTS) to both encode and decode 5.1- and eventually 7.1-channel soundtracks from films. Larger theaters used multiple speakers per channel to effectively spread the sound around the room so that every seat received the immersive effect. The majority of today’s theaters still use this type of installation. And films can include as many as sixteen discrete channels of audio.
It didn’t take long for surround audio to make its way into consumer products. The earliest receivers simply combined a two-channel preamplifier and two power amplifiers, along with an AM/FM tuner. Once the cost of home video became more affordable in the 1980s and 90s, the demand for 5.1 and 7.1-capable units inspired products from every major manufacturer. Of course VHS tape only allowed for a maximum of two discrete channels, so surround processors had to be added to the signal path to create a 5.1 mix.
The first such product was the Yamaha Digital Soundfield Processor (DSP-1) introduced in 1985. It marked one of the first uses of DSP technology in an audio product. By feeding it a two-channel signal, it could create up to six channels of sound. Not only that, it could add phasing and reverb effects in order to simulate different environments like stadiums or jazz clubs. Those DSP modes are still available today from Yamaha and many other brands.
The real turning point in home theater surround sound came with the introduction of DVD video. The data capacity of DVD allowed for the encoding of six discrete channels, and the only processing required was to convert the disc’s audio bitstream to PCM, so it could be fed to the receiver’s DAC section. Now it was possible for the viewer at home to hear a surround mix identical to the one heard at a commercial cinema. The only difference was of course the level of compression used. For lossless audio, we had to wait until 2006 when Dolby TrueHD and DTS-HD Master Audio came out as part of the Blu-ray and now-defunct HD-DVD standards. That final step, which gives us the ability to hear up to eight discrete channels, is our final launch point for the current discussion about Dolby Atmos and Auro 3D.
Dolby Atmos – How It Works
If you look at the history of computer programming languages, you’ll see an evolution from instruction-based to object-oriented coding. In the simplest terms, this allows software engineers to create new applications from pre-made objects rather than writing the same instructions over and over again to accomplish a task.
Another metaphor to consider is that of bitmap versus vector graphics. A bitmap simply specifies a color and luminance value for each pixel in an image. While it gets the job done, it’s an extremely inefficient way to digitize a picture. Without compression, bitmap file sizes quickly become unmanageable. The better way is to write an instruction for how the image is to be drawn. This was first done by Adobe and its Printer Command Language (PCL) as a way to easily print different fonts and images without filling the printer or computer with tons of very expensive (at the time) random-access memory.
Dolby Atmos seeks to give sound engineers the same capability. In a traditional mixing environment, the engineer must pan sounds between the different channels according to what is happening on-screen. This is done primarily with faders, which are volume controls for each speaker in the array. Also, panning effects must be in proper phase to create the illusion of a moving audio object. Obviously, great skill and experience are required to do this well, and it can be very easy to do it poorly, spoiling the surround effect and sense of immersion.
Atmos takes the idea of channels out of the equation. Rather than panning from channel to channel and approximating the movement of sound sources on-screen, the engineer can move the objects themselves through a virtual space on a computer monitor and let the system create the necessary panning effects.
Of course that’s just the tip of the iceberg. Thanks to its additional processing power and bandwidth, Atmos can add height information so that sounds can come from overhead as well as the sides and rear. Now, things like rain or flying objects can literally fly around the room and sound like they’re coming off the screen. It’s like 3D for the ears. In a commercial application, an Atmos soundtrack can utilize up to 10 bed channels for fixed objects and up to 128 tracks into 64 speaker outputs for moving ones. And the best part is the whole thing is simply added to the existing encode with a metadata layer.
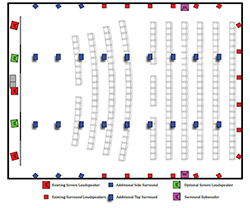
A large commercial theater has many more speakers than one would find in the home. In the diagram above, blue represents the additional speakers required to support Dolby Atmos. You can see that the audience is literally surrounded by sound on all sides and above.
Hardware Requirements
So, technology aside, what does it take to actually put Dolby Atmos into your home theater? Well the answer is fairly simple: a compatible Blu-ray player, a compatible receiver or processor and power amplifiers, and more speakers.
Obviously, with any new codec, you’ll need a processor to decode the information. Luckily A/V receivers have evolved to the point where you can get a great-sounding unit with plenty of speaker channels, decent power, and lots of features for a reasonable price. You won’t have to resort to separate amplification (unless you want to of course) or exotic processors. In fact, there are receivers you can buy right now from all the major Japanese brands that support Dolby Atmos.
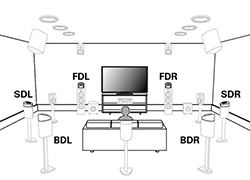
The greater investment will have to be made in additional speakers. I realize that many of you reading this have just managed to convince your significant other that you need five speakers and a coffee-table-sized sub to really feel the impact from movies and TV. But to do Dolby Atmos at a minimum, you’ll need at least two overhead channels, preferably four.
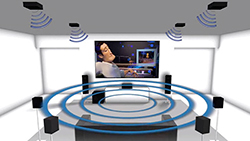
Before you wring your hands in frustration, the A/V industry has come up with a great solution to the problem: Atmos-enabled speakers. Rather than hanging four speakers from the ceiling as shown above, you simply add small speakers to the top of your existing towers that fire upward. Some new speakers (Atmos-enabled) come with the drivers already installed, or you buy modules that work with existing speakers, like the snap-on units from Definitive Technology.
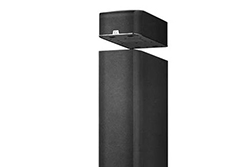
Pictured above is a DefTech BP-8060ST with an A60 elevation module. The small box on top has a single up-firing midrange speaker and its own terminals to make it a separate dedicated channel. So you can see that if you already have a speaker (even a bookshelf-size) with a flat top, you can add an Atmos module easily. We saw several such solutions at CEDIA, and more are on the way.
Here’s Marantz’s suggestion for the addition of reflecting speakers to an existing 7.1 installation. By placing a module (shown in black) on top of the two mains and four surrounds, you achieve a 7.6.1 setup.
So, as you plan your new installation, the choice comes down to which will sound better: speakers on the ceiling or add-on modules. I was able to hear both configurations at CEDIA 2014, and to my ears the add-on modules with their reflected sound imparted a greater sense of immersion than the ceiling-mounted speakers.
Now this may sound counter-intuitive, but consider what surround speakers are meant for. They are intended to play ambient sound effects that give the impression of motion to on-screen elements. Some users prefer direct-radiating surround speakers, and to those people, I suggest going with the on-ceiling approach. But for me, I find greater immersion in a diffuse soundfield and therefore prefer the reflected sound from up-firing Atmos modules.
Ultimately the choice is yours, but given the complexity of installation and wiring of ceiling speakers, I’m betting the majority of home theater buffs will go for the modules.
Auro 3D – How It Works
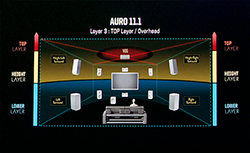
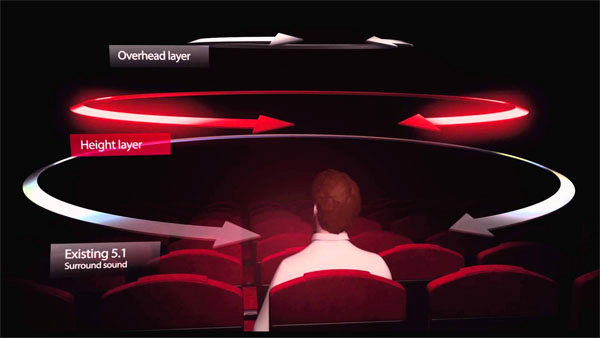
Of course, no technology would be complete without some competition, and Atmos has it in the form of Auro 3D. First developed in 2005 by Wilfried Van Baelen, CEO and Founder of Galaxy Studios and Auro Technologies, it adds two extra layers to the surround experience: height and overhead. Found in 9.1, 11.1 and 13.1 configurations, it has already been used in films like Hunger Games, Mockingjay Part 1, and was first heard in Lucasfilm’s 2012 release Red Tails.
The principal difference between Auro and Atmos is the speaker layout. To effectively reproduce the height layer, speakers are placed on the walls above the traditional main and surround locations. Then a single “Voice-of-God” channel is installed on the ceiling in the center of the listening area.
You might notice there is an additional center channel which you don’t see in the Atmos spec. Ultimately though, the end result is pretty much the same. More sound comes from more directions.
On the production end, Auro doesn’t use the term “objects” like Dolby does, but their software tools do work in an object-oriented fashion. Auro provides plug-ins that work with most digital audio workstation packages. They give mixing engineers the capability to move on-screen objects in real time, while the software does the work of panning sound from channel to channel.
Hardware Requirements
Installing an Auro-compatible system is a little different from Dolby Atmos. Since Auro has specific height and overhead layers, speakers must be mounted high on the walls and angled down a bit towards the listening position. Only a single speaker need be installed on the ceiling. This alone will make having both standards in your home theater a compromise. Configuring for one codec means the other won’t sound its best. Auro isn’t designed for multiple ceiling speakers nor the reflective add-on modules I mentioned on the previous page.
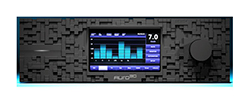
Fortunately, the electronics side of things is a little easier. Denon and Marantz are hedging their bets against a possible format war by offering Auro 3D in a firmware upgrade for their high-end receivers and surround processors. And Auro markets three processors called Auriga, Mensa, and Crux. The Mensa is pictured below.
Honestly I’d love to buy one of these just for the super-cool faceplate!
Auro specs their layouts in traditional X.1 terms. Smaller home theaters that are already configured for 5.1 can skip the ceiling channel and go for a 9.1 setup with height speakers above the two mains and two surrounds. 10.1 adds the Voice-of-God channel, and 11.1 adds a center height channel. In a 13.1 configuration, you add left and right rear surrounds. If you’ve started with a conventional 7.1 layout, you’d add a speaker above each surround, the center and the single ceiling channel. So that means adding at least four speakers to 5.1 or six to 7.1.
The Potential of Atmos and Auro in Consumer Content
After digesting everything I’ve said so far, you are likely asking the million-dollar question: is it worthwhile to upgrade?
I listened to at least five different Dolby Atmos demos at CEDIA. Some were full-blown theater rooms with speakers on the ceiling or add-on modules in 5.2.4 and 7.2.4 layouts. One attempted to simulate a living room with a 7.1 setup and four additional ceiling-mounted speakers. I watched mostly the same material at each booth: CGI clips of a rainforest, a scene from Transformers: Age of Extinction or Oblivion, and came away with a decided opinion. The sound was amazing. The simulation of rain overhead and birds flying around was extremely realistic. The sound was properly diffused, especially in the reflected-style setups, and the effect was truly immersive. In the movie clips however, it just sounded like really good surround. The overhead information was more subtle.
Before you think I’m downplaying the technology however, I must share the experience from one of my recent movie reviews. Back in December I checked out Dawn of the Planet of the Apes, a film released to theaters in Dolby Atmos. The Blu-ray does not have an Atmos soundtrack on it, but it was evident throughout that the technology greatly enhanced its traditional 7.1 mix. My theater has multi-pole surround speakers mounted high and angled towards the money seat. I believe the fact that the film was originally mixed using Atmos, coupled with my particular installation style greatly increased this movie’s sense of immersion.
The obvious conclusion is that when a film is mixed using Atmos, it sounds better even when played back on a conventional 5.1 or 7.1 setup. The tools available to the mixing engineers enhance the experience noticeably. And it’s logical to assume that seeing the film in a Dolby Atmos theater would be even better.
Right now, the cost and labor associated with a Dolby Atmos and/or Auro 3D upgrade are going to be in the realm of well-heeled early adopters. You have to change out your Blu-ray player, receiver, and add several speakers. Already, I can hear many of you saying, “Change all of my primary equipment to add height and overhead? I don’t think so!” But, give it a listen at your local hi-fi dealer, or go to a movie that had Atmos. Then, think about it again.
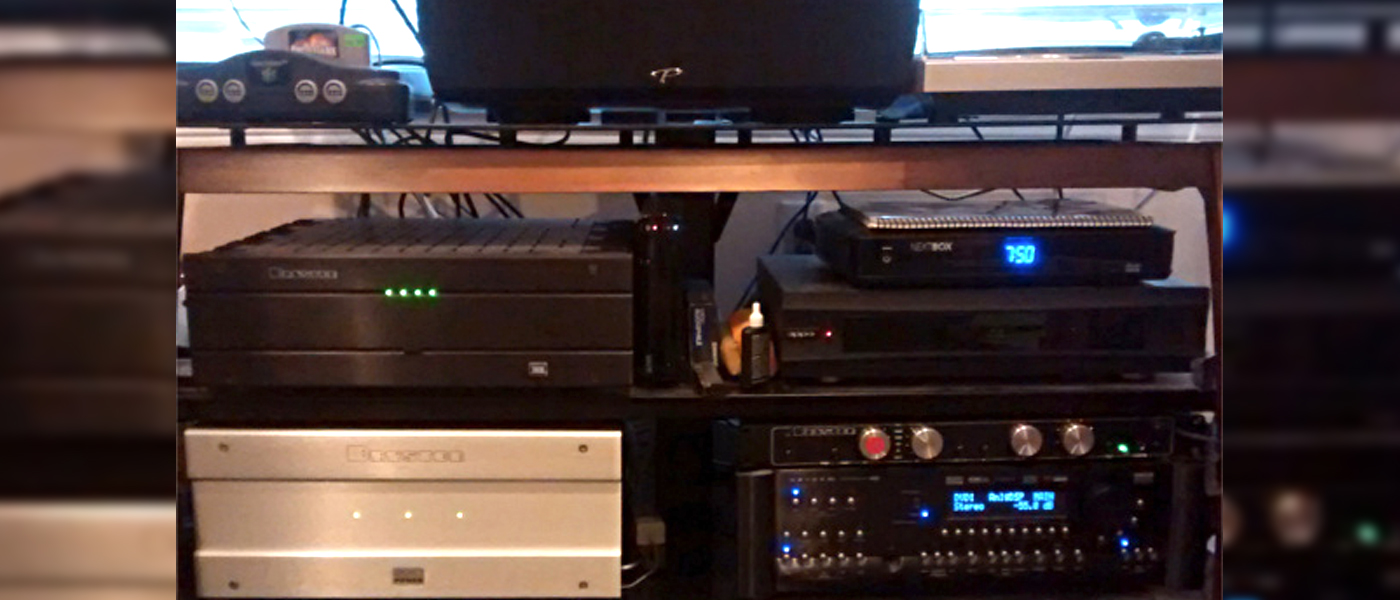
The only concrete example I can give is what it might cost to upgrade my own theater. If I were to take the plunge, it would be for Dolby Atmos given its wider adoption. Because I use separates, I’d have to start with a new processor. The Integra DHC 80.6 has the codec and HDMI 2.0 to boot. Cost: $3,200. Then I’d need four additional speakers to serve as the height modules. Well, that’s two modules for the front mains. The DefTech A60s would work with my Axiom towers. Cost:$500 for the pair. For the surround channels, I’d have to scrap my Axiom QS8s entirely since multi-pole units are not supported in the Atmos spec. The best bet would be a pair of M60 towers and another pair of the DefTech A60s. Cost: $1,960. And of course there’s the additional four channels of amplification required. I’m an Emotiva fan, so an XPA-5 would complement what I’m currently using. Cost: $1,000.
And if you’re wondering why I haven’t mentioned a new Blu-ray player, it’s because you don’t need one! Well, that may not be entirely true. If you have a very recent model, it will likely work without issue. Some older players can experience audio drop-outs when seamless branching is used to author a Blu-ray disc. But as long as your player meets the latest Blu-ray standards and can provide bitstream output, you won’t need to upgrade anything except maybe the firmware. Thanks to the fact that Atmos information is simply a meta-data layer added to the current TrueHD codec, it’s only the receiver or processor that needs to be up changed.
I realize my theater is not budget-friendly, but to add Dolby Atmos and maintain the sound quality to which I’m accustomed, we’re looking at $6,660 plus cables, which is not a trifling sum.
I believe the principal benefactors of both Atmos and Auro 3D will be those installing new theaters. Creating a capable system from scratch will be far easier and more efficient than a retro-fit.
Conclusions
In this article, I’ve tried to consolidate a large amount of information on Dolby Atmos and Auro 3D into just a few pages. The basic concepts of both technologies are pretty much the same. Their hardware implementations are different, and of course, you’ll need to pick one, since the speaker configuration is different between the two. Eventually, players and receivers will support both codecs, but the goal of both is the same: more speakers for better and more immersive surround sound.
In my experience so far, I’ve been very impressed with the quality of sound mixes created with the Dolby Atmos production tools. Even when they’re translated into traditional 5.1 or 7.1, they sound far more immersive with sounds seeming to fly overhead and behind with equal ease. I feel that users with well-engineered audio systems will see a benefit from the technology, just as I have, and eventually succumb to the urge to buy more gear.
As more and more films are mastered in Atmos and Auro 3D, and Blu-ray players and the Blu-ray discs start to include the codec, enthusiasts like myself will likely make the investment.
There’s no doubt that more speakers in a theater can enhance the sense of immersion. Dolby Atmos and Auro 3D are the first codecs can be used to improve both the creation and presentation of content. We puttered along for a while with AVR modes like Dolby Pro Logic IIz which take 5.1 and 7.1 soundtracks and add height information using an algorithm. But now it’s possible to add that information to the source material making the processor, once again, a simple decoder.
I spoke at the beginning about the importance of audio in a home theater and how it has a far greater impact on the experience than video. The logic of adding more speakers and new sound technology for greater immersion is hard to ignore. With Dolby Atmos and Auro 3D in the house, the future certainly looks bright, and, yes, expensive.


