Check out Ofer LaOr’s Blog www.hometheater.co.il
Introduction to the Darbee Darblet DVP5000 Video Processor
Darbee came into our lives after a dry period in the world of video processors. New video processors are coming out all the time, but the excitement behind them is pretty much the focus of videophiles and pro calibrators.
DARBEE DARBLET DVP5000 VIDEO PROCESSOR SPECIFICATIONS
- Design: Video Processor
- HDMI in, HDMI out, Remote Control, 5V DC Power Supply
- HDMI Version: 1.4
- MSRP: $350 USD
- Darbee
- Secrets Tags: Darbee, Video Processors
First a brief history of home theater video processors. About 13 years ago, I purchased my first plasma display. I was ecstatic about the possibility of owning a flat screen 42″ (non HD) Fujitsu display that cost an arm and a leg. I was in heaven, for about 10 minutes, before realizing how many flaws this display had. In fact, I was getting rid of a 34″ Grundig CRT display primarily because I was sensitive to various geometrical and convergence issues. I couldn’t believe that plasma displays had issues too. They did and in fact I grew to learn about every single one of them… I was hoping that at least a few of the issues I saw could be mitigated by a video processor and ever since then, in addition to upgrading my display annually (until my trusted KURO 5090H entrenched itself in my living room) I had also started upgrading video processors.
The Darbee Darblet DVP5000 Video Processor Design
What is a Video processor?
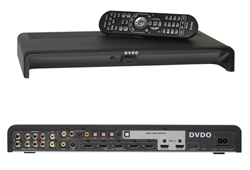 DVDO Edge video processor
I guess the first question that one needs to ask is what is a video processor and why would one need such a product? The purpose of a video processor is to squeeze out every bit of potential image quality from your display or projector (the processing, deinterlacing, scaling part of the processor), all the while trying to get as close as possible to imaging standards (the CMS part of the processor). VPs also have other features, such as picture in picture, switching converting and splitting HDMI connections.
The original need for video processors started in the CRT projector era. Back then, these were the best projectors money could buy. They had their problems (convergence, geometrical issues) but the contrast level was legendary. As people started getting the hang of these projectors, they started enlarging the image more and more. These projectors did not produce pixels as we know them, but had scan lines that worked their way from left to right blanked and returned back to the left. The source material was 480i, which meant that each scan line had to do 240 rounds for even lines and then 240 more for the odd. That left quite a bit of a gap when enlarged to a large (even at 50″ or so) screen size. Line doublers first repeated each line twice, but that did not really improve things. Then bob/weave algorithm based doublers came but didn’t really improve resolution by much.
 Lumagen XE video processor
The big breakthrough came when Yves Faroudja came up with an ingenious patent for retrieving the 3:2 telecine sequence that film content went through in order to convert it into 60Hz content. The sequence caused a minor glitch, a repeated field once every 5-field sequence. Once Faroudja’s line doubler picked up on it, he could reproduce the sequence and reproduce the original 24FPS content in all its progressive 480P glory…
Add a scaler to that and you get Faroudja’s original DVP5000 masterpiece processor. Unfortunately, once Yves sold the company, Faroudja slowly faded away after selling many chips to DVDs, displays and AVRs that basically reproduced these algorithms.
And then came HD.
The time between SD and HD was the golden age of Video Processors. 1080P displays were coming out in droves, but the content was still not there. Scalers were able to upscale the content and make it worthwhile to see on these large projectors and flat displays.
However, as time went by and Bluray content proliferated, the need for a dedicated processor became more and more the focus of videophiles rather than regular folks who would do just fine with the processing abilities in their projectors or AVRs.
VP manufacturers added more features, such as cleaning compression artifacts, Color Management Systems (CMS), calibration features and more. But these were focused on the niche high end videophile market.
Setup of the Darbee Darblet DVP5000 Video Processor
This is where Darbee comes in. The company introduced the DVP5000 (Darbee Visual Presence), perhaps a salute to Faroudja’s old processor. The focus of the unit is not to reproduce the original image, but to try and sharpen it as much as possible. The low price and light design makes it a plug & play instrument that is meant to be located behind your bluray player. It is also very affordable – with an MSRP of around $350.
This unit is not necessarily meant just for the typical videophile – it’s price point and how it does the work suggest it was designed for any home theater enthusiasts that wants to make their image sharper (and who doesn’t).
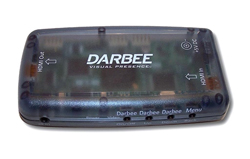
The unit itself is not much to look at – it is a small see-through box (the kind that was popular after the original iMac design was shown). There are a few buttons, an IR sensor for a remote, a 5V power input and an HDMI in and out jacks. The HDMI connections are on the two sides of the unit, making it more of a passthrough device than something that’s intended to sit on your equipment shelf. The box itself is tiny, it’s roughly the size of a typical cell phone (not an iPhone, though).
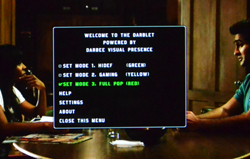
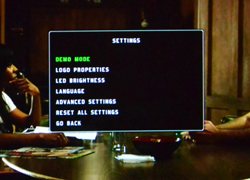
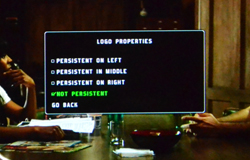
The menus are pretty basic. There are basically 3 modes (green for HD, Yellow for gaming, Red for “full pop”) and a couple of demo modes. After deciding what setting you like, you’re probably going to leave it tied in the back of your system without touching it much.

The company was nice enough to let us turn off the annoying blinking leds, or at least turn them way down. The remote that comes with the unit is I’d expect to see included with a Chinese light dimmer, but it does the job and in all likelyhood will not be touched much after the initial setup.
I tested the unit with 3 different types of displays: The Samsung 55ES8000, The Pioneer KURO 5090H and the Epson TW9000 projector. Source material used was typical HD and SD satellite content, as well as bluray content played by an Oppo BDP-93 and a Dune HD Max.
Testing was conducted on a unit with software 2.8.2214 and firmware 1.3.21, it should be noted that firmware updates are not possible in the field and if you need an update, you will have to send your unit in to Darbee. Firmware updates are primarily bugfixes for specific devices that have issues with the unit (I have not seen any such issues personally).
The Darbee Darblet DVP5000 Video Processor In Use
What was tested:
- Analyze and the effects of the Darblet, see if there are any artifacts or issues with the produced image.
- Verify that the unit does not deteriorate or reduce image quality somehow.
- Check if I personally like the effect or not.
The first two tests are completely objective, while the latter is completely subjective. Many videophiles and HT enthusiasts really like the Darblet, and I indeed wanted to see what all the fuss was about.
The Modes
The unit has 3 modes: HD (green), Gaming (yellow) and full pop (red). As I’m not really a gamer, I analyzed all 3 with video material only. Interestingly, the three modes are essentially variations on two different algorithms that seem to be weighed in differently depending on the mode. The filters seem to have some parameter variations depending on the mode – HDTV focuses on contrast enhancement with a lighter dose of sharpness, while full pop focuses primarily on heavily sharpening the image. The yellow gaming mode seems to be a mix of the two, which meant it was much more of a compromise than being truly functional.
Contrast stretching is a well known feature that you can find in many cameras, Photoshop or even freeware like Picasa (auto contrast). It was actually implemented in video processors like the Lumagen XD/XE series. In this case, a much more localized contrast stretching algorithm is used, which produces a much more subtle result. The effect is like lifting a layer of film right off the image.
Sharpness is also a very popular filter found on every display and projector. Usually, the first thing a good calibrator does is turn sharpness off to remove any of the annoying halo edge enhancement artifacts that these algorithms produce.
You can see an exaggerated contrast enhancement algorithm at work here:

 After contrast enhancement
Results
My first test was to try and figure out if the unit was harming any of the video. The Darblet converts content to 4:4:4 internally and then back into your original content source format (RGB or 4:2:2), so I recommend to keep your source at 4:4:4 when possible to avoid unnecessary format conversions. Other than that, the unit performed without interfering with the content – no lipsync issues, no gamma changes or color gamut changes. The unit slightly increases the HDMI sync times, but it is overall transparent and does not cause any issues with the video.
The unit worked in all framerates, resolutions and even 3D.
I started with SD and saw that the results were pretty bad. The unit brought out many of the compression artifacts unless turned quite low. I recommend against using this unit with SD content.
Next, I turned the unit to full pop mode to see what it would do with a 720P signal.
The following images were created by slowly increasing the processing strength from 0% (off) to 120% (spinal tap anyone?).
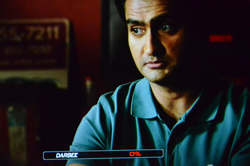

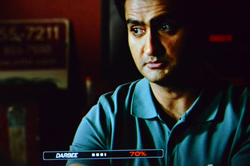
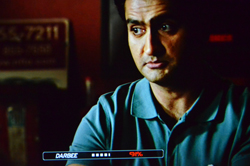
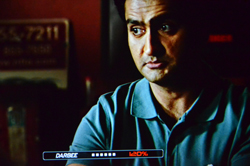
You can see that as the processing gets stronger, the facial features become more pronounced and harsher. The contrast also becomes stronger and more stretched (but localized).
Using a test pattern, you can see artifacts past 40% at full-mode. The artifacts appear as left and right smears on the horizontal plane. They are most pronounced on the left and right horizontal lines.
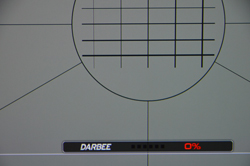
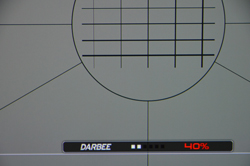

The HD mode does not exhibit this behavior and is far less prone to artifacts even when set to the highest setting.
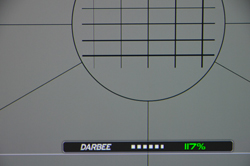
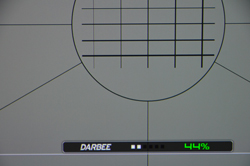
Using a high frequency pattern, you can see that the center circle slightly changes its shape to more of a rhombus shape.
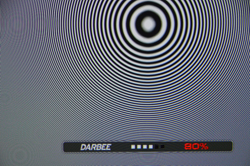
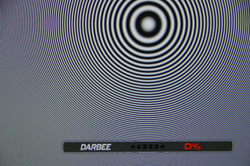
Adding contrast without artifacts
Darbee’s challenge is to add more contrast and sharpness to the image without introducing artifacts.
The next few images demonstrate how Darbee attempts to do this:
The Original Image.
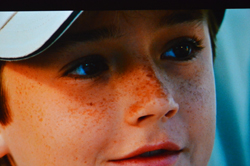
Darbee’s Image
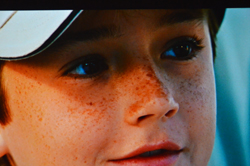
The difference map between the two:
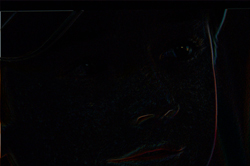
As you can see, Darbee focuses on changes on a few fronts. First, it enhances the cheek and hair on the right side of the image. This is done by brightening the light part of the face. Usually, this is contrasted by a darkening of the outer edge of the face, thus producing an artifact called “ringing” or “overshooting”, but Darbee avoids this.
There are also some enhancements to the lips and nose and a slight enhancements to the freckles. Nothing to outstanding, but enough to make these more pronounced.
Lets take another image and analyze it:

This is the original image. Lets enhance it using a VXP adaptive contrast algorithm (using a Lumagen XE).
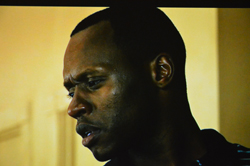
As you can see, this algorithm brings out many details but does not sharpen the image at all.
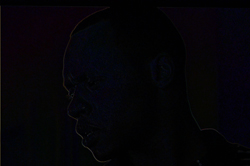
You can see there are details enhanced across the entire range of the image and the face.
This is the image at full pop 45% (my recommendation for this mode):
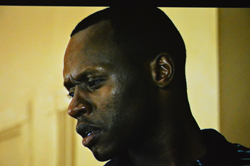
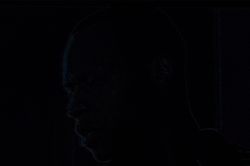
The difference map is interesting – it focuses on the left side of the face, the ear and the right side, but does not bring much enhancement to the details of the face itself.
At full pop 100%, the difference is more dramatic:

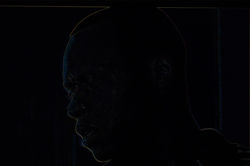
Here, you can see that the edges of the face are much more pronounced (notice the brown edges of the forehead), but there are many facial details enhanced as well.
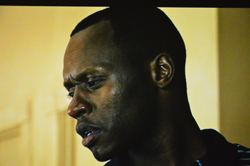

At HDTV 45%, you get a much more balanced enhancement, which brings out the edges a lot less, but does increase the contrast much more (note the facial features are more pronounced).
Conclusions about the Darbee Darblet DVP5000 Video Processor
First, I have to say that after testing and comparing the VXP’s adaptive contrast vs. the Darblet, I ultimately like the VXP enhancement more. My main complaint with it is that even at its smallest setting = 1, the effect is a bit much for me.
The Darbee definitely does what it sets out to do. It does both contrast stretching, usually the type that should have been done by the video producers to begin with, and sharpening. I ultimately did not like Full pop mode, it produced a much harsher image than I like and although it did not produce noticeable artifacts at values of 45% or less (an accomplishment in itself) it was a bit too harsh of a change for my eyes. However, I do realize that many users would like this effect and that this is a pure question of taste.
HDTV produces a much more subtle effect, one that videophiles would appreciate more, particularly at settings of 40% or lower. The effect is subtle and makes more use of contrast stretching than sharpening.
Bad content looks awful through the Darbee. It really does its job when the content it receives is good.
I also saw some differences between how different displays handle the Darbee. Some displays have an inherent contrast stretching ability of their own (e.g., the Kuro). Those showed less of an effect than did the displays that did not have this ability.
The most noticeable change was in the projector. The image was noticeably sharper and clearer. The benefit of the Darbee is really in producing a sharpness algorithm that really does its job without introducing nasty artifacts into the image.
However, I still prefer the image produced by the Lumagen processor to the Darbee.
The differences between the original image and the Darbee results can be seen quite easily here:


So, if you like your picture punchier and sharper, the Darbee is definitely an interesting solution to a problem we didn’t know existed – how to get your Bluray content to excite you with its picture quality again.


