

Introduction
Anthem has long been recognized as a leading manufacturer of processors and amplifiers. Anthem’s AVM series processors have always offered a tremendous blend of functionality and performance. With the introduction of the Anthem Room Correction (ARC) system, Anthem took things a step further by offering one of the finest room correction systems on the market. While all of this capability and performance was available to those with the budget and space for separates, Anthem did not offer a solution for those looking for an A/V receiver – until now.
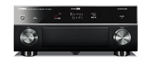
With the introduction of the Anthem MRX series products, Anthem has finally added A/V receivers to their product lineup. All of the MRX receivers offer 7 channels of amplification, 4 HDMI 1.3 inputs, on-board decoding of DTS-HD Master Audio and Dolby TrueHD high-resolution audio formats, video conversion of composite and component video to HDMI, video scaling up to 1080p60, and support for 3D. The most notable feature of the MRX series of A/V receivers is that each receiver in the lineup includes Anthem Room Correction which was previously available only on the Anthem AVM and Anthem Statement processors. The MRX series currently comes in three models with the primary difference being the amount of amplification. The entry level receiver is the MRX 300 which offers 80 watts per channel. The MRX 500 is the middle receiver in the MRX lineup and offers 100 watts per channel and adds support for internet radio and the playback of music from USB devices and hard drives. The flagship model, which I’ll be covering in this review, is the MRX 700 which includes all the functionality of the MRX 500, offers 120 watts per channel and adds an HD Radio tuner. Let’s take a closer look at the MRX 700 and see how well Anthem’s first receiver offering performs.
Specifications
- Codecs: Dolby Digital, Dolby Digital EX, Dolby Digital Plus, Dolby TrueHD, DTS, DTS-ES (Discrete, Matrix), DTS 96/24, DTS-HD Master Audio, DTS-HD High Resolution Audio
- Precision: 24-Bit/192kHz A/D
- 2-Zone Operation
- AM/FM/HD Radio Tuner
- Anthem Room Correction (ARC)
- Power Output: 2 x 120 watts RMS/two channels driven @ .1% THD into 8 Ohms; 5 x 90 watts RMS/five channels driven @ .1% THD into 8 Ohms
- Dimensions: 6-1/2″ H x 17-1/4″ W x 15-1/4″ D
- Weight: 35.4 Pounds
- MSRP: $1,999 USA
- Anthem
Design
The Anthem MRX 700 A/V receiver comes in black and is surprisingly compact for an A/V receiver. It is only 15-1/4″ deep, but it weighs over 35 pounds. The front panel is made from brushed aluminum and the small buttons on the front panel are reminiscent of the buttons on the Anthem A/V processors. The bright blue LED display is very readable and is another similarity that makes the MRX 700 feel like an Anthem product. To the right of the display is a large volume knob in addition to buttons for controlling Dolby Volume, channel level and basic audio settings. To the left of the display is a standard set of cursor buttons that allow for easy navigation of the MRX 700 setup menus as well as its multi-media interface. Directly under the display is a complete set of input buttons which allows for simple control of the receiver. In the bottom-right corner of the MRX 700 are power buttons for the main and secondary zones, as well as a button for zone input selection. Hidden on the bottom-left, behind a small sliding panel, is the front A/V input, a USB input jack and a headphone jack. The exterior case of the MRX 700 has a textured black finish.
The rear panel of the MRX 700 is well organized and offers support for a wide array of components. The rear panel is color coded to help distinguish inputs from outputs. Inputs have a black background while outputs have a white background. This same technique is used on the Anthem A/V processors and I was glad to see that Anthem included this on the MRX receivers.

The MRX 700 receiver supports four HDMI 1.3 inputs and one HDMI 1.3 output. This is enough to handle a satellite or cable receiver / DVR, a Blu-ray player and a gaming system with one input to spare. The receiver supports a full complement of analog audio and video inputs with three component video inputs, four composite video inputs, and 7 sets of stereo analog RCA inputs. The MRX 700 supports 5 digital audio inputs (2 coaxial and 3 optical). The MRX 700 includes a second USB input on the rear panel in addition to a connector for an Anthem MDX 1 iPod/iPhone dock. A very nice touch is the inclusion of a complete set of 7.1 channel pre-outs should you want to use the MRX 700 with an external amplifier. You will also find an Ethernet connector on the rear panel. This allows the MRX 700 to access the vTuner Internet Radio application.
The speaker jacks on the MRX 700 support a full complement of 7 speakers. The MRX 700 refers to the last set of speakers as an auxiliary output which can be used to power surround-back speakers or front vertical-height speakers for use with Dolby PLIIz processing. If you don’t use the surround-back or vertical-height speakers, then you can use the auxiliary channels to power a set of speakers in a secondary zone. The MRX 700 does not support the option to bi-amp your front speakers should you decide to not use the auxiliary output channels.
The remaining connections on the MRX 700 back panel allow for antenna connections for the HD Radio and AM/FM tuner. The MRX 700 includes an IR input and two IR output jacks as well as an RS-232 jack which can be used to control the MRX 700 with an external control system. The RS-232 jack is also used when configuring ARC or when upgrading the MRX 700 software. A 12 Volt DC Trigger is also included which allows you to turn on another device, such as an external amplifier for zone two.
While the MRX 700 offers a lot of connectivity options, you may have noticed that the MRX 700 does not offer any support for multi-channel analog inputs or S -Video inputs. The lack of multi-channel analog inputs is becoming less of a concern as the simplest connection for today’s Blu-ray players is a single HDMI cable. At this price point, I can understand Anthem leaving out that feature and the inclusion of ARC more than makes up for it in my opinion. As for the missing S-Video inputs, this too will become the norm as analog video gradually disappears from our home theater electronics.
The MRX 700 comes with two remotes. The primary remote is well organized and fits nicely in your hand. It is also backlit which is a really nice plus.

The smaller remote is used for zone two operations.

Setup
After unpacking the MRX 700 and placing the receiver in my cabinet, I couldn’t wait to get everything connected. I started with the speaker cables first since they tend to be the most time consuming. The speaker binding posts on the MRX 700 are three-way posts which allow cable to be inserted from the top, bottom, or directly into the post via banana connectors. It is tedious to hook up bare wire to 14 binding posts in a 7.1 system, so I would always recommend that you take the time to terminate your speaker cable with banana connectors. This greatly simplifies the process should you have the need to move or change the equipment in the future. One note about the MRX 700 speaker connectors is that they don’t accept spade connectors.
Moving on to the HDMI connections was a breeze. The MRX 700 has 4 HDMI inputs to which I connected my satellite DVR, PS3, and an Oppo BDP-95. I ran a single HDMI output cable from the MRX 700 to my HDTV. I connected my first generation Apple TV to the MRX 700 via component video and optical digital. The MRX 700 is able to up-convert the video signal from composite video and component video to HDMI, so this really simplifies system configuration and minimizes your video cables. I did run an extra set of analog audio cables from the Apple TV to the MRX 700 so I could listen to music using the zone two functionality of the MRX 700. Unlike the Anthem processors, the MRX series receivers are not able to play digital sources from the main source in zone two. It’s a simple limitation to get around, but does require that you have an extra set of analog audio connections for every source that you intend to enjoy in zone two.
I connected an antenna so I could checkout HD Radio and I also connected an Ethernet cable so I could eventually play with the vTuner Internet Radio application. The MRX 700 does not support wireless networking, so you have to run a network cable to the receiver or purchase a wireless networking adapter. I double-checked the connections, connected the power cord, and was finally ready to get started exploring the configuration options on the MRX 700.
The menu system in the MRX 700 is nicely organized and pretty simple to use. The bottom-right corner of each menu has a small circular graphic with black arrows indicating the possible cursor-navigation directions within any particular menu.

The menus are sized for a minimum display size of 480p and don’t resize when a higher screen resolution is used. This makes the menus rather small on a 1080p display and they can be a bit hard to read from a distance.
The first step in configuring the MRX 700 is to visit the “Quick Setup” menu and answer a few basic questions about your configuration. The first two questions determine whether you will be using HDMI or Component video output. Since the MRX 700 supports only one HDMI or Component video output at a time, you have to revisit the “Quick Setup” menu again should you wish to change the video output type at a later time.

The third question determines if you are using a subwoofer. The last question determines the overall speaker configuration and whether you will be using the auxiliary speakers for main back, main ceiling, or zone two operations. The reference to “ceiling” in the menu is a bit confusing and would be more appropriate if called “front height” since this configuration is used for Dolby PLIIz processing.

With the setup questions out of the way, I entered the distance between my primary listening position and each speaker in my room. Distances are entered in the “Listener Position” menu and can be entered in feet or meters in increments of 1 foot or .3 meters respectively. I was now ready to run Anthem Room Correction, but before I did that, I verified that I was running the latest version of the MRX 700 software. This is easily accomplished by comparing the version number shown in the “System Information” menu against the version number shown on the Anthem web site.

In my case, I was not running the latest software so I needed to perform an update. I downloaded the latest version of the MRX 700 software as well as the latest ARC and MRX Multimedia software from the Anthem site. If you are thinking that this doesn’t sound like something you do with the average consumer receiver, then you are correct. Anthem has always done a fabulous job supporting their A/V processors with software upgrades and they are continuing that same practice with the MRX receivers. While this may sound a bit complicated, the process is pretty simple and helps to ensure that you have the latest functionality and the latest software corrections for the MRX receiver.
To get started, I needed a laptop and the serial cable that came with the MRX 700. While most laptops these days don’t have a serial port, they all have USB ports and I used a USB to serial port adapter to connect my laptop to the RS-232 serial port on the back of the MRX 700. Anthem is not currently including a USB to serial adapter with the MRX receivers, but you can buy one from Anthem support, your Anthem dealer or at your favorite computer store. The main thing to remember is that the adapter must have a Windows-certified software driver to ensure proper communications between the MRX 700 and the computer. I connected the serial cable between my laptop and the MRX 700 and ran the MRX 700 software updater program.

I just pressed the “Run” button and the updater software automatically found the MRX 700 and updated all the necessary software in the MRX 700. The program provided some status and progress messages along the way and even took care of turning off the MRX 700 when necessary. All I had to do was sit back and watch. The entire upgrade process took about ten minutes.
With the update completed, the next step was to run Anthem Room Correction. ARC is an extremely sophisticated software program that analyzes each speaker’s in-room response and makes the appropriate corrections to each channel to ensure optimal performance in the listening room. The ARC software is a Windows application that comes on a CD with the MRX receiver. In addition to the software, a calibrated microphone and telescopic stand are included in the ARC kit. I installed ARC on my laptop using the software CD that came with the MRX 700 since it includes a special microphone calibration file that is tied specifically to the microphone in the ARC kit. Once the initial installation is completed, you can install any updates to ARC using the ARC download files from the Anthem website. You just need to ensure that the microphone calibration file for your microphone remains in the ARC program directory. Unless the default directory is changed during subsequent ARC installations, this shouldn’t be a concern.
I connected the ARC microphone to my laptop. The microphone is a USB device so I was happy to not have to worry about another serial connection. I placed the microphone in the stand and positioned it at the primary listening position in my room pointing straight up. Proper microphone height is critical to measurement with ARC and the microphone should be positioned at ear level.
I launched the ARC program and was greeted with a very simple dialog which offers an “Automatic” or “Manual” option.

I will walk you through the “Automatic” option which is the recommended option for most users. The first step in the process is a simple dialog which confirms that ARC will automatically proceed to each step and save its progress along the way. I selected “Start” to begin the process.

The next step in the process is to measure the speakers. The measurement dialog allowed me to select which speakers I have in my room and also allowed me to measure a separate configuration for both movies and music.

For example, I could exclude all but my front speakers in the music configuration. Most people will use the same speaker configuration for music as they will for movies. ARC requires a minimum of five measurement positions but you can also select up to ten if you wish. The first position should be at the primary listening position which should be at the center of the listening area. Once I was ready, I simply pressed OK and ARC prompted me to confirm the microphone serial number.

This step confirms that the microphone calibration file in the ARC program directory matches the serial number of the microphone in the ARC kit. I just checked the serial number tag on my microphone and pressed OK to continue. ARC then prompted me to move the microphone to the first measurement position. Once I was ready, I pressed OK and sat quietly.

For each measurement position, ARC produced a series of test tones from each speaker. ARC provided a basic progress bar indicating which speaker was being measured. Once the first set of measurements was complete, ARC prompted me to move the microphone to the next position. This process continued until each position had been measured for the movie configuration. If you have a 7.1 system and use the default of 5 positions, ARC takes 40 distinct measurements of the room. I chose to use the same configuration for music and movies, so I was done with speaker measurements. If I had chosen to use a different music configuration, ARC would have prompted me to move the microphone back to position one and then repeat the entire process for the speakers in the music configuration. If the phone rings or a dog barks (as in my case) interrupting the process, ARC is able to detect such a problem and prompts to repeat any questionable measurement.

Once the measurement process was complete, the ARC software preprocessed the results.

The software then prompted me to save the results to my PC hard drive. Once that was completed, ARC calculated the room correction parameters based on the measurements and uploaded the correction data along with the proper speaker levels to the MRX 700.

A final message informed me that the process was finished and offered me the option to “Show Results.”

The ARC program shows a detailed graph for each measured speaker including the target and corrected values that ARC computed. In this example, the target response for the center channel was in blue, the measured response was in red and the final ARC corrections were in green.

The ability to actually see a graphical representation of what ARC is doing is a significant benefit of the ARC solution. The final message from ARC reminded me to turn on room correction for each source as desired in the MRX 700 setup menus. At this point, I was able to disconnect my laptop from the MRX 700 and put away the microphone.
I won’t get into the details of the advanced ARC options in this review, but the software allows the enthusiast to adjust the correction response targets for each speaker and tweak the computed room gain as well as adjust the frequency limit for ARC corrections. ARC is an amazingly sophisticated solution and I was impressed to see that Anthem included all of the ARC capabilities with the MRX A/V receivers.
I still had one more step to complete before finalizing the setup of the MRX 700. The multimedia software on the MRX 700 is updated using the USB input on the MRX. The first step is to download the update from the Anthem website and copy the MRX multimedia update to a USB memory device. With the MRX turned-on and the USB input selected, I simply inserted the USB device into the MRX 700 and followed the on-screen prompts to update the software. The on-screen display let me know when I could disconnect the device and cycle the power on the MRX. The software updates and the ARC process was trouble free and took about an hour from start to finish.
With all of the software updates out of the way, I was able to finish up the setup of the MRX 700. I reviewed and named each input on the MRX 700 and made sure that the video and audio inputs were set correctly for each source. The menu system made this really simple. The MRX supports a movie and music speaker configuration as we saw in the ARC setup, and the “Main Source Setup” menus allow you to specify which of those configurations to use through the “Bass Manager” option for each source input.

I also checked the “Advanced Source Setup” menu for each of my sources to ensure that the “ARC (Room EQ)” option was turned on.

This menu also allows you to specify the analog inputs for zone two as well as adjust the Dolby Volume options. The Dolby menu is not particularly obvious and can be found on page two of the “Advanced Source Setup” menus by pressing the down arrow on the remote.

In Use
For my listening tests, I was using a 7.1 speaker configuration from Definitive Technology including a pair of BP-3000TL speakers with powered subwoofers for the front mains, a CLR 2002 speaker for the center channel, and four Definitive Technology UIW 94/A speakers for the surrounds and rear channels. I used a variety of source devices including an Oppo BDP-95 and an Olive O4HD. My normal reference processor is an Anthem Statement D2, and I’m typically listening to my room and these speakers using Anthem’s ARC-1 Room Correction System. I was really looking forward to hearing how ARC performed on the MRX 700.
I started off with some of my standard receiver listening tests. For Gladiator, the MRX 700 did a great job of reproducing the combat scenes and the noise of the crowds and chariots in the coliseum. Bass response during the fight scenes was excellent. The sound of the mace being circled overhead in the “Battle in Chains” scene was perfectly seamless as it transitioned across the rear speakers. In the Lord of the Rings: Return of the King, the “Battle of Pelennor Fields” scene sounded fantastic. From the thunderous roar of the army, to the sub-sonic bass of the giant Oliphaunts crossing the battle field, the MRX 700 did a tremendous job of drawing me into the movie. I was particularly impressed with how controlled the bass response was in the room.
In the King’s Speech, the dialog between the actors was exceptionally detailed and well placed in the center of the sound stage. I never strained to hear the dialog and the subtle use of music in the surround channels was a beautiful accompaniment to this touching story. I didn’t know what to expect with Tron: Legacy, but the MRX 700 did a killer job with the movie’s DTS HD Master Audio 7.1 sound track. The use of the rear surround channels at the start of the disc wars was awesome. Bass response and dynamics throughout the movie were tremendous. The MRX 700 created a superb soundstage for this reimagining of Tron. I was completely sucked into the movie and just listened in utter enjoyment as the MRX 700 got out of the way and brought this movie to life.


On the music side of things, I was really impressed with how well the MRX 700 performed. With ARC engaged, the MRX 700 consistently produced a detailed and expansive sound stage. The MRX 700 was adept at everything I threw at it. From popular music from artists like Katy Perry, Muse and P!nk, to jazz favorites from Diana Krall, to the soulful angst of Rolling in the Deep from Adele’s ’21’ album, the MRX 700 was simply a blast to listen to.

During my time with the MRX 700, I had the chance to listen to the 24-bit 176.4 kHz version of the Reveries album from Reference Recordings. This exquisite album contains a collection of pieces performed by the Minnesota Orchestra and conducted by Eiji Oue. One of my favorite pieces on Reveries is “No. 11: Solvejg’s Song” from Peer Gynt, Op.23. A few years ago, I had the opportunity to hear the Cleveland Orchestra perform Peer Gynt with narration by actor John de Lancie. Listening to this music played through the MRX 700 brought back fond memories of that evening. The beauty and emotion of the piece came through and I could imagine myself sitting at the performance with friends enjoying this incredible music. I was impressed with how well the MRX 700 sounded especially since I was reprocessing the analog output from an Olive O4HD using ARC on the MRX 700.

From a video perspective, the MRX 700 did not display any handshake problems when changing resolutions on my satellite box or when changing inputs to another HDMI source. Video output looked great on movie and television content and Blu-ray content like Tron: Legacy was excellent. We will talk much more about the video performance in the benchmark.
From an operational perspective, the MRX 700 was very simple to use. I only ran into one processing quirk. If you are using a 7.1 speaker system with rear surrounds, the MRX 700 does not allow you to select Dolby PLIIx processing as a default listening mode through the “Listening Mode Presets” menu. This means that if you send a DTS 5.1 or DTS HD Master Audio 5.1 bitstream to the MRX 700, you will not get any content from the rear surrounds. It turns out that there is a workaround to this. The listening mode default for DTS can be set to “Last Used” in the “Listening Mode Presets” source menu. By pressing the Audio button on the remote or the front panel while playing a DTS source, you can select Dolby PLIIx processing on the fly. Since the listening mode preset is set to “Last Used”, the MRX 700 will remember the PLIIx selection the next time a DTS bitstream is played for that source. It is interesting to note that while the MRX 700 won’t assign PLIIx as a default listening mode to DTS content through the setup menus, it does let you assign Dolby PLIIz processing to DTS if you are using front height speakers.
The MRX 700 offers support for the vTuner application which allows access to thousands of internet radio stations from around the world. The MRX provides a graphical interface for vTuner which allows for the browsing of local stations, genres, favorites, stations by location, as well as recently played stations. I was a bit surprised that the local station list in vTuner on the MRX 700 only showed 6 local stations based on my home location. I have another device on my home network which offers vTuner and that implementation lists 35 local stations for the greater Cleveland area. The difference is partially due to the limitation that the MRX does not play WMA encoded vTuner stations. The other missing stations seem to be related to vTuner identifying only the radio stations in my local county and not the stations in the greater Cleveland area. Fortunately, Anthem includes an access code with each MRX 700 that allows for direct access to the anthem.vtuner.com website. This site allows for easy access to vTuner and lets you create and customize your own channel groups for the MRX 700. It was a very easy process for me to just create a list of my favorite Cleveland radio stations.

I enjoyed listening to HD radio on the MRX 700 and I was happy to see that I could play music from USB devices. The MRX offers a graphical user interface which allows for quick browsing of music files on USB media. I was happy to see that album artwork is displayed during playback. I was disappointed that the MRX 700 does not offer support for the popular FLAC format. Anthem tells me this is on the feature request list. For now, the MRX supports WAV, WMA, MP3, M4A, WMA 9.2 Lossless, and Ogg Vorbis formats.
On The Bench
At 1 kHz, THD+N was 0.03251%. We see a lot of even and odd harmonics as well, which average about 80 dB below 0 dBFS.

At 10 kHz, THD+N was 0.01416%.

Here are the results for 19 kHz, 20 kHz combined test frequencies. There is a small visible B-A peak at 1 kHz about 80 dB below 0 dBFS.

The IMD measurement was 0.0267%. We have a second order harmonic out at 14 kHz that is around 90 dBV below 0 dBFS.

The video benchmark was done using an Oppo BDP-95 as the source device, as well as the Spears & Munsil High Definition Benchmark Blu-ray disc for test patterns. The first set of tests in the video benchmark validates that HDMI video is correctly passed through the MRX700. The tests used were: Overscan, Whiter than White, Blacker than Black, Luma and Chroma Burst, and Luma and Chroma Plate.

As you can see, the MRX 700 had some problems properly passing Chroma data. Regardless of the color space, the MRX 700 had difficulty processing fine vertical lines of the highest resolution color data. The problem ranged from a significant loss of Chroma information using 4:2:2 and 4:4:4 color spaces, to a flickering of the fine vertical lines when using the RGB color space. The problem could also be seen in the Chroma Plate patterns which were very dark at the edges when using 4:2:2 and 4:4:4 color spaces.
I also tested converting 1080i component video to HDMI, and the same problem with fine vertical lines is also present. The problem is also evident in the Luma Burst pattern when processing component video. The MRX 700 was also not able to pass blacker than black, and whiter than white when processing component video. While the Chroma resolution problem may not be readily obvious while watching Blu-ray or television content, I was able to detect the loss of fine detail in Blu-ray content. I made Anthem aware of my findings and they are looking into possible resolutions for the fine vertical line problems. We’ll certainly let you know if the issue is resolved. In the meantime, if you are able to set your Blu-ray player or video output device to RGB, you will minimize the effect of the problem.
For the deinterlacing tests, the MRX 700 did well with the exception of the 24p pull-down test. This test validates that the device is capable of properly deinterlacing 1080i60 to 1080p24. In the case of the MRX 700, the A/V receiver does not offer an option to force its video output to 1080p24. The MRX 700 will only pass a 1080p24 output signal if it receives such a signal as an input. I set my Oppo BDP-95 to 1080p24 output, and verified that the MRX 700 did do a proper job of sending the 1080p24 signal to my display. Unfortunately, since the MRX 700 can’t perform 1080i60 to 1080p24 conversion, it gets a failing mark on this test.
Conclusion
My overall experience with the MRX 700 was excellent thanks to the inclusion of Anthem Room Correction. Regardless of whether you are listening to music or a movie, the MRX 700 delivers an outstanding listening experience that is really hard to beat. While the initial setup of the MRX 700 may take a bit longer than the typical consumer receiver, the rewards are so worth it and will definitely appeal to the enthusiast who wants this level of performance at an approachable price. I was definitely disappointed with the video issues, and I hope that Anthem is able to resolve the problems in a timely manner. When they do, they will certainly have a tremendous product offering with the MRX series in their lineup.