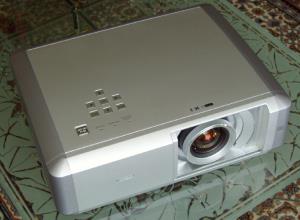
Introduction
After reviewing the Sanyo
PLV-Z1,
Z2, and
Z3, it was
natural that we would test their latest iteration, the PLV-Z4.
Progressive differences among the earlier versions
included an increase in resolution, the addition of an HDMI input, and an
adjustable iris.
The Z4 adds an electronically controlled lens cover,
a higher lens zoom ratio, more contrast, and more brightness. The resolution
has not changed since the Z2 (1280x720).
Several projectors out there have irises that are
dynamic, that is, they open and close to varying positions while you are
watching movies, depending on the brightness of the scene. If the scene is
bright, the iris opens, to maximize the light, and during a dark scene, the
iris adjusts to a small opening, to deepen the black areas. Sometimes, video
processing adjusts contrast during these operations, so as not to lose
highlights or shadow detail.
In the case of the Z4,
it appears that there
are two irises, one of which the user can set, and the other is dynamic
under certain circumstances. That is, you can set the user iris to adjust the overall brightness, and
this setting does not change during the movie. The other iris changes
dynamically during the movie, depending on the brightness of the scene.
By combining different menu settings with
the iris, different overall effects on the final image are available. For
example, in the Natural mode, the iris closes down, contrast is set to the
middle level, and this produces an image that is similar in brightness to a
commercial theater. In the Powerful mode, the iris opens up fully, the lamp
brightness is turned up, and color is turned up.
Although I
always use the Natural mode, or whatever name the projector has for that
type of mode, for bench tests, I actually preferred the Powerful mode for
viewing (the Vivid mode was also good). As you will see below, I took that basic preset and then adjusted
the brightness, contrast, gamma, and color, to produce an image that I found
particularly nice for watching movies on DVD, and high def satellite TV
programming. I stored that setting in one of the projector's memory banks.
My wife thought the image was beautiful, and said it reminded her of
Technicolor®
movies from decades past.
Inputs and Connectivity
The Z4 inputs are located on the back of the projector, and include one composite,
one S-Video, two component (RCA/BNC), one HDMI (HDCP compliant), and one
computer.
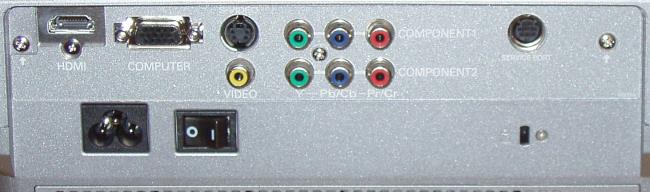
A Service Port takes the place of the more standard
DB-9 RS-232 serial port.
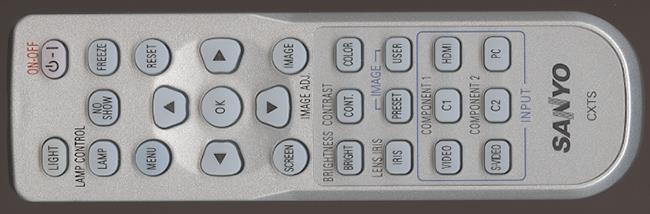
Remote
Control/Projector panel
The Z4 remote is backlit, but it is not automatic, which is a good idea
because it saves battery power. You just press Light to turn on the
backlighting.
The buttons are nicely laid out, are
intuitive, and are useful. You can select Lamp (increases or decreases bulb brightness), Screen (aspect
ratio), Image (takes you to the Image menu for changing any of the complete
list of controls), and specific buttons for Brightness, Contrast, Color
(saturation), the Iris (for reducing overall screen brightness), and Image
Presets/User Presets. The bottom set of buttons lets you select the input.
There is a small panel on the bottom of the
projector that, once opened, will let you use the included squeeze bulb to
blow dust out of the optical path. Dust manifests itself as nebulous blobs
in the image. I find that they come and go, so I don't worry about them. In
fact, the air that you suck into the squeeze bulb could very well have dust
in it, and make things worse.
Click Here to Go to Part
II.