Introduction
LCD projectors have come a long way in the last few
years. Not only are they less expensive than the first ones to hit the
market, but they are much better performers as well.
The new Hitachi PJ-TX100 is a three-panel 16:9 LCD
projector that boasts high brightness (1,200 Lumens), excellent contrast
(1,200:1), along with vertical and horizontal lens shift. It has a DVI-D
input that is HDCP compliant.
All for $3,999 MSRP, street price will be less at places
like ProjectorPeople.com.
For a projector with so much, it comes in at 9
pounds, easily held in one hand, and therefore easy to move on and off the
coffee table for an evening's movie viewing.
Features
The TX100 is loaded.
Focus and zoom are manual, controlled by two rings
around the lens (you can see them in the larger version photo at top left).
Two dials near the lens are for vertical and
horizontal lens shift. This moves the lens up and down or sideways, which
lets you shift the image on the screen without having to move the entire
projector. It is a very handy feature for fine tuning the image on the
screen if you can't situate it in that ideal spot that almost never exists.
After seeing this feature on a few projectors, I have decided it is one I
must have in my own projector.
The lens on the Hitachi has a short throw, meaning
it is shorter in focal length than some other lenses, so it will let you
place the projector closer to the screen and still fill it edge to edge. It
does tend to have a bit of pincushion distortion, which is typical of short
focal length lenses.
Pincushion distortion results in the edges of the
image bowing inward towards the center, like this example of the top edge:

The other type of distortion is called "Barrel
Distortion" which results in the edges of the image bowing outward, like
this example of the top edge:

Of course, the examples in these
diagrams are exaggerated.
The brightness is specified as 1,200
ANSI Lumens, which is just about what we found in our bench tests. Because
this may be too bright for some people, especially if you project movies on
a smaller screen, there is an iris control that has many small steps so you
can reduce the brightness to your preferences.
For such high brightness, the fan is
one of the quietest I have ever experience. I could sit right next to the
projector and not be bothered.
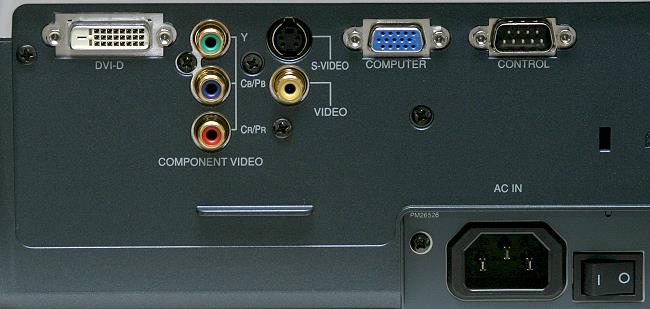
The rear panel has numerous
connections. These include a DVI-D jack, one set of component video jacks,
one S-Video, one composite video, and one jack to connect your computer. AC
is detachable grounded, and a toggle on/off switch puts the projector into
standy.
The top of the projector has push
buttons for taking the projector out of standby and into the full On
position, as well as buttons for changing the input or selecting items from
the extensive menu.
Remote Control
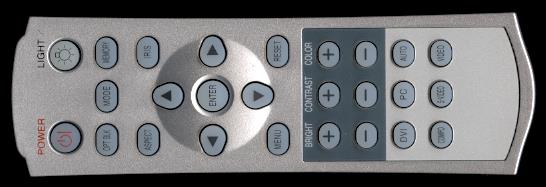
The remote control is very nice., mainly because it
has all the buttons I would want to use, such as the aspect ratio,
brightness, contrast, color intensity, and buttons for each input (for
changing between the DVD player and your satellite box for example). And . .
. the remote is backlit by pushing the button in the top right corner. The
light stays on for about 30 seconds.
User Menu System
The menu, like that of all modern digital
projectors, has lots of choices.
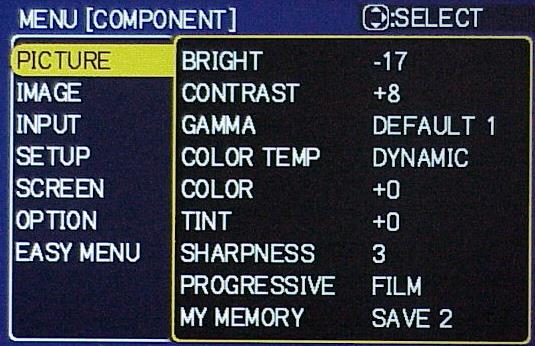
Pressing the Menu button brings this screen, and the
first choice is the Picture Menu. It shows the current settings for the
Dynamic Color Temperature setting.
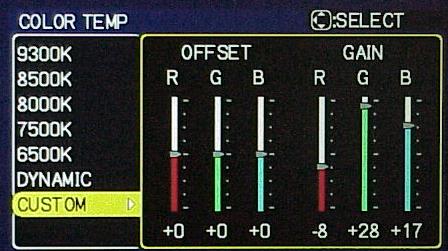
In our case, we set up a Custom Menu where we
changed the color values during the bench tests and calibration procedure.
Offset changes the way the colors appear in dark areas, while the Gain
changes the values in bright areas. The values shown below are the ones
selected during calibration, and a CC40 red filter was used.
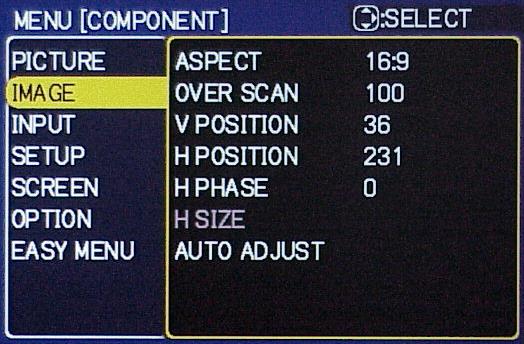
Scrolling down gives the Image Menu. Here are
choices for the aspect ratio, over scan, and positions of the image.
Next is the Input Menu.
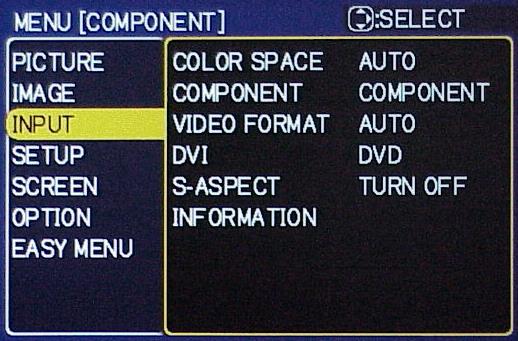
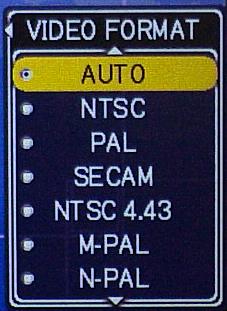
The Video Format Menu, a sub-menu of the Input Menu,
shows that this projector can be used in both NTSC countries as well as PAL
countries.
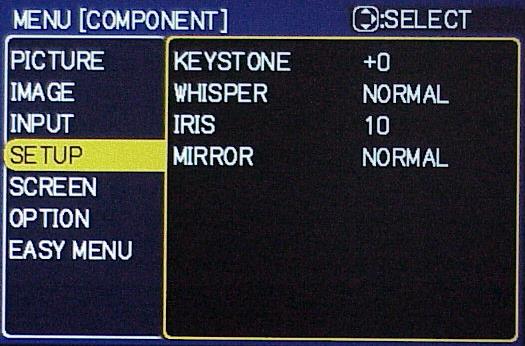
Then, the Setup Menu has options where you can adjust the amount
of Keystone Correction and displays the Iris setting.
The Screen Menu sets up your preferences for the On
Screen Display (OSD).
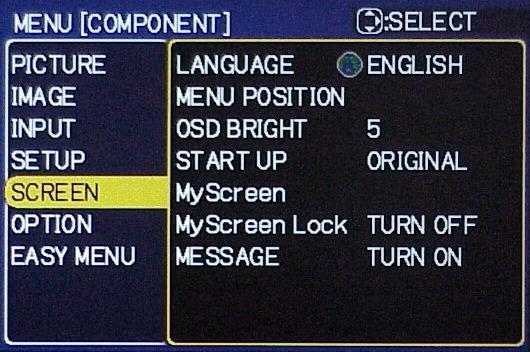
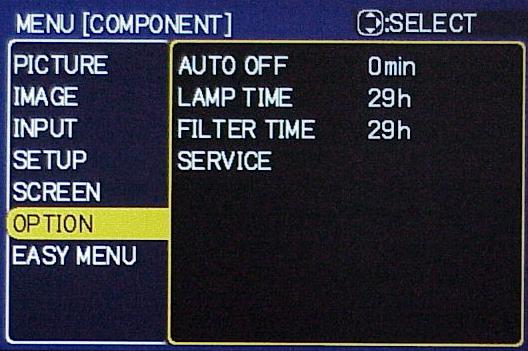
The Options Menu lets you know the amount of time
the lamp has been used as well as the air filter.
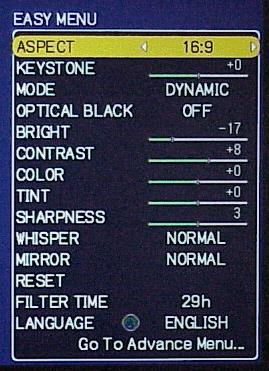
If all these menus are too much, you can go to the
Easy Menu.
Click Here to Go to
Part II - Measurements and Viewing


