|
|||||||||
|
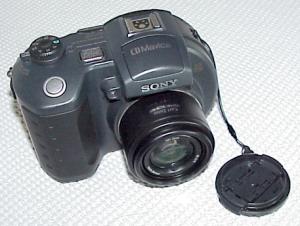
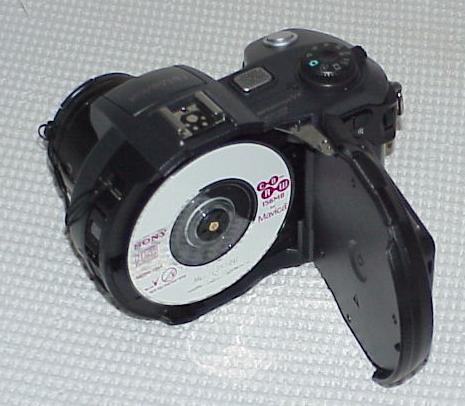
Introduction When Sony introduced their Mavica digital cameras several years ago, they were an instant sensation. This was due to their novel way of storing the images, on a floppy disk. At $0.25 per disc, this made image storage not only inexpensive, but simple. No connection to a computer was necessary. All you had to do was put the floppy in your PC and voila. The Mavica at that time was limited to the storage size of a floppy disk, 1.44 MB. Then came Compact Flash, Smart Media, and all the others. Sony opted for their own proprietary Memory Stick media, which they still use today in most of their cameras. Well, what about all those Mavica fans in light of the ability to take multi-megapixel images? The Sony MVC-CD500 is the answer. It uses a 3" CD-R or CD-R/W with 156 MB storage capacity. How did they put a CD recorder into a camera and make it operate on a stable basis? I don't know, but it sure seems to work. Why sell a camera that uses CDs instead of Compact Flash, Smart Media, or Sony's own Memory Sticks? Because there are a lot of Mavica fans out there, including me. Plus, even though memory chips are cheap, they are not as cheap as the 3" 156 MB CD-Rs and CD-R/Ws ($20 for a box of three CD-R/Ws). The CD-R/Ws can be rewritten, just as can the memory chips in other cameras. Features The MVC-CD500 is a 5 MegaPixel camera with a 3:1 zoom lens made by Zeiss, whose optics are renown. The lens is permanently mounted. The sensor is a 9.04 mm CCD. There is no viewfinder, so the LCD monitor is large (2.5"). The camera uses a Lithium Ion NP-FM50 rechargeable battery that fits into the right hand bottom of the camera. The battery situation in the CD500 is a little unusual for digital cameras, in that you recharge the battery while it is still in the camera. You plug the recharger into the wall AC, and then the other end, which looks a bit like a Firewire connector, goes into the top right corner of the camera. This means, essentially, you don't have to take the battery out to recharge it, which is very nice. I found that with a completely discharged battery, recharging took about 2 1/2 hours, but while changing the CD-R/W (loading images into the computer), it took only a half hour or so to bring the battery back up to full charge. The specs state that the CD-R/W holds 51 images in the highest JPEG resolution (5 MB), and my tests confirmed it at 49. The battery here, just as in other Mavicas, will go on, and on, and on. I did not feel the urge to have a second battery on hand, but they are available. The 3" CD fits into a compartment that opens on the left side of the camera. You snap the CD onto a spindle in the middle and close the case. After turning the camera on, with a slider switch next to the main dial on the top right, you "Initialize" the disc, which gets it ready to store images. This takes a few minutes, and you have to place the camera on a level surface and leave it alone during the process. When the disc is full of images, you go back into the setup menu and "Finalize" the disc. Then you can remove it from the camera and read it on pretty much any PC CD-ROM drive. This process seemed to work without a hitch during my tests. With a CD-R/W, you put the disc back in the camera and "Format" it, which includes initialization, so you can just keep using the same disc over and over. However, while on vacation, obviously you would want to have more than just the 1 disc on hand, even if you plan to transfer all the images to your computer and use the discs again later. I take a lot of pictures when I travel, so I would probably carry 6 discs, including the one in the camera (and have the battery recharger as well).
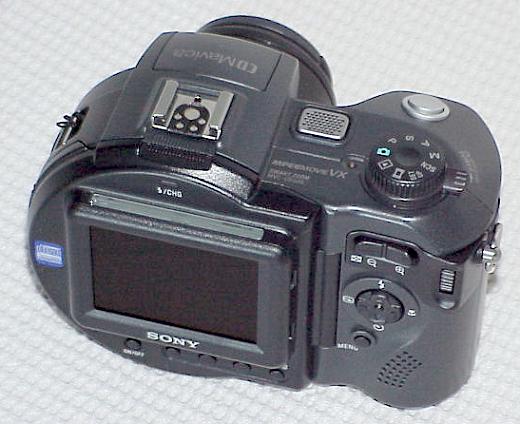
The top of the camera has the main dial on the right side. It has the usual set of selections, including a green camera icon for when the camera selects all settings (AF), P for Program, S for Shutter Priority (you select shutter speed, the camera selects the aperture), A for Aperture Priority (you select the aperture, the camera selects the shutter speed), M for Manual (you select shutter speed and aperture), SCN (select exposure based on scene conditions, including Twilight, Snow, and Beach), Set Up (initializing and finalizing the CD), Movie Frame for recording multiple images or an MPEG movie file, and Boxed Arrow for displaying images and deleting images. There is a pop-up flash unit built-in, but of course, it is low power. A hot shoe lets you add outboard flash units for more power.
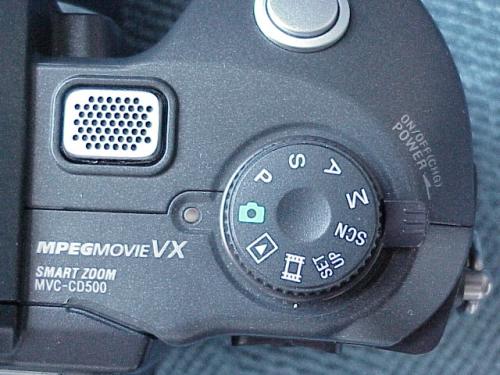
Here is a close-up of the main dial. There is a slider switch near the right side of the dial for turning the camera power on or off.
The rear of the camera has a large LCD panel and more control buttons. At the bottom left are buttons for turning off the LCD backlight, AI Lock (locking an exposure setting, then moving the camera, and taking the picture at the locked exposure setting), Focus (lets you change from Multipoint AF to Spot AF, Center, Left, Right, Bottom, or Top), Exposure (lets you increase or decrease the exposure from + 2.0 EV to - 2.0 EV in 0.3 EV steps), and the Image Size button for changing the recorded file size. You also use this button to delete images from the CD. On the right is the lens Zoom toggle, a round toggle for turning on the flash, self timer, and macro mode. A thumb wheel in the top right lets you make adjustments in shutter or aperture when in S or A modes.
Here is a close-up of the buttons on the bottom of the camera.
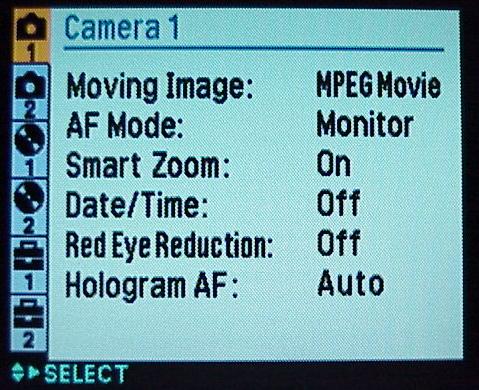
The Menus are numerous. First is the Set Up Menu, when you turn the main dial to Set Up and press the Menu button. Shown below is Menu 1. The Hologram AF is a laser pattern that is projected onto the subject in darkened situations. This lets the camera auto-focus very easily. A very unique feature that I have not seen before.
Here is Menu 2 (the various selections are shown in a vertical column on the left side).
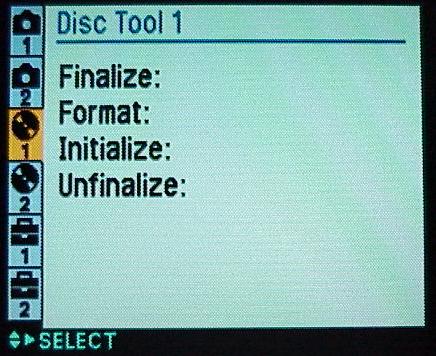
Menu 3. Here is the menu for initializing, finalizing, and formatting the CD-R/Ws.
Menu 4.
Menu 5.
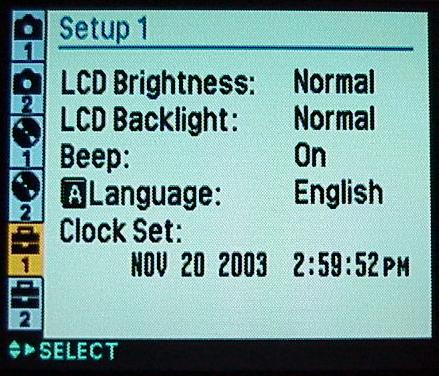
And, lastly, Menu 6. Video Out can be configured for NTSC or PAl.
Following is the set of menus that you get when you are in Program mode and press the Menu button. You move among the menu choices using the round toggle with the arrow marks. Menu 1.
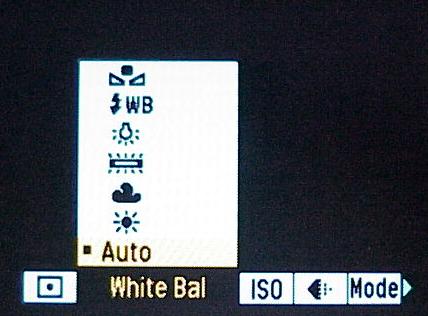
Menu 2. The White Balance settings.
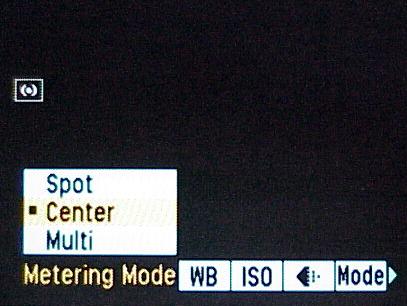
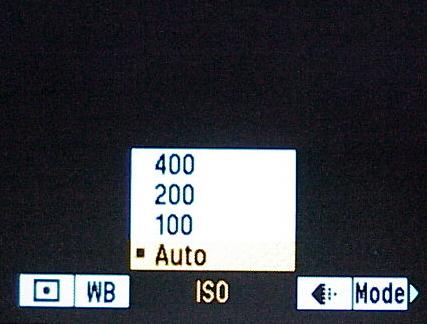
Menu 3. You can select an ISO of 100 - 400, or Auto.
Menu 4. The Picture quality.
And Menu 5.
Part I - Introduction and Features Part III - On the Bench and Conclusions
|
|||||||||


Magazine Publishing Solutions by