|
Menu System
The menu system on the Epson is amazing. Amazingly good, that is, if you like
the ability to adjust the projector to get optimum performance.
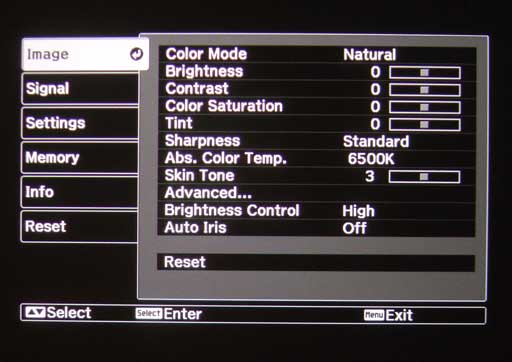
The menus are grouped into six categories: Image, Signal, Settings, Memory, Info, and Reset. The Image menu allows selection of the Color
Mode and well as the familiar adjustments for Brightness, Contrast, Saturation, Tint, and Sharpness. Less familiar, are controls for Color
Temperature and Skin Tone as well as access to an Advanced menu, and the
lamp Brightness control which can be set to High or Low lamp brightness
settings. The low setting provides less light output, but extends bulb life
and reduces fan noise. The Auto Iris can be turned on or off, and this enhances contrast ratios and black levels when
activated, as will be explained later.
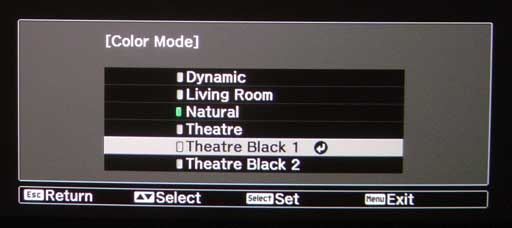
The Color Mode submenu allows selection of one of six color modes.
The Sharpness setting has the familiar 0 to 5 adjustment as well as allowing a
detailed tweaking of horizontal and vertical sharpness settings.

The Color Temperature adjustment allows the user to select the desired color
temperature in Kelvin while the Skin Tone menu allows adjustment of the
green/magenta balance. (The color temperature in Kelvin is less sensitive to
green/magenta balance than it is to balance between red and blue.)

The Advanced submenu leads the user to lower level menus that allow adjustment
of gamma and color controls.
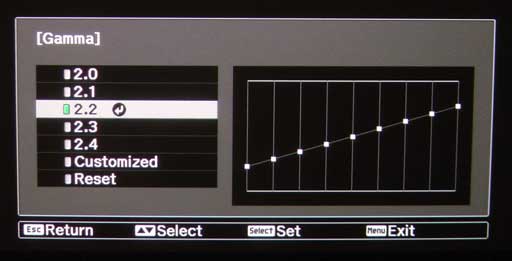
The
gamma submenu allows adjustment of the display unit's gamma numerically or to
be fine tuned graphically.
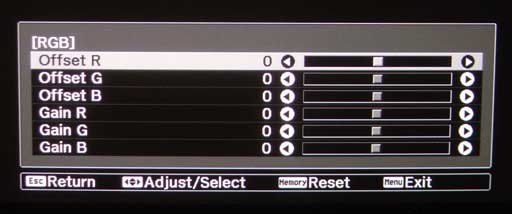

The RGB submenu has the welcome red green and blue Offset or Bias and Gain controls for tweaking color balance and grayscale tracking, and the RGBCMY submenu allows the user to tweak the Hue and Saturation (but not
intensity) of the primary and secondary colors.

The Signal menu allows adjustment of the projector's aspect
ratio to that of the image, e.g. Normal for 4:3 sources, Full for the
Anamorphic or squeezed widescreen images, or Zoom for letterboxed images.
There is also the infamous Wide aspect mode to expand (and distort) 4:3
images to fill the 16:9 display by preferentially expanding the left and right
sides of the image.
The Signal menu also allows selection of signal processing and noise
reduction modes. Of note is also the Output Scaling adjustment. For whatever
reason, this defaulted to 92%, thus significantly cropping the image.
Fortunately, setting the Output Scaling to 100% was easy and eliminated pixel
cropping. The HDMI Video range setting allows proper operation (black and
white levels) with both computer and video HDMI sources.
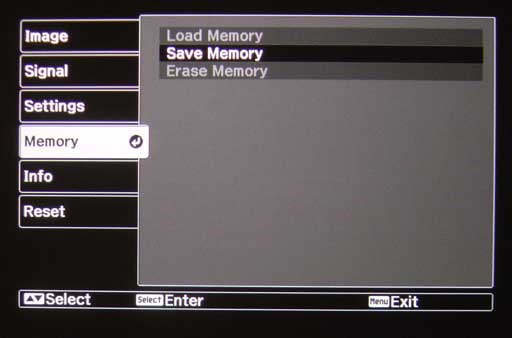
The Memory menu allows the user to save and recall favorite settings in named memory locations (up to nine).
The Info menu shows information about the input signal and other useful
things about the projector such as lamp hours. Of particular note is the HDMI
bit depth potentially associated with an HDMI 1.3 compatible signal.
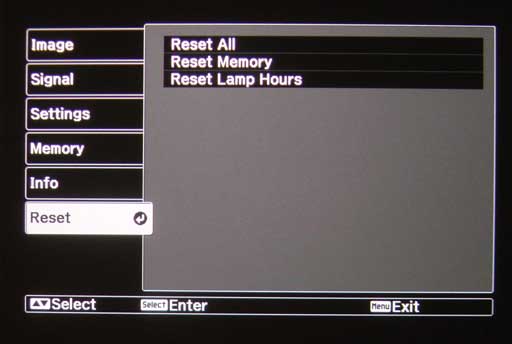
Finally, the Reset menu allows the user to reset all projector settings to
their defaults as well as the memory settings and lamp hours. Note that the
menu system also allows resetting of values to their default for specific menu
pages.
Go to Part III.
Terms and Conditions of Use
|

