The GUI
The graphical user interface of the No 40 deserves special
mention. I will start by saying that this is the best design I have ever
experienced. This is particularly important, as the complexity of these systems
has grown to a point that setting them up can be frustrating and
intimidating at times. That is not the case here.
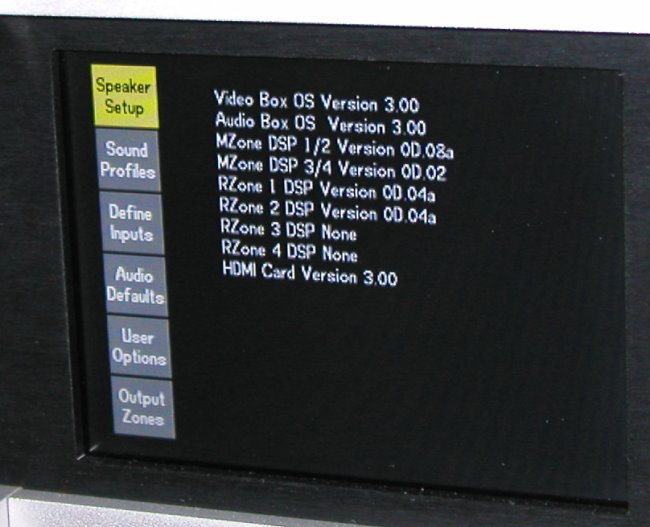
The text is rendered with good resolution, which makes it easy to read. If
you are using the LCD panel on the processor, you have to be within a few
feet to read it. At any given point you can see the path from the top-level
to wherever you are in the menu hierarchy. This makes navigation through the
menus intuitive, and setup a relatively painless process.
One extremely neat feature is the process of assigning inputs. When this is
done, a graphical depiction of the back panel is drawn on the screen. The
card numbers, along with which type on connectors are offered on each card
gets displayed. Inapplicable connectors for a given assignment are grayed
out. For example, if you are assigning a digital input, all the analog
inputs are grayed out. You simply move the cursor around and then hit enter
to assign it to the current input.
The ML website states that they have been able to create an interface
which is amenable to both an expert and a novice. I certainly feel that they
have succeeded in doing this. The only sad part here is that many buyers may
never get exposed to it given that they are likely to have the unit set up by
a dealer and then use some external system to control it. Regardless, the UI
designers have put a lot of thought into the design of this system, and
they are to be commended for it.
The Remote Control
Most processors these days are accompanied by universal remotes. ML has
chosen to supply one which is not of the universal variety. This is not
surprising given that the majority of the owners are likely to use some
external device to control the processor. What is surprising, however, is
just how much care has gone into the design and look of the remote.
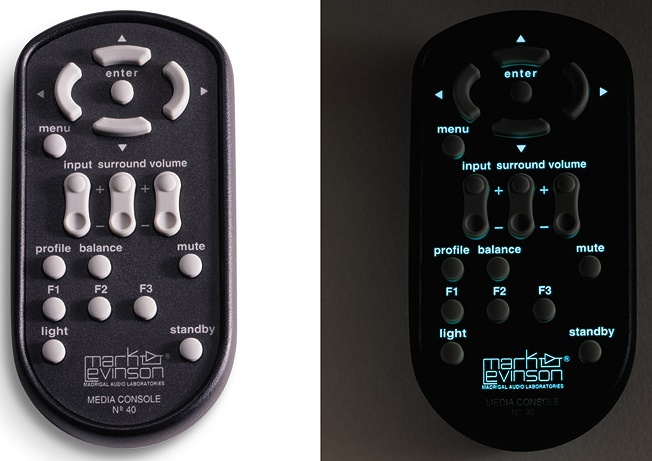
The remote is heavier that its size might
indicate. It fits nicely into the hand, and while there are a small number
of buttons, it is very functional. All the buttons, including the rocker
buttons, have a good feel when they are pressed. The only issue I had here
was with the "Down" button which would sometimes get stuck. The buttons
themselves are not backlit, but the labels which are adjacent to the buttons
are. There is a nice look to the remote when the labels are backlit with the
soft blue-green light. One other detail worth mentioning is the processor's
excellent reception of the remote even at wide angles.
While the functionality of most of the buttons is self-explanatory, the
buttons labeled "F1" through "F3" deserve some mention. The function
provided by these functions keys is programmable through the Setup menu. For
example, one can use these function keys to select a particular input
without having to cycle through all the inputs using the "Input" rocker
buttons. Alternatively, one can use these function keys as a THX toggle or
to pick a different listener position.
Setup
The speaker configuration entails the usual drill of defining crossover
points, measuring the distance to each speaker, and setting the levels. What
is unusual here is that the levels can be set in 0.1 dB increments. What's
more is that you can define up to four different listening positions, each
with its own independent level and distance setting.
The crossover selection
offers two options for the slope; one conforms to the THX specification (a
2nd order high-pass for the speakers and a 4th order low-pass filter for the
subwoofer), while the other offers a 3rd order slope for both the speakers
and the subwoofer. I would have liked to see a 4th order high-pass option as
well. The crossover frequency is independent of the slope choice. The
selectable range is 30 Hz to 100 Hz in 10 Hz increments.
The No 40 allows for a 7.1 setup; however, two of these channels are
designated as auxiliary channels, and their functionality is configurable. In
a 7.1 setup, these channels will of course be relegated to back surround
duty. If you have a 6.1 setup for example, you can use one of the auxiliary
channels as a single back surround. The other auxiliary channel can be used
as either a second mono sub or a stereo sub.
The No 40 provides the capability to create up to twenty logical inputs with
customizable names. The analog and digital connectors for both audio and
video can be assigned to one or more inputs. As was described in the GUI
section, the interface makes the assignment process straightforward.
Multiple audio sources can be assigned to an input. In this case the
following priority has been established: HDMI, Digital, Analog. The force
migration feature can be used to select an audio input with a lower
priority.
An offset can be added to any analog input for level balancing. All analog
audio goes through the ADC. I am surprised there is no pass-through mode.
However, I personally prefer the audio to always be digitized in order to
get the benefit of all the bass management and surround sound processing
capabilities of a processor.
An audio delay can be applied on any input to synchronize the audio with the
video in the case where there is some video processing downstream on the
processor.
In my setup, the primary source of audio and video input into the No 40 was
via the HDMI card. For video, the output was again relegated to the HDMI
card. At present, I only have an HDMI cable running to the projector. I did
not give the analog video section a workout, but I would be surprised if the
quality were anything short of excellent there.
From an operational standpoint, there was an occasional operational glitch
that I came across. This was infrequent, and as far as I can tell, random.
The glitch manifested itself with flashing of the standby LEDs and the LCD
panel. When in this state, the unit became sluggish responding to any
commands. Repeated power cycles would eventually cause this erroneous
behavior to cease. This issue coupled with some HDMI issues that I came
across resulted in ML sending a replacement unit. I never saw this
issue with the new unit.
Apart for the glitch mentioned above, the logical construction of the menu
system coupled with the LCD panel on the front panel provided for a painless
setup process.
Go to Part V.

