The rear panel is the business area like all
digital cameras. On the left are the Menu (to scroll through the menus and
change settings), Arrow (to review photos you took), "i" (gives you detailed
information about your photos, such as f/stop, shutter speed, etc.), *
(modifies photos), and the garbage can for deleting photos from the Compact
Flash memory card.
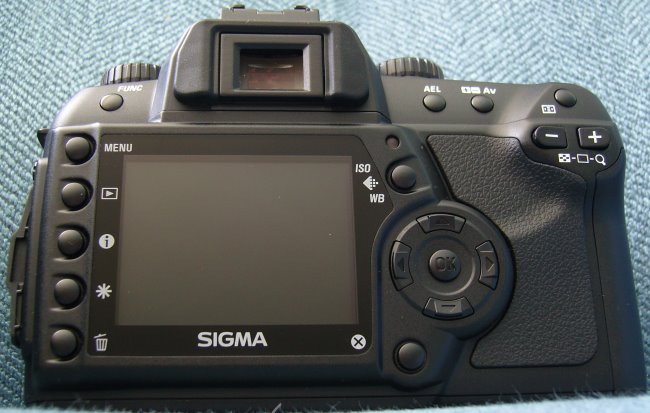
On the right is an ISO/WB button, the scroll
buttons (wheel), a Cancel button (X), and buttons for Auto Exposure Lock (AEL),
Exposure Compensation (Av), and +&- buttons for zooming in on the reviewed
photos shown in the nice big LCD screen (much bigger than on the SD10).
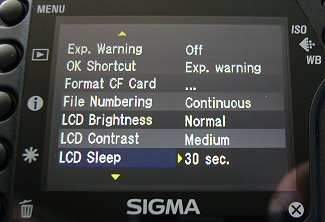
The Menu screens are shown below. From there,
you can alter settings for just about everything that stays constant,
including White Balance, Date, how long you want the Preview Screen to stay
on, and formatting CF cards.
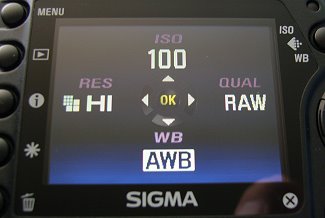
When you press the ISO/WB button, you see the
menu in the left photo below. Using the buttons on the wheel, you can scroll
through the various options of setting the ISO from 100 to 1,600 and the
Quality from RAW through various JPEG settings.
I really like this (ISO/WB) menu setup because
it accesses the most often used settings and the words have a big font that
is easy to read even without my glasses.
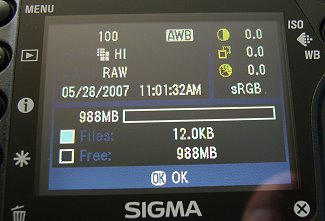
You can also check the status of the main
camera settings by pressing the Info button when no photo has been selected,
seen in the photo above, on the right (otherwise, you get the info for a
specific photograph).
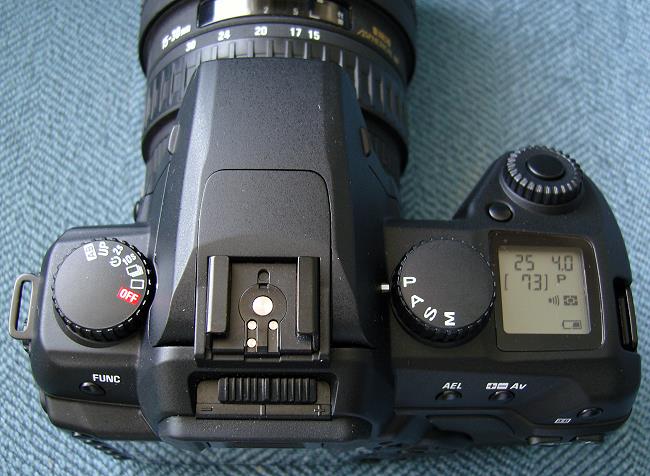
On the top of the camera are the dials, such
as the one on the left, for Power On, Single Frame or Continuous Shooting,
Self Timer, Mirror Lockup, and Auto Bracketing. On the right is a dial to
select Program (the camera makes all the settings), Aperture Priority (you
set the aperture), Shutter Priority (you set the shutter speed), and Manual.
The shutter release is at the front right, surrounded by a dial that lets
you change the shutter and aperture together, maintaining proper exposure.
The LCD display shows the shutter speed and aperture, as well as the
exposures that you still have room for on the CF card, the metering mode
(average or spot meter), and the battery status.
There is a built-in flash, but it is usually
better to have a dedicated flash for best quality pictures. Behind the flash
shoe is a slider for diopter changes in the viewfinder in case you wear
glasses.
The Li Ion battery (included) and CF card
slots are on the bottom of the camera. I got about 100 shots before the
battery needed to be recharged, taking photos at the highest resolution JPEG
or RAW.
All in all, I found the SD14 the easiest to
use DSLR I have ever worked with. The dials all seem to be intuitive. It was
truly a pleasure to use it.
Lenses
For the review, Sigma supplied three lenses as
shown in the photo below, from left to right: (A) 28mm-70mm f/2.8 DF ($329); (B) 50mm f/2.8 EX Macro
($269);
and (C) 15mm-30mm f/3.5-4.5 DG ($499).

If I could only choose one of these lenses to
take on a trip, it would be the 15mm-30mm, because of its wide angle
capability. As you will see in the following pages, it takes very sharp
pictures.
The SD14 comes with PhotoPro software that
assists in downloading your photos to your computer and working with them in
RAW format if you like. Here is a screenshot. Notice that the photos I
worked with are the infrared pictures. They are red because I had not
processed them yet. I think that Adobe Lightroom is much more comprehensive
in the way it handles RAW files, so if you plan to shoot in RAW, I recommend
you get that program. For the infrared, processing includes converting to
black & white, and adjusting various other parameters such as contrast,
brightness, and gamma.

Go to Part III.