|
||||||||||||||||
|
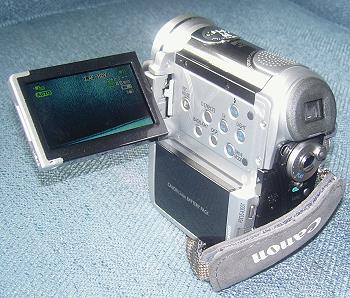
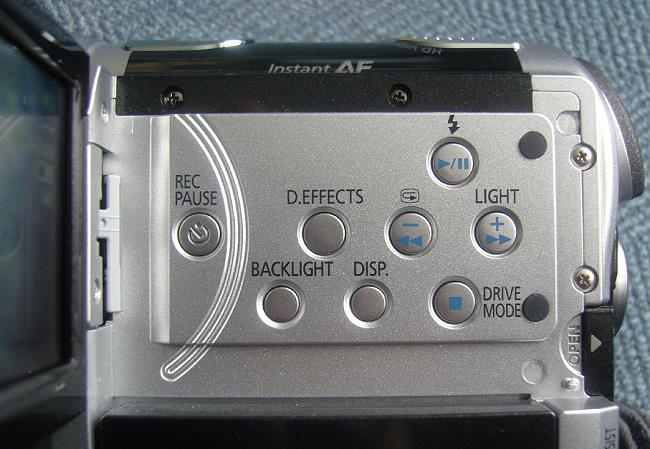
Introduction I remember in the 1980's when I rented a video camera to record a Christmas dinner. The camera was separate from the recording mechanism, which I had to hang over my shoulder. It used standard VHS tapes. The whole thing weighed about 25 pounds, and the picture quality was terrible. Fast forward to 2007, and we have high definition camcorders that weigh 1 pound. The Canon HV10 High definition video has been with us for a few years now, but at this point, all of the consumer high def video cameras either record 720p or 1080i, and are called HDV. These HDV cameras will record both high definition (HD) and standard definition (DV), thus the HDV designation. HDV cameras that record 1080i process and store the data at 1,440 x 1,080, not 1,920 x 1,080. In the case of HD, the image is captured at 1,920 x 1,080, then converted to 1,440 x 1,080 for the processing and storage on tape as an ATSC video. In the case of DV, the image is captured directly from the 1,440 x 1,080 pixels on the sensor, processed, scaled to lower resolution, and output to tape as an NTSC video. Therefore, since both HD and DV data are 1,440 x 1,080 to start with (which is a 4:3 aspect ratio), this allows most of the camera's circuitry to be used for both formats, and reduces the cost of the camera significantly. Even the ProSumer cameras ($4,000 up to about $10,000) are 1,440 x 1,080 and many television studios use them for their HD broadcasts, since full HD resolution (1,920 x 1,080) studio cameras are about $30,000 or more. Studios often need several dozen video cameras, so buying 50 cameras at $5,000 each is a lot more affordable than 50 at $30,000 each. The ProSumer cameras have three sensors instead of one, and other features like Genlock control, as well as a higher quality lens (usually interchangeable with other optional lenses). The Canon HV10 is a consumer HDV camera, with 1,440 x 1,080 resolution, and one 1,920 x 1,080 sensor. However, it can record higher resolution in its still picture mode, although that feature is really just a convenience. Storage is on conventional DV tapes which cost about $3/each in packages of several. HDV videos are recorded onto DV tape as MPEG-2 files at 25 Mb/sec. DV files in standard DV camcorders are recorded as *.avi (also at 25 Mb/sec), while HDV files are recorded as *.m2t. As a result, HDV images will have artifacts typical of JPEGs unless they are captured through SDI ports (Serial Digital Interface), which some video cameras have (the HV10 does not). DV is recorded in 4:1:1 Y Cb Cr, while HDV is recorded in 4:2:0 Y Cb Cr. SDI outputs uncompressed video streams, but they take up a huge amount of storage space. The bottom line is that HDV on DV tape is much more compressed than conventional DV on tape, but the higher resolution still delivers a much better picture. The HV10 only weighs one pound. It comes with a battery charger and an Li Ion battery. You can recharge the battery while it is still attached to the camera, but you can also remove the battery if you want to carry more than one with you. The main control panel on the left side (exposed by opening the 2.7" LCD display), shown below, lets you pause during recording (instead of coming to a full stop), turn on a camera light that is located on the front, add digital effects such as a "fade" between one shot and the next, turn off the data display, and play the tape back to see if you got what you wanted.
On the right side of the camera are located the zoom control (far right), still photo (snapshots) button, selector for tape (video) or memory card (snapshots), and printer button (to print your snapshots directly from the camera).
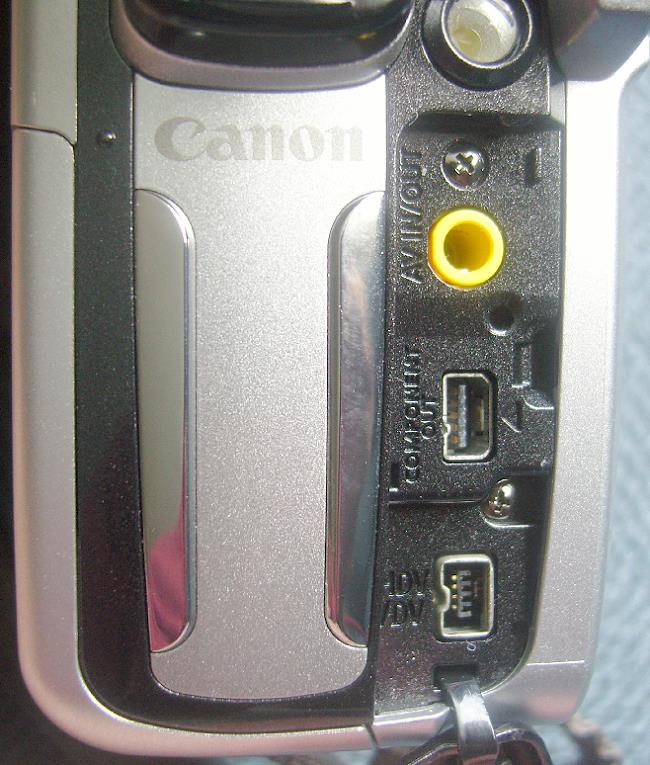
Below are shown two photos of the camera front. The first one illustrates two light sources. One, rectangular in shape, is the flash unit for taking snapshots, and the other one, round, is a light for taking videos. It is use in low-light situations, but is really only for close-up work (a few feet away, not across the room). Notice that the lens has a protection cover. It slides open when you turn on the camera. This is a great feature to keep fingerprints off the lens. The second photo shows the jacks that are underneath a flip-open cover. The yellow one is for analog audio, the jack underneath it has analog component video, and the third one is IEEE-1394 (Firewire) for digital audio and video out.
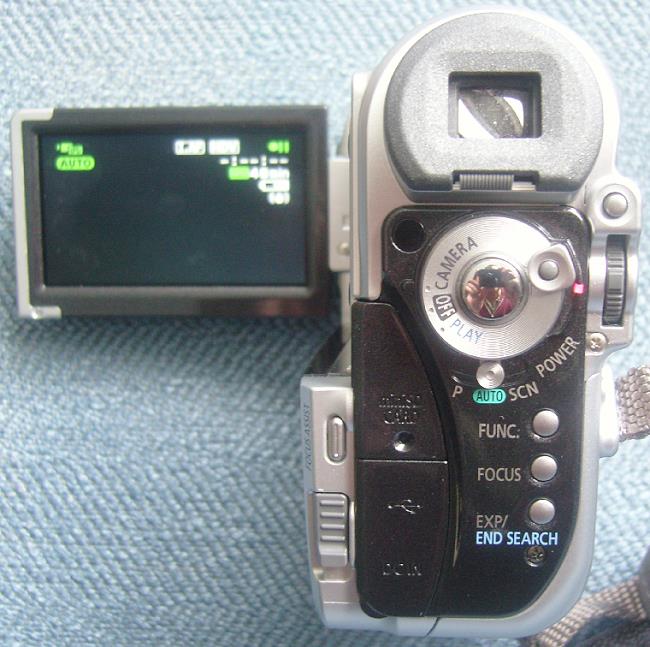
The rear panel has the day-to-day functions, such as power on/off, which is a circular dial that lets you select Camera (for recording videos), Play (for playing back the tape from the camera), and Off. Underneath this dial is a selector for Auto (the camera sets everything automatically), P for Program (you can adjust the lens iris and shutter speed for exposure), and SCN (pre-programmed combinations of f/stop and shutter speed for special situations such as a spotlighted stage, snow, and fast action sports). To begin recording, you press the round button in the middle of the circular dial (you can see a reflection there of me taking the photo). The Focus button is for manual vs. auto focusing, and the Focus Assist button enlarges the image so you can see more details for the manual focus, which is controlled by the thumb wheel seen at the far right, underneath the Menu button. The thumb wheel is also used for scrolling through menu items. You push it in when you want to make a menu selection. There is a flip-open panel on the left side, underneath which is the battery recharging jack, along with a USB 2.0 jack for uploading still photos from the SD memory card to your computer.
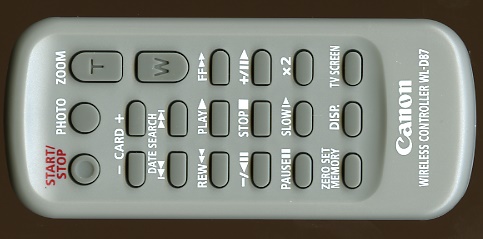
The HV10 is operable with a small remote control, so you can get in the videos along with your family. It's about 4" long and 1-1/2" wide.
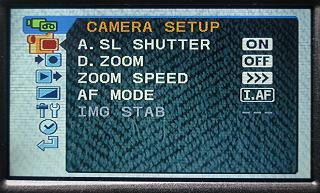
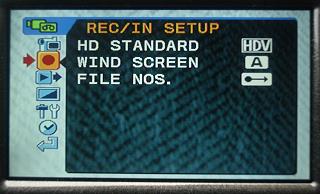
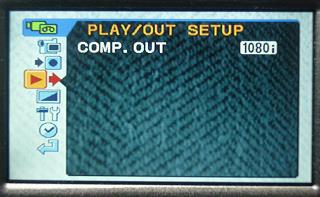
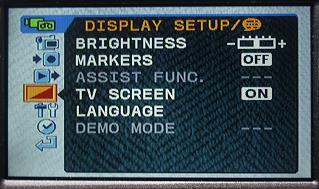
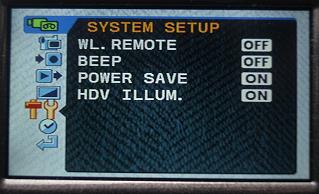
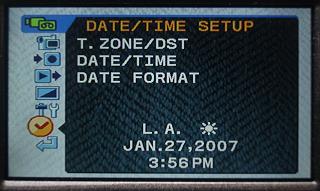
When you press the Menu button on the rear panel, you see the following six menus, scrolling through them with the thumb wheel.
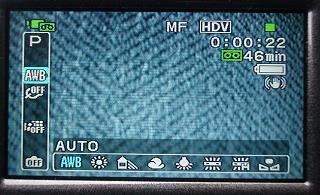
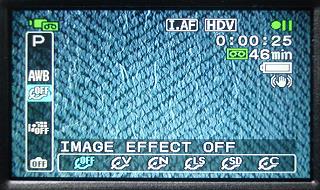
The Function button, on the other hand, accesses such things as White Balance (sunny day, cloudy day, fluorescent lighting, etc.) and Image Effect (selects among several levels of sharpening), as shown below. The MF next to HDV in the left photo indicates Manual Focus, while I.AF in the right photo indicates Auto Focus. You select Manual or Auto Focus with the Focus button. Manual focus is controlled by the thumb wheel.
You have probably noticed by now all the special effects that are in several menus, selected by the D. Effects button on the side of the camera and also with the Function button. Then you have other menus selected through the Menu button. I would suggest that all functions be accessed by a single button ("Menu"), and you scroll down with the thumb wheel to the function you want to change, select it by pressing the thumb wheel, and get on with taking videos. I would also like to see an input for external stereo microphones, which would be useful for recording weddings, interviews with aging parents, etc. You just clip one wireless lapel microphone on the bride, one on the groom, and away you go. (Azden makes wireless stereo microphone systems.)
|
||||||||||||||||


Magazine Publishing Solutions by