Wrapping Up
It's all but over now. Just need to install the
front driver.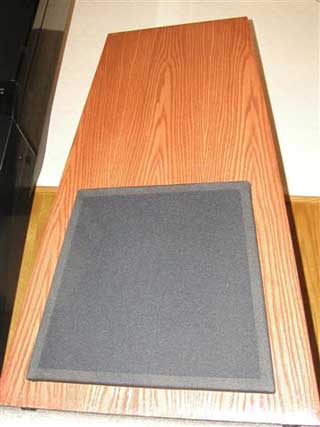
64. Solder speaker wire to the two voice coils of the
remaining driver.
65. From the "Internal Speaker Distribution" block in
the Isobaric Chamber, connect a speaker wire to the wires you just soldered
as well as the two sets of binding posts labeled "Isobaric Voice Coils".
Tip: You'll note that we are wiring each of the
voice coils in parallel and using the Matchit Autoformer to bump the
impedance up to a reasonable load - at least for the amp I used.
66. Apply the speaker caulk to the perimeter of the
driver.
67. Install the driver into the cabinet.
68. Find two or three close friends to lift this
beast into position.
69. Connect it to the subwoofer pre-out on your
receiver or SSP.
70. You're done. Celebrate and enjoy!
Conclusions
As you can probably tell, I wasn't a design expert
when it came to speakers before this project - heck I'm not much better now.
But, if anything, the Pyramid Powered Isobaric Subwoofer Project shows that with the right tools
and a willingness to work though issues, even an amateur can get a lot of
boom for the buck. I can't say all my design goals were met - I did spend
400 bucks on a used Adcom GFA Mark II Amp. But I'm happy with the way things
turned out.
Thanks again to Ron for the help.
- Kevin Lichterman -
Appendix 1: Parts and Prices
For those of you interested in constructing your own
copy of the sub, I've included a list of the parts I used, the sources where
I purchased them, and approximate prices. I may have missed small things, but
this should get you started.
Speaker Components
|
|
Part # |
Quantity |
Use |
Source |
Total Cost |
| 4x8 MDF Panel |
N/A |
2 @ 24.00 |
Main structural
component |
Home Depot |
48.00 |
| Red Oak Veneer |
N/A |
2 @ 16.00 |
Makes the cheap
box look expensive |
Menards |
32.00 |
| Shiva Mark III
Subwoofer |
N/A |
2 |
Pushes Air |
Adire Audio |
250.00 |
| Dayton Audio
Binding Posts |
091-1245 |
3 |
Internal
Speaker Wire Connection |
Parts Express |
22.50 |
| Audioplex Matchit
300 Autoformer Protection |
302-305 |
1 |
Impedance
Multiplier: Reduces Impedance seen by amplifier to make speaker easier
to drive. |
Parts Express |
33.95 |
| Magnetic Grill
Guide |
329-045 |
1 |
Connect the
grill to the box |
Parts Express |
4.88 |
| Black Grill Cloth |
360-335 |
1
|
Protect the
driver! |
Parts Express |
6.90 |
| Speaker Sealing
Caulk |
269-300 |
2 |
Keep it Air
Tight |
Parts Express |
1.96 |
| 1 ¾ " square drive
coated deck screws. |
N/A |
1 Pound |
Mechanical
fastener |
Home Depot |
7.00 |
| 1 inch round oak
dowel |
N/A |
5 feet |
Box bracing |
Menards |
4.00 |
| Durham's Wood
putty |
N/A |
|
Box smoothing |
Home Depot |
4.00 |
| WBT Binding Posts
– Red |
089-589 |
1 |
External
Speaker Wire Connection |
Parts Express |
8.88 |
| WBT Binding Post –
White |
089-587 |
1 |
External
Speaker Wire Connection |
Parts Express |
8.88 |
| WBT 0716 Mounting
Kit |
093-566 |
1 |
Pretty way of
connecting the Binding Posts |
Parts Express |
11.25 |
| 12 gauge speaker
Wire |
N/A |
4 feet |
Connecting the
Electrical Dots |
Home Depot |
4.00 |
| Egg Crate Foam |
N/A |
N/A |
Box Dampening |
N/A |
0.00 |
| 2" Flared
Precision Ports |
268-348 |
2 |
Lets the Air
Out (box tuning) |
Parts Express |
21.40 |
| Dayton Audio
Chrome Spiked feet |
240-715 |
1 |
Couple the Sub
to the Floor |
Parts Express |
19.95 |
|
T
nuts 10x32 x 7/16
|
N/A |
24 @ 0.39 |
Driver and Port
Mounting |
Menards |
10.00 |
| Phillips Head
Screws 10x32x1" |
N/A |
16 @ 0.20 |
Driver Mounting |
Menards |
3.20 |
|
Black Allen head nuts 10x32x1" |
N/A |
8 @ 0.80 |
Port Mounting |
Menards |
6.40 |
| Gorilla Glue |
N/A |
1 |
Secure T-nuts
and Bracing |
Home Depot |
7.00 |
| Copper Single Hole
Mechanical / Solderless Terminal Lug |
N/A |
2 @ 1.97 |
Provide
rewiring potential in chamber |
Home depot |
3.94 |
| 3M Multipurpose
Spray Adhesive |
N/A |
1 Can |
Attach Foam and
Veneer |
Home Depot |
10.00 |
| Used Adcom GFA
555II |
N/A |
1 |
My choice for
power – 850Watts into 4 ohms |
N/A |
400.00 |
| Minwax Stain –
Color of Choice |
N/A |
8 oz |
Box finishing |
Home Depot |
5.00 |
| Brush on
Polyurethane |
N/A |
8 oz |
Box finishing |
Home Depot |
4.00 |
| Spray on
Polyurethane |
N/A |
1 can |
Box finishing |
Home Depot |
6.00 |
Speaker Total: $580
Amp Total: $400
Grand Total: $980
Appendix 2: Tools and Consumables
Here's a list of the tools and shop supplies I used
to complete the project. Your mileage may vary.
Tools:
Table Saw
Japanese Flush Cut Saw
Circular Saw with Tilt feature
Router with ¼" Straight cut bit.
C-Clamps
Soldering Iron
Random Orbital Sander
Carpenters Square
Tape Measure
Veneer Roller
Jasper Circle Jig
Phillips Screwdriver
Allen Head Screwdriver
Drill with bits
Utility Knife
Consumables:
Elmer's Professional Wood Glue
Sandpaper 100 – 100 Grit
Silver Solder
Nylon Paint Brush
PVC Glue

