 Input
Selection
Input
Selection
Selecting a particular input is quite easy and can be done discretely
through the remote control, which is simple and very easy to get used to.
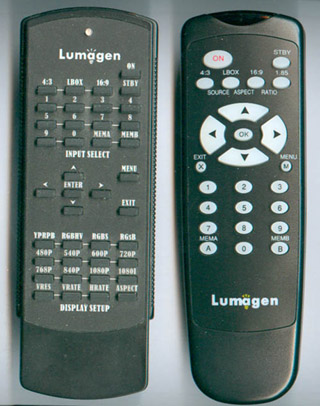
The old style Lumagen remote control (on the left, in the photo) still works and supports
advanced features such as switching quickly between output display rates. A
newer remote (on the right, in the photo) offers basic every day functionality and is more suitable
towards regular end users.
Each input has four separate memories attached to them (A, B, C, D). These can
be set up to switch automatically between PAL and NTSC (A->C, B->D) or serve
as fully standalone memories. Each memory has a fantastic number of
parameters that can be attached to it. In the simplest scenario, one can use
this technique to switch their display from day to night mode. One can also
assign different output profiles to each memory, which can let you switch
between your projector (RGBHV) to your plasma (DVI) or vice versa, or even
switch from 60 HZ genlocked mode to 50 Hz genlocked mode (Genlock, or
Generator Locking Device, allows a display to accept two video signals
simultaneously).
The input memories are extremely versatile. They can also hold different
contrast/brightness settings (after all, my DVD acts quite differently when
it is outputting PAL vs. NTSC) or even different calibration settings on a
per-input basis. A master menu controls how these memories interact with the
system and allows for even greater flexibility.
Inputs can also be set up to switch output profiles based on the type of
input they receive. This is not just limited to PAL/NTSC, but can also be
extended to switch output profiles (up to eight profiles are available)
automatically, based on the signal type being input (e.g., 720p or 1080i).
Each input memory holds not only video settings like contrast and brightness,
but also aspect ratio settings that can be manually reset. This lets you
customize aspect ratios and use input A-D memories to create a large number
of customized aspect ratios as well. The unit internally holds quite a few
aspect ratios, including 16:9, letterbox, and 4:3 (including
non-linear-stretch!). Setting up the top left (TOPL in Lumagen Speak - see
what I mean about the acronyms?) and
bottom right (BTMR) is easily done with a unique shifted screen that lets
you control on a pixel level where each corner will end up on your screen.
It cannot be more accurate or simpler than that, and other processor
manufacturers should follow Lumagen's idea on this feature. Each aspect
ratio setting can also be zoomed in small increments, which is great for
avoiding plasma burn-in.
De-interlacing parameters are specific on a per-input basis and allow manual
forcing for video mode and even field flipping. Genlock control can also be
set on a per-input, per-memory manner. This prevents an occasional missed
frame due to mistiming.
Another neat feature is the separation (for the first time, from what I've
seen) of Y/C delay into distinct components: Pb delay and Pr delay. Having
checked quite a few sources, Y/C delay that comes from broadcasters is often
prone to more red delay than blue. Separate adjustment leads to a
cleaner and sharper image with less color smearing.
Processing
In the end, a scaler is judged by its video picture quality. First, lets
separate de-interlacing from scaling.
The unit is still using the Sil504 de-interlacer, but with a custom
co-processor. The co-processor is in charge of detecting film mode (2:2 and
3:2 cadence sequences) and informing the Sil504, which actually performs the de-interlacing based on those instructions.
During the last year or so, Lumagen continually improved the co-processor
component. While lacking at first, the system created by Lumagen works quite
well these days and properly handles most PAL and NTSC sources without
combing too often.
Click Here to Go to Part IV.

