|
|||||||||
|
Introduction One of the hottest new technologies in home networking is the media server. These devices will let you stream your music, photos, and movies to hi-fi systems and displays anywhere in your home. One of the problems right now is that most of them will not stream high definition content. A second problem is that they are not easy to set up. Until now, that is. Enter Roku Labs' PhotoBridge HD1000. This unit will stream your digital photos, music, and HD programs to your home theater, and other audio/video systems in your home. And, it is a piece of cake to install. The Design The HD1000 is only $299, so it does not have any hard drive inside. It is designed to stream content from your networked computer (wired or wireless), using DHCP or Windows File Sharing protocols. This means you need to put the photos, music, and video files into directories that are tagged as shared files. You assign them as such in the Windows menu system (right-click on the directory, click Sharing and Security, and then click the "Share this folder on the network" box). Remember that doing so opens this directory to hackers who might be trying to look at your computer files, so be sure to set your security and passwords appropriately. The HD1000 will also show files stored on photo memory cards, such as Compact Flash. So, you can transfer your pictures to memory cards, insert them into the slot on the front of the HD1000, and show them without needing a network. In fact, Roku markets photo galleries on memory cards, containing such things as classic art, nature photos, and seasonal photos (Thanksgiving, Christmas, etc.), and you can view them on your HDTV (also on conventional NTSC TVs, but this product really is designed for high definition use). Using the Slide Show option, you could display the seasonal photos in sequence, choosing how many seconds you want each photo displayed, at a holiday party, with music, all routed through the HD1000. Roku updates their software from time to time, and it can be downloaded from their website for updating the HD1000.
Set-Up
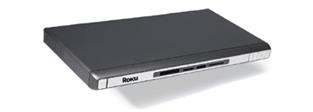
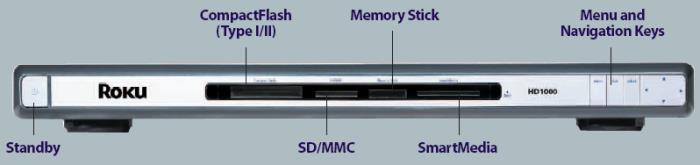
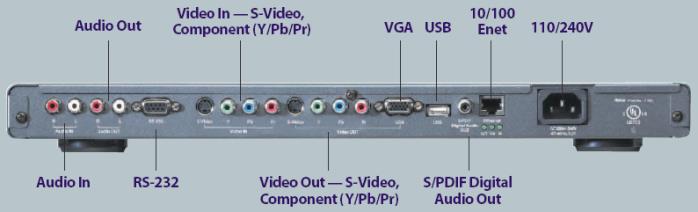
The photos above show the front and rear panel.
Although you can set everything using the navigation keys
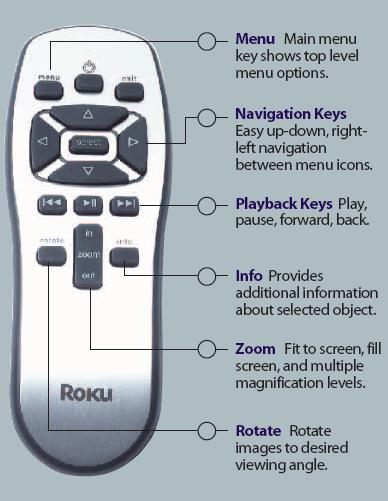
on the front panel, the supplied remote control is much easier to use. It
also has a few things not on the front panel, such as the Rotate Image and
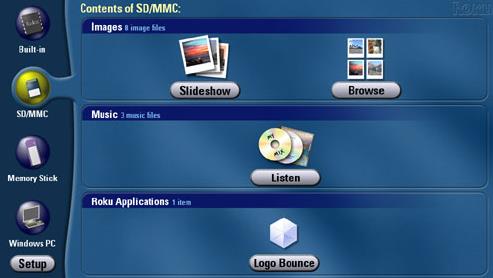
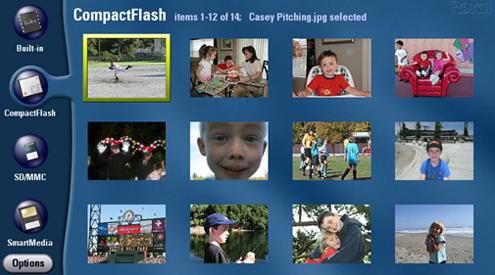
Zoom Image buttons. Set-up is automatically invoked when you first turn the unit on, and it steps you through selection of the display resolution. In my case, I selected 720p. The whole process only took a few minutes, and then the main menu appeared, which let me select what files I wanted to view. Roku specifies that the network is automatically connected to the HD1000 during set-up, and that is exactly what happened, as the menu showed the Images directory from my computer. There is an optional wireless USB network device that you can plug into the HD1000, and this replaces the Ethernet cable you might have to run to the room where your computer is sitting, but keep in mind this will slow things down a bit, and you can't show HD video content this way (wireless networking), as the speed is too slow, for now. I opted to keep the hard wire Ethernet cable in place. The photos below show the Main Menu, where you select which type of files you want to view or listen to, and the files you can view once you have selected the source.
If you make a mistake and select a resolution your display can't handle, or some other problem comes up where you need to go back to the beginning, you can reset the HD1000 though a sequence of front panel button presses (complicated enough that you would never accidentally press them in such a sequence). In Use I was really surprised at the quality of the presentation. This is the first media server that I have tested which will let me view my digital family snapshots in high definition. In fact, I found that I need to store JPGs at higher resolution and lower compression for viewing this way. Whereas on other media servers, the photos looked fine, here, in high definition, I can see all the compression artifacts. The HD1000 will not show photos in TIFF or RAW format though, so just compress your snapshots as little as possible for viewing with the HD1000. I did have to adjust the projector color intensity and hue a bit from the settings I use with my DVD player, but these changes can be stored in a memory bank that most displays have. The photos took a few seconds to display, and although I used a hard wire Ethernet cable to the router, my network is wireless to the computer. So, I could not view HD videos from the computer. If you are going to have a media server distribute video material throughout your home, especially if it will be HDTV, you should take into account that wireless networking is not quite fast enough right now to handle HDTV streaming. There are pass-through audio/video connections on the HD1000, but no matter how good your cables and connectors are, there is always a slight deterioration with each connection in a chain. I would use the HD1000 as its own path to my receiver (for audio) and high definition display, using the source selection feature on my display. Conclusions For $299, the Roku Labs HD1000 is a no-brainer. You can stream audio and video from your computer, but for me, the feature I like the best is the ability to view my digital family snapshots in high definition. Set-up is a snap, takes just a few minutes, and then the viewing pleasure just begins.
|
|||||||||


Magazine Publishing Solutions by