
Introduction
Over the past few years, countless compact digital camera designs have been marketed and sold. At first, it was all about the megapixels. The funny thing was that, at 5 megapixels or so, it was really not very important to go beyond that number in compact cameras. The average consumer takes his/her photo files to places like Costco and has 4″x6″ prints made to hand out to relatives or put in the family album. In fact, as we went higher and higher in megapixels, the sensors remained the same size, so what we actually ended up with was simply more picture noise because the pixels were so small, they had a difficult time acquiring enough voltage charge to deliver an accurate color reading.
So, here we are, with compact digital cameras often having 10 or more megapixels, and the resulting photos are not any different than when we had 5 megapixel cameras. The features have stayed the same too, including the zoom lenses.
Specifications
- Design: Compact Digital Camera
- Sensor: Foveon, 14.1 Megapixels, 20.7mm x 13.8mm
- Lens: 16.6mm Fixed (No Zoom)
- Focusing Distance: 12″ to Infinity
- File Format: JPEG, RAW (X3F), AVI, WAVE
- Maximum Image Size: 2,640 x 1,760
- ISO Range: 100 – 800
- Dimensions: 2.3″ H x 4.5″ W x 2″ D
- Weight: 10 Ounces
- MSRP: $999 USA
- Sigma Photo
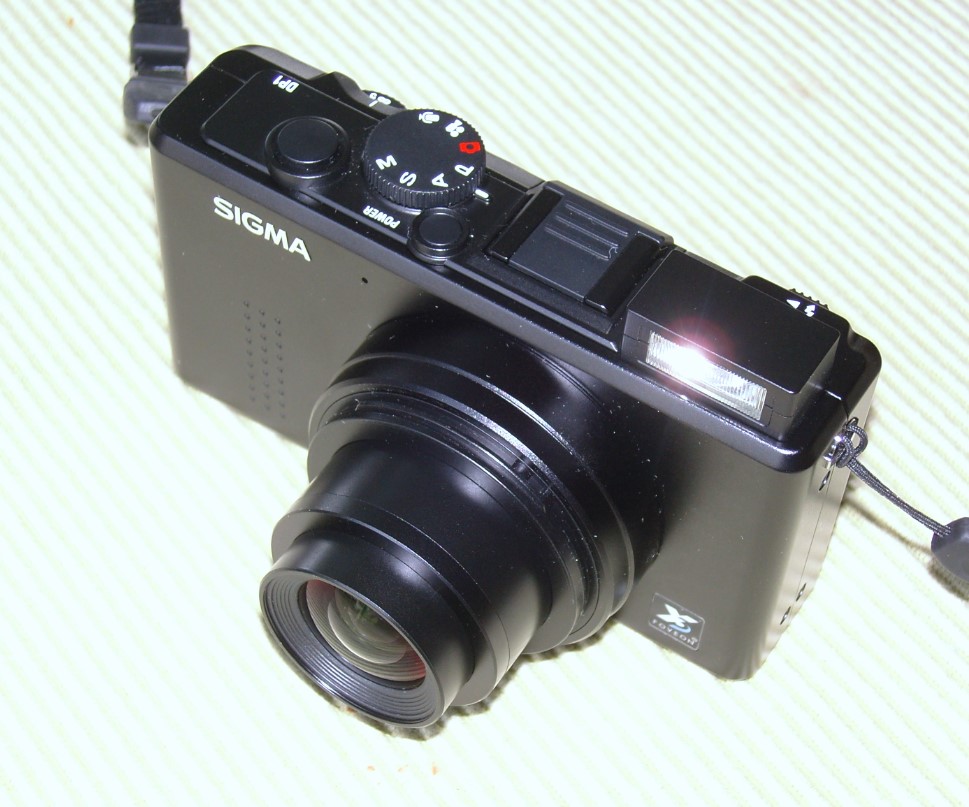
Well, when I heard about Sigma’s new DP1 camera, I was really intrigued and decided to get one for review. I have had it here for 5 months, taking hundreds of photos. It is a compact digital camera, but its distinguishing feature is that it has a sensor the size of those in DSLRs. In fact, it is the same sensor in the Sigma SD14 DSLR that we reviewed back in June of 2007. The sensor is made by Foveon and is 20.7mm x 13.8mm in size. This is about 8 times the area of sensors in typical compact digital cameras. It has 14.1 megapixels, but unlike other sensors where the red, green, and blue pixels are arranged side by side (called the Bayer configuration), the Foveon pixels are arranged vertically in columns, so the light passes through the blue pixels to get to the green, and deeper to get to the red. The reason for having such an arrangement, is that it is more like film, where the three color-sensitive layers are on top of one another. Secondly, with the Bayer configuration, image processing software has to be used to look at individual pixels and determine what colors the adjacent pixels should be.
The process of going from the RAW Bayer image to a viewable image is called “demosaicing”. If a small area of the scene is blue, then the red and green pixels in that area will be converted to blue because all the blue pixels in the Bayer mosaic were exposed, and not the green or red. Obviously, this can produce errors at edges of areas in the scene that are different colors. More details of the Bayer vs. Foveon configuration can be seen in the original Sigma SD14 review. Lastly, the 14.1 megapixels in the Foveon center are divided in the three layers so that the surface area has 4.7 megapixels across it, with each pixel (blue on the surface) having a green and a red pixel underneath it. For a 14.1 megapixel conventional sensor, all 14.1 megapixels are spread out over the surface, one pixel deep. Colored filters are placed over the pixels so that red, green, and blue pixels are side-by-side.
Because the Foveon sensor is so much larger than conventional compact digital camera sensors, the lens has to be much, much different. In the case of the DP1, it is a 16.6mm focal length, equivalent to a 28mm lens in an SLR. It is not a zoom lens (unfortunately), so you are restricted to wide angle photography. The lack of a zoom lens (at least 2:1) is an omission in my opinion, because you really can’t take close photos of people with a wide angle lens because it distorts their facial features. On the other hand, because it is a fixed focal length (called a “Prime” lens), it is very sharp, as you will see in the bench tests. Zoom lenses sacrifice a bit of resolution because of the necessity to move lens elements during zooming. It would have been nice to see either a permanent zoom lens, say 16.6mm-40mm, or interchangeable lenses, one wide angle like the lens on the camera now, one wide angle to short telephoto, and one short telephoto to long telephoto zoom.
Large sensors require more power, and in the SD14, which is a full sized DSLR, there is room for a large battery. But, in the DP1, which is a compact camera, the battery has to be smaller, even though the sensor is large. This means battery life is relatively short, so if you purchase this camera, get an extra battery to take along on photo excursions.
A second thing I found about the DP1 is that it is slow to take pictures, probably because it takes longer to read the data from such a large sensor. There is about a two second lag between the point a picture is taken and before you can take another one. Third, it only focuses down to 12″ which is not really enough to call it Macro. I do a lot of close-up photography, and 12″ away doesn’t do it. Lastly, it does not perform very well in low light. The LCD readout becomes very noisy in this situation. My guess here is that because light has to travel through one or two layers to get to all the colored pixels, this reduces sensitivity. In the menu, there is an additional option of setting the ISO to 50. This is further indication that the Foveon may not be quite as sensitive as conventional sensors. However, this is countered by the fact you don’t get the artifacts produced in Bayer configured sensors.
OK, now, in spite of the criticisms, the DP1 takes terrific pictures, mostly because that really, really big sensor delivers color that has great depth and clarity. The images “POP”.
Besides having a big sensor, the DP1 will take photos in RAW format, and their version is called X3F. I could not open them in Adobe Lightroom software, but I assume future updates of that software, and other RAW graphics programs, will include the decode for X3F. In the meantime, you can use Sigma’s included Sigma PhotoPro software that opens all files, including RAW, and lets you do some manipulation, although not anywhere near what you can do with a major photo editor like PhotoShop, and save them in various formats.
The top of the camera have the usual controls including power on/off, the shutter button, the mode dial for selection of Program, Auto, Aperture Priority, Shutter Priority, and Manual. On the rear are controls for selecting options in the menu on the 2.5 LCD monitor, zoom, turning on the flash, setting manual focus, deleting exposures to save memory card space, and changing the display to show settings, horizontal and vertical lines for horizon alignment, or turning it off altogether to save battery power.

Here are screen shots of the LCD panel. The first one is what you see during normal shooting. Remaining battery power, ISO, Image Quality (Fine), Exposure Number, Spot Focus, Program Mode, Shutter Speed, and F-Stop are shown. The other two screen shots indicate the various menus.


In Use
As I mentioned, I had the DP1 on hand for months, and I ended up with hundreds of photos. For snapshots, I used the highest JPEG setting, and for some of the bench tests, where specified, I used the RAW format for comparisons.
So, let’s look at some pictures. I set the camera to Program and ISO 100 for all photos, except where indicated.
Here is a crab apple tree loaded with fruit. The color depth makes them look like you could grab one right off a branch.

These lillies have excellent detail and color depth in spite of being intensely pink.

Yellow, which is often very tough on digital cameras, was not an issue here with this huge sunflower.

Here are some orange flowers that I shot in front of a court house in Colorado. Again, you can see that the depth of field is narrow, at f/4.5.

This shot of an office building shows the value of a wide angle lens, as it gives very dramatic pictures. The pale blue sky was exposed just as it appeared in life. Normally, that sky might have been washed out because the side of the building was in shadow and the camera would raise the exposure to compensate. If you look at the gray scale results in the bench tests below, you will see that the DP1 lowers highlight exposure, and this is why the sky is properly exposed.

The soft pastels of these rocks in a playground came through perfectly.

This close-up of a wooden carving of a human face was shot at f/4.0, so parts of it are out of the depth of field. Flash would have let me close down the f/stop, but it would have also produced unwanted reflections.

This is a photo taken in RAW format, where I placed the camera on a table because the exposure was 0.5 seconds. Because the original was an X3F (RAW) file, I would have expanded flexibility in processing it to give the final photo with more illumination in the shadow areas without making it noisy. However, I must wait until Adobe adds the X3F decoding in Lightroom to do that.

And, the grocery store vegetable rack standard photo for all my camera tests. It looks just a bit underexposed, but the colors are all very natural.

On the Bench
The falloff test results (photo taken at 1/320th second at f/11) showed that a maximum falloff of 0.6 f-stop.
Shown below are the sharpness (resolution) test results for both a JPEG (first graph) and a RAW photo (second graph). You can see that in RAW, the MTF50 was 1752 LW/PH (the resolution for optimal picture quality), and in JPEG form, was 1557 LW/PH, so conversion to JPEG did lose some sharpness. In fact, both the RAW and JPEG versions were slightly undersharpened compared to the standard sharpening.
Chromatic aberration (CA) was very, very low, for both JPEG (0.05 pixel) and RAW (0.1 pixel) photos. This low CA is partly due to the primary lens (no zoom). Theoretically, there should be no chromatic aberration at the center of the lens, but there is no perfect lens out there, so I measure CA at the center. The CA results here show the DP1 lens to be excellent.
Gray scale analysis for both JPEG and RAW is shown below. In both cases, the highlights are suppressed quite a bit to prevent blowing out the bright regions of photographs.
The noise level analysis (lower section of the graphics) indicates noise is increased in the JPEG photo compared to the RAW photo. Sometimes, noise levels will actually decrease because of image processing, but that does not seem to be the case here. The result will be a sharper picture, because noise reduction also reduces sharpness.
I took a photo of our gray scale chart at ISO 100, 400, and 800. Here is the chart. I then cropped out the vertical gray rectangle indicated by the red marker and put the three gray strips side by side for comparison, as shown in the second photo. As the ISO increases, so does the noise, and this occurs with all digital cameras. Some cameras use a lot of noise reduction in their image processing, but this reduces sharpness. The results shown here are actually very good in terms of noise at ISO 800. Other cameras, with smaller sensors, have a lot more noise. So, even ISO 800 is quite usable with the DP1. In any case, like film, there is noise (grain in film) with increased ISO, but there are times when you really need that extra sensitivity to take the photo, and you either just accept the noise, or you don’t get the photograph. I want to emphasize that the noise shown here in the dark gray test strip is not the same thing as not performing well in low light situations that I mentioned earlier. The noise test photos here were taken outside during the day when there was plenty of light.


Here is the Gretag Macbeth Color Checker SG chart analysis. The tints look pretty good, but there is overexposure.
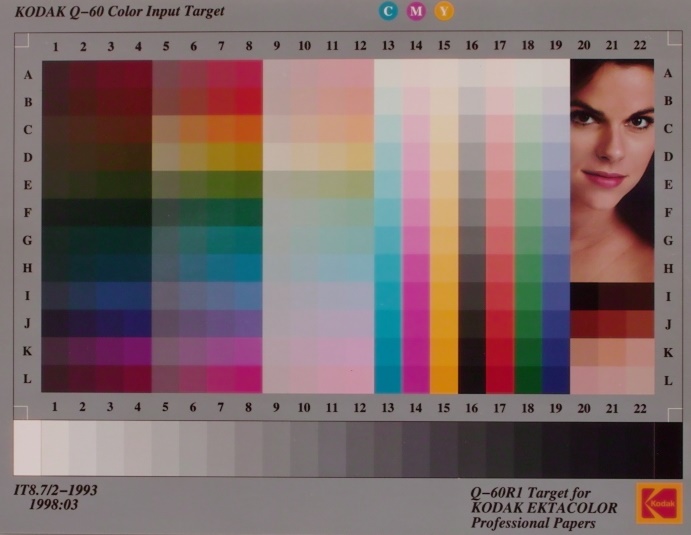
And, the Q60 Color Chart. Again, the tints are fine, but this time, there is a bit underexposure.
Conclusions
The Sigma DP1 is a major advance in compact digital cameras, but it does have its problems, including no zoom lens, slow in taking photos, not very good low light performance, and only focuses down to 12″ However, the picture quality in good light is spectacular, pretty much like the SD14 DSLR. It has color depth that just can’t be found in conventional compacts. If you take mostly wide angle shots of the outdoors, you would probably enjoy this camera a lot. However, the next version will probably have that zoom lens and perhaps better performance in low light. That will make it a top contender in the compact digital camera market.