

Introduction to the Integra DTR-80.3 A/V Receiver
The Integra name always makes my short list of leading companies in the receiver and processor market space. While Integra is a premium manufacturer of high-end A/V equipment catering to custom A/V installers, their products offer a great mix of leading-edge technology along with outstanding performance at an attainable price. At CEDIA 2011 this past September, Integra introduced their latest product updates, including the flagship DTR-80.3 receiver, which I cover in this review. The DTR-80.3 is a 9.2 channel network-based A/V receiver and boasts the latest Audyssey MultEQ XT32 room correction system along with 145 watts per channel of amplification and an endless array of processing options. Let’s take a closer look at the features of the DTR-80.3 and see how well Integra’s latest receiver offering performs.
INTEGRA DTR-80.3 A/V RECEIVER SPECIFICATIONS
- Design: 9.2 A/V Receiver
- Codecs: Dolby Digital, Dolby Digital EX, Dolby Digital Plus, Dolby TrueHD, DTS, DTS-ES (Discrete, Matrix), DTS 96/24, DTS-HD Master Audio, DTS-HD High Resolution Audio
- Precision: 32-Bit/192kHz D/A
- 4-Zone Operation
- AM/FM (Optional HD Radio) Tuner
- Audyssey MultEQ XT32 room correction
- Power Output: 145 Watts/channel into 8 Ohms; 0.05% THD, 2 channels 20 Hz – 20 kHz, FTC
- Dimensions: 7.8″ H x 17.1″ W x 17.9″ D
- Weight: 52.9 Pounds
- MSRP: $3,000 USA
- Integra
- SECRETS Tags: Receiver, DTR, Audio
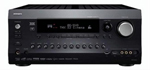
Design of the Integra DTR-80.3 A/V Receiver
The Integra DTR-80.3 A/V receiver is a substantial component, weighing in at almost 53 pounds. The overall style is classic Integra, with a simple curved front panel made from brushed aluminum along with a very crisp white LED display. To the right of the display is a large volume knob in addition to a standard set of cursor buttons that allow for easy navigation of the DTR-80.3 setup menus as well as its multi-media interface. To the left of the display is the power button along with discrete power buttons for zones two through four. Directly under the display is a small series of buttons which provide access to tuner functionality as well as tone controls and toggles for the various listening modes. Just below those buttons is a complete set of input buttons which allow for easy control of the receiver. In the lower-right corner of the DTR-80.3 is the auxiliary input which provides an external HDMI connection along with analog and optical-digital audio inputs and a composite video input. Just to the left of the auxiliary input is a USB jack which can also be used for your favorite Apple iDevice. The headphone jack is on the lower-left corner along with the microphone jack for Audyssey.
The rear panel of the DTR-80.3 offers support for a wide array of components and is color coded to help distinguish inputs from outputs. Inputs have a black background while outputs have a white or checkered background.

The DTR-80.3 receiver is THX Ultra2 Plus certified and supports eight HDMI 1.4a inputs and two HDMI 1.4a outputs which can be operated simultaneously or independently. This should be more than enough to handle the HDMI devices in a typical home theater with plenty of room for expansion. The receiver supports a full complement of analog audio and video inputs with three component video inputs, five composite video inputs, four S-Video inputs, one 7.1 multi-channel input, and nine sets of stereo analog RCA inputs. The DTR-80.3 supports seven digital audio inputs (3 coaxial and 4 optical). The DTR-80.3 includes a second USB input on the rear panel which can be used with a USB storage device or an optional UWF-1 Wi-Fi adapter. A very nice touch is the inclusion of a complete set of nine channel pre-outs along with two independent subwoofer pre-outs should you want to use the DTR-80.3 with external amplifiers. You will also find an Ethernet connector on the rear panel which allows the DTR-80.3 to access your home network and the internet.
The speaker jacks on the DTR-80.3 support a full complement of eleven speakers including front-height and front-wide channels. There are plenty of options available if you don’t have a full set of eleven speakers in your theater. For example, if you don’t use the front-height channels, you can use those channels to bi-amp your front speakers if your speakers support a bi-amp configuration. If you don’t use the front-wide channels, you can use those channels to power zone two. Finally, you can configure the DTR-80.3 to use the surround-back and surround channels to power zone three and zone four speakers respectively. The optimal configuration is to use external amplifiers to power the multi-zones, but the configuration options are available to handle a variety of installation needs.
The remaining connections on the DTR-80.3 back panel allow for antenna connections for the AM/FM tuner. The DTR-80.3 includes a universal port for the connection of the optional UP-HT1 HD Radio module and/or the UP-A1 iPod dock. The UP-HT1 has a universal port connection so both optional modules can be connected to the DTR-80.3. The DTR-80.3 includes two IR inputs and one IR output jack as well as an RS-232 jack which can be used to control the DTR-80.3 with an external control system. Three 12 Volt DC Triggers are also included, which allows you to turn on another device, such as an external amplifier for multi-zone operations.
The DTR-80.3 comes with a very nice, backlit remote.

From a technology perspective, the DTR-80.3 introduces several new features into the Integra line-up. For room correction, the DTR-80.3 uses the latest Audyssey MultEQ XT32 technology. According to Audyssey, the MultEQ XT32 delivers 32 times the filter resolution of the MultEQ XT technology. Audyssey MultEQ XT32 provides more than ten thousand individual control points and applies its filter technology to all channels, including the subwoofers. As of the latest Integra firmware release on March 16, 2012, the DTR-80.3 supports Audyssey Pro which allows a professional calibrator the ability to measure up to 32 positions in the room and adjust the target sound curves using a graphical interface on a PC.
For those lucky enough to have a theater with front-height and front-wide speakers, the DTR-80.3 provides three different processing solutions to help you enjoy those extra channels. Dolby PLIIz processing can start with stereo or 5.1/7.1 channels and deliver a 7.2/9.2 channel mix using the front-height channels. Audyssey DSX processing starts with 5.1/7.1 channels or a DTS-ES mix and adds the front-wide channels first and then the front-height channels if they are present. DTS Neo:X processing starts with stereo, 5.1/7.1 channels or a DTS-ES mix and delivers up to a 9.2 channel mix using both the front-height and front-wide channels. In case you are wondering about the math on the number of channels, the rear-surround channels must be disabled when utilizing both the front-height and front-wide channels on the DTR-80.3.
On the video side of things, the DTR-80.3 utilizes the IDT HQV Vida VHD1900 video processor to upscale all video sources to 1080p via HDMI. The DTR-80.3 also includes a Marvel Qdeo 4K processor which allows for scaling to 4K resolution of 3840×2160 at 24/25/30 Hz. While most people will not have a 4K display in their theater for a while, the custom installer market will appreciate the inclusion of 4K support in the DTR-80.3 for their clients jumping into the 4K projector products.
Setup of the Integra DTR-80.3 A/V Receiver
After unpacking the DTR-80.3 and placing the receiver in my cabinet, I got started with the speaker cables first since they tend to be the most time consuming. The speaker binding posts on the DTR-80.3 are five-way posts which allow cable to be inserted from the top, bottom, or directly into the post via banana connectors. There are 22 binding posts on the DTR-80.3, so I would always recommend that you take the time to terminate your speaker cable with banana connectors. This greatly simplifies the process should you have the need to move or change the equipment in the future. The DTR-80.3 speaker connectors also accept 3-5 mm spade connectors.
Moving on to the HDMI connections was a breeze. The DTR-80.3 has 8 HDMI inputs to which I connected my satellite DVR, PS3 and an Oppo BDP-95. I ran a single HDMI output cable from the DTR-80.3 to my HDTV. I connected my first generation Apple TV to the DTR-80.3 via component video and optical digital. The DTR-80.3 is able to up-convert the analog video signal to HDMI, so this really simplifies system configuration and minimizes your video cables. I did run an extra set of analog audio cables from the Apple TV to the DTR-80.3 so I could listen to music using the zone two functionality of the DTR-80.3. I was disappointed to find that the DTR-80.3 is not able to play digital sources from the main source in a multi-zone configuration. While I understand most manufacturers only supporting analog audio in alternate listening zones, this limitation needs to go away as more devices like the newer generation Apple TV come on the market without any analog outputs. Other manufacturers are already handling this today, so I hope Integra considers adding this feature in the next product revision. I connected an antenna so I could checkout the tuner and I also connected an Ethernet cable so I could play with the DTR-80.3 network functionality. The DTR-80.3 supports wireless networking through the optional UWF-1 Wi-Fi adapter which can be used in the front or rear panel USB port on the DTR-80.3. I double-checked the connections, connected the power cord, and was finally ready to get started exploring the configuration options on the DTR-80.3.
The setup menus of the DTR-80.3 are well designed, extensive and pretty simple to use. The place to start is with the “Input/Output Assign” menu.

The “Monitor Out” sub-menu allows for the assignment of the primary video output of the DTR-80.3 to either one or both HDMI outputs or analog output if required. This sub-menu lets you assign a global output resolution such as 1080p and also allows for the output resolution to be set independently by each source on the receiver.

The “HDMI Input” sub-menu allows you to assign each HDMI input connection on the DTR-80.3 to a corresponding source. The major limitation in this approach is that you can only assign one HDMI input to one and only one source. For a device like the Oppo BDP-95, I found this to be a bit frustrating. For example, I wanted to setup three inputs for the BDP-95: one using just HDMI audio and video, the second using HDMI video and two channel analog, and the third using HDMI video and the multi-channel analog input. While I could assign the audio connections to three separate source inputs on the DTR-80.3, I was forced to assign the HDMI input to one source; I chose “BD/DVD” on the receiver. I should point out that it is entirely possible to assign all the audio outputs from the BDP-95 to one source and then use the “Audio Selector” sub-menu in the “Source Setup” menu to manually make a preferred selection. The other option is to use a custom remote control and use discrete codes to make the audio input selection. In either case, it just isn’t as user-friendly as I’d like to see out-of-the-box. The other sub-menus in the “Input/Output Assign” menu allow for the assignments of the component, digital and analog audio inputs to their corresponding sources.
After finishing the input assignments, I exited the menu system and was pleased to see a picture from each of my source devices. I was ready to move on to room correction. I unpacked the basic Audyssey microphone that comes with the DTR-80.3 and connected the microphone to a tripod so that I could easily position the microphone in my listening room. I plugged the microphone jack into the front of the DTR-80.3 and the Audyssey “MultEQ XT32: Auto Setup” menu automatically appeared on the display. There are two calibration options. The first is a “Quick Start” which only configures the speaker settings. It only takes a couple minutes and requires measurement from only one location. This is an easy step to make sure that all the speakers are connected properly. The second option is “Full Calibration” which takes about 20 minutes and allows for speaker configuration as well as measurement of room response at up to eight positions in the listening room. I performed a full calibration and followed the on-screen directions which were very straightforward. After completing eight sets of measurements, I saved my calibration results and went back into the menu system and took a look at the “Speaker Setup” menu. I was pleased to find that the calibration had correctly identified all of my speakers and their distances from the primary listening position and had set the levels as needed.
I went back into the setup menus for a few more adjustments. I visited the “Source Setup” menu for each of my sources. I checked the “Audyssey” sub-menu to make sure that Audyssey processing was enabled and set to “Movie” or “Music” based on the source. The “Audyssey” sub-menu also allows for selection of Audyssey Dynamic EQ and Audyssey Dynamic Volume. Audyssey Dynamic EQ maintains a proper octave-to-octave balance at any volume level. Audyssey Dynamic Volume compensates for variations in the volume of source material such as movies, television, and commercials and adjusts the volume in real time to ensure a consistent listening volume while still preserving dynamic range. Audyssey Dynamic EQ is automatically engaged on the DTR-80.3 if Audyssey Dynamic Volume is enabled for a given source.
The “Picture Adjust” sub-menu is extensive and allows for full control over the video processing for each source.

The “Picture Mode” menu option allows for several predefined options such as “Cinema” and “Game” as well as two ISF modes for day and night viewing depending on the brightness of your room. There is a “Through” mode which does not adjust the incoming picture quality but does scale the incoming signal as necessary, depending on the selected output resolution. There is a “Direct” mode which does the same thing as “Through” mode but also maintains the original input resolution. For those wanting complete control, a “Custom” option is included which allows access to basic video controls such as contrast, brightness, hue, saturation and color space, noise reduction options, gamma, and brightness and contrast controls for each primary color. If you do use the “Custom” option, the “Resolution” menu item allows for the output resolution to be set independently by source. While the “Resolution” menu item can be changed, it won’t actually be active unless the “Monitor Out” resolution is globally changed to “Source” in the “Input/Output Assign” menu. No warning is given if you forget this detail and your source output resolution will just be ignored in favor of the resolution set in the “Monitor Out” menu.
In addition to the extensive video control, the DTR-80.3 offers the same level of control on the audio side of things. The “Audio Adjust” menu allows for the configuration of audio processing options for such things as Dolby PLIIx, Dolby PLIIz, Dolby Volume and Audyssey DSX. This menu also allows for the configuration of subwoofer handling in “Direct” mode as well as whether DSD (Super Audio CD) signals are processed by the DSP in the DTR-80.3. The other handy feature tucked away in the “Audio Adjust” menu is the “Sound Program Edit” sub-menu.

Integra has included a predefined list of six sound programs labeled “Stereo Source 1” through “Stereo Source 3” and “MultiCh Source 1” through “MultiCh Source 3”. These programs allow you to predetermine the values for Audyssey, Dynamic EQ and Dynamic Volume, Dolby Volume and a favorite listening mode and assign them to a sound program. The sound program can then be selected for an individual source while listening to the receiver.
The “Listening Mode Preset” menu lets you configure the default audio processing mode for everything from analog to Dolby and DTS high-definition formats. The menu allows for selection of Dolby, DTS, and THX processing options and also includes stereo, direct decode and direct mode for each input format. As if that weren’t enough, the listening presets can be varied across each input on the DTR-80.3 for the ultimate in control. While that concludes the bulk of the setup of the DTR-80.3, I’ll give you a quick glimpse at some of the remaining functionality.
The “Miscellaneous” menu provides for such things as absolute or relative volume display, muting level, maximum and power-on volume, as well as headphone level. The “Hardware Setup” menu provides for such things as trigger, multi-zone and network configuration. The “Remote Controller Setup” menu helps in programming the remote and in defining the behaviors of the activity buttons such as “My Movie” that are included on the remote. The last menu is the “Lock Setup” menu that allows you or your custom installer to lock the setup menus so you don’t easily modify all those customizations.
The last setup item to consider is upgrading the firmware on the DTR-80.3. Integra frequently offers firmware upgrades which improve their products, and the DTR-80.3 is no exception. Updates can be done using the network or via USB input. I tried performing a firmware update using the network via the “Firmware Update” sub-menu found on the “Hardware Setup” menu. I had no luck in doing so and consistently received an ambiguous network error. After talking with Integra support, I just decided to copy the update from the Integra website to a USB stick and update using the front panel USB input on the DTR-80.3. The process only took about 10 minutes and worked as expected without any further hassle.
The Integra DTR-80.3 A/V Receiver In Use
For my listening tests, I was using a seven-speaker configuration from Definitive Technology including a pair of BP-3000TL speakers with powered subwoofers for the front mains, a CLR 2002 speaker for the center channel, and four Definitive Technology UIW 94/A speakers for the surrounds and rear channels. I used an Oppo BDP-95 as my primary source device. I was really looking forward to hearing how Audyssey MultEQ XT32 performed on the DTR-80.3.
In Harry Potter and the Deathly Hallows: Part 2, the DTR-80.3 had no trouble drawing me into the final chapter of these wonderful movies. Dialog was exceptionally clear and well placed, and the sound effects during the battles were excellent. I especially loved the sustained bass during Voldemort’s attack on Hogwarts. I really noticed how well the Audyssey MultEQ XT32 was handling the bass response in my room. I had configured the video processing on the DTR-80.3 to process the video from my BDP-95 and I was really pleased to see that the DTR-80.3 had no trouble producing a beautiful picture. The shadow details throughout the movie were excellent and the detail in Voldemort’s face as he disintegrated was amazing.
In Steven Spielberg’s Super Eight, the DTR-80.3 recreated this demanding soundtrack with ease. From the awesome bass as the bus is crushed to the amazing effects during the train crash, the DTR-80.3 more than succeeded in impressing me. I almost jumped out of my seat as the boxcar door crashed behind me. The amplifiers in the DTR-80.3 had no trouble handling the dynamic range in this soundtrack. I really loved the use of rear surround effects in this movie especially the subtle clicking of the movie projector in the rear of my listening room as the kids’ movie played during the ending credits of the actual movie.
In listening to music on the DTR-80.3, I consistently preferred to listen in stereo with Audyssey processing enabled rather than in direct mode without processing. Audyssey MultEQ XT32 processing definitely improved the overall imaging and detail in music and the bass response in my room was much cleaner as well. On the Ray Charles: Genius Loves Company album, vocals were very clear and instruments were well positioned in the soundstage. Adele’s ’21’ album had great dynamics and I found myself listening to the entire album all over again.
While I enjoyed listening to two-channel music on the DTR-80.3, multi-channel audio on the DTR-80.3 really impressed me. I played some of the sample tracks from the AIX Records Audio Calibration and HD Music Sampler disc. The 96 kHz Dolby TrueHD track of Let Me by Lisbeth Scott was positively stunning, showcasing her amazing voice along with the beautiful piano accompaniment. The vocals, bass and flute in Primavera sung by Destani Wolf were also exquisite. I was absolutely drawn into the performance and was reminded of just how good such high resolution music can sound. The DTR-80.3 had no trouble creating a wonderful soundstage to bring these amazing performances into my listening room.
I was also really pleased with the overall sound quality of Audyssey Dynamic Volume. This feature supports several levels of processing, and I found that the “Light” setting did a great job of improving the overall quality of the presentation and allowed me to enjoy the DTR-80.3 at lower volumes without losing dynamic range. In comparison, I felt that Dolby Volume limited the sound quality too much and really muddled the sound for my tastes. I also experimented with passing DSD (SACD audio) directly from my Oppo BDP-95 through the DTR-80.3 using “DSD Direct” mode which completely bypasses Audyssey processing. I found that the soundstage lacked focus and I wasn’t pleased with the bass response in my particular room. I really loved the sound with Audyssey processing engaged and was happy for the opportunity to compare the sound with the DTR-80.3.
From a video perspective, the DTR-80.3 did not display any handshake problems when changing resolutions on my satellite box or when changing inputs to another HDMI source. Video output looked great on movie and television content and Blu-ray content was excellent. I set my Oppo BDP-95 to output 480i and let the DTR-80.3 process the video from the DVD of Gladiator. The picture looked great and there were no processing problems even on tough scenes like the flyover of the coliseum. We will talk much more about the video performance in the benchmark.
From an operational perspective, the DTR-80.3 was pretty simple to use. Source inputs can be selected just by pressing a button on the front of the receiver or on the remote. Sound processing modes are grouped into four categories named Movie/TV, Music, Game and THX. To change to a different processing mode like Dolby PLIIx Music while listening to music for example, I simply had to press the “Music” button on the remote multiple times to cycle through the possible choices. Unfortunately, pressing the button just once changes the current processing mode, so this leads to some frustrations as the entire list of options must be reviewed to find the original selection.
The DTR-80.3 includes a very handy on-screen “Home” menu which allows for input selection as well as direct access to most of the configuration options that you might want to change for a given input. The menu can be accessed directly from the remote by pressing the “Home” button. I really appreciated how easy it was to select audio processing options and to experiment with the Audyssey options using this menu. My biggest complaint about this menu is the overall color scheme and use of transparency which allows the image underneath to show through. The menu can be very hard to view when it appears over a primarily blue image background as you can see in this example.

The menu continues to add more highlights and more color as items are selected.

I would have much preferred a solid menu background using similar graphics to the setup menu system. Another odd thing about the “Home” menu is the lack of user-friendly names. Even though I had assigned a user-friendly name to each of my source inputs using the on-screen keyboard found on the “Name Edit” sub-menu of the “Source Setup” menu, the names are completely left off from the input list as you can see in the previous image. The user has to select an input first in order to see the user-friendly name. I would like to see Integra reverse this approach on this interface.
From a control perspective, I really liked the backlit remote that comes with the DTR-80.3. The remote is well organized and fits nicely into your hand. The remote can be programmed to support other devices and it has a nice macro facility. I was also able to control the DTR-80.3 from my iPhone using the free Integra Remote app, which is available for both Apple iDevices and Android devices. The main interface of the Remote app provides access to power, input, and listening modes.

Pressing the input button brings up a handy input selection menu. It would be really nice if the app could get the user- defined names from the DTR-80.3.

Pressing the small arrow at the edge of each input button brings up a control interface for the current input such as this one for the BD/DVD input.

Swiping to the right from the main interface brings up slider controls for the bass, treble, center, and subwoofer level.

Swiping to the left from the main interface brings up controls for setup and access to the “Home” menu. The arrow controls can be activated by sliding your finger in the direction of the arrows. This wasn’t obvious at first and just pressing the arrow controls results in hitting the “Enter” button by mistake.

The volume slider control can be accessed by swiping up from the bottom of any of the interface screens.

I did find a workaround to my problem with reusing the HDMI input from the Oppo BDP-95. I first selected the “BD/DVD” input which displayed the HDMI output from the BDP-95 on my television. I then selected the alternate input on the DTR-80.3 which was assigned the analog stereo output of the BDP-95. The DTR-80.3 continues to output the HDMI signal from the original input selection and then allowed me to listen to the analog input while still enjoying the picture. This isn’t terribly family-friendly, but it does get the job done as long as you don’t forget and change inputs to another HDMI source such as a cable or satellite receiver.
On the networking side of things, the DTR-80.3 offers a wide array of options.

Some of the highlights include the vTuner application, which allows access to thousands of internet radio stations from around the world. DLNA support is provided for accessing local media servers on your home network. Music services like Pandora, Rhapsody and Napster are included and joined by new services Aupeo! and Spotify. Aupeo! Personal Radio is an internet radio service based in Germany. Spotify is another internet music service based in the UK. Spotify allows you to access whatever music tracks you want and offers a free package along with paid subscriptions that offer other functionality and ultimately no advertising. I explored vTuner, Pandora and DLNA with the DTR-80.3 and had absolutely no problems in accessing my network or the internet. From an interface perspective, the apps are pretty basic and don’t really take advantage of any significant graphics processing to make a more sophisticated or appealing interface. For example, here’s the interface for Pandora while a song is playing.

While it certainly gets the job done, it pales in comparison to the Pandora interface offered on the Oppo BDP-9x players or the Apple iPad. The network apps are displayed in a 4:3 aspect ratio. In my case, the on-screen display appeared stretched unless I changed the picture format on my television to handle 4:3 content.
The DTR-80.3 offers a graphical user interface which allows for quick browsing of music files on USB media. The DTR-80.3 supports WAV, WMA, MP3, FLAC, WMA 9.2 Lossless, and Ogg Vorbis formats. While album artwork was displayed during playback of WMA files, the artwork and some metadata like artist name were completely missing during playback of FLAC files. I also tried the “Extended Mode” iPod interface but while it was functional, it was just cumbersome to use and no match for using the iDevice’s native interface. I wish the DTR-80.3 supported AirPlay so I could just wirelessly stream music from my favorite iDevice to the DTR-80.3.
The Integra DTR-80.3 A/V Receiver on the Bench
At 1 kHz with a 4 ohm load, THD+N was 0.09668%. We see a lot of even and odd harmonics as well, which average about 75 dB below 0 dBFS.

At 1 kHz with an 8 ohm load, THD+N was 0.07832%.

At 10 kHz with a 4 ohm load, THD+N was 0.04402%.

At 10 kHz with an 8 ohm load, THD+N was 0.05466%.

Here are the results for 19 kHz, 20 kHz combined test frequencies. There is a small visible B-A peak at 1 kHz about 80 dB below 0 dBFS. We also see second order harmonics starting at 13 kHz with the largest peak being at 18 kHz and around 60 dBV below 0 dBFS.

The harmonics are reduced with an 8 ohm load.

The IMD measurement was 0.0434% with a 4 ohm load and 0.0231 with an 8 ohm load.


Finally on the THD+N tests, most of the values average around .07% and then gradually roll off. The 8 ohm results are a bit cleaner which is consistent with the results observed in the other tests.


The video benchmark was done using an Oppo BDP-95 as the source device, as well as the Spears & Munsil High Definition Benchmark Blu-ray disc for test patterns. The first set of tests in the video benchmark validates that HDMI video is correctly passed through the DTR-80.3. The tests used were: Overscan, Whiter than White, Blacker than Black, Luma and Chroma Burst, and Luma and Chroma Plate.

While the DTR-80.3 did really well on all the HDMI tests, it did have an odd problem with the Luma Plate test. While I did not see any unusual loss of detail in the Luma Plate pattern, there was an obvious hourglass pattern present in the image. This is not normal for this pattern and setting the DTR-80.3 to “Direct” mode for the video source eliminated the issue. I also found it interesting that setting the DTR-80.3 to “Through” mode also shows the problem with the Luma Plate pattern. The only difference between the two modes is image scaling. In this case, the input resolution matches the output resolution of 1080p, so I’m very curious about what the image processor is really doing in this situation. As is sometimes the case with this sort of thing, I didn’t see any problems when watching normal television or Blu-ray movies when letting the DTR-80.3 process the video. I passed on my results to Integra and I will let you know what they tell me.
I also tested converting 1080i component video to HDMI and the same problem with the hourglass pattern is also present. The component processing side of the DTR-80.3 had some other issues, including the inability to pass whiter than white. There was also some loss of fine detail in the burst patterns.
The DTR-80.3 passed all of the deinterlacing tests without any issue.
Conclusions about the Integra DTR-80.3 A/V Receiver
I had the DTR-80.3 in my system for several months and overall I was really pleased with it. I thought the Audyssey MultEQ XT32 processing did a great job with my room, and I was delighted to listen to movies and music with this receiver. The DTR-80.3 has a substantial number of features and more than enough options to keep most customers and installers happy with its configurability. If you like to experiment with configuration options and tweak settings, then the DTR-80.3 is a dream. The only major feature that I wish it had is support for Apple’s AirPlay. For a complicated product, it was really simple to use and the inclusion of apps for Apple and Android products is terrific. If you don’t need a receiver but are intrigued by the functionality, Integra offers the exact same feature set in a processor/preamplifier version called the DHC-80.3 for $400 less than the DTR-80.3. Either way, if you have been holding off on a receiver or processor upgrade for a while, I have no reservations in telling you to take a look at the DTR-80.3 or the DHC-80.3.