NAD Masters Series M10 Streaming Amplifier
- A rich feature set, including sophisticated streaming and room correction
- Discreet and modern design featuring a full-color touch screen display and computer and mobile control applications
- A sound presentation at once both smooth and dynamic
Welcome. Welcome to the age of the streaming amplifier. In the M10, NAD includes pretty much everything you can imagine and likely more. There is a fully digital integrated amplifier, an MQA-capable DAC, streaming and multi-room functionality, room correction, voice-control capability, AV integration via HDMI ARC, and a full-function, full-color touch screen display. By packing all of this and more into a small, lightweight, and elegantly finished enclosure, the M10 has the look and feel of a high-end, modern lifestyle product, but with serious credentials under the hood.
Power:
100W @ 8 and 4 ohms
Dimensions:
8.5” W x 4” H x 10.25” D
Weight:
10 lbs
MSRP:
$2749
Company:
SECRETS Tags:
BluOS, streaming, Dirac, room correction, MQA, aptX, wireless, Streaming Amplifier Review 2019
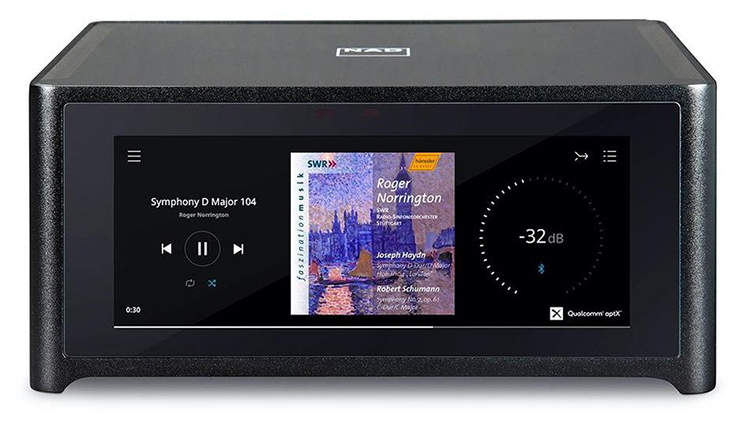
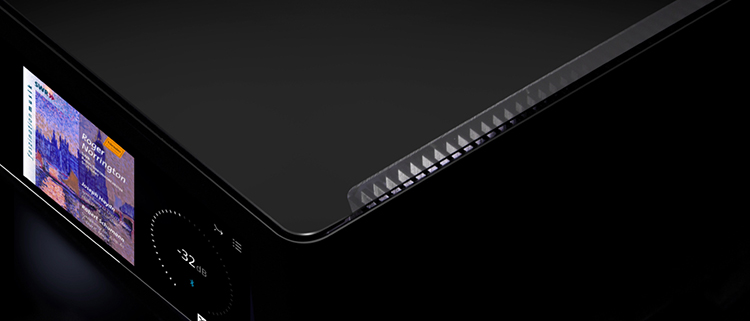
There are no knobs or buttons on the M10. The name of the game here is smooth Industrial chic. The casework is black, low-sheen, anodized aluminum with gently radiused corners. The top and front panels are made from durable Gorilla Glass, the stuff found on smartphones and tablets. The use of that makes sense here because the M10’s front display is a full-color, seven-inch LCD touch screen and, for the top panel, it facilitates wireless communication without the need for external antennas. The front display also allows a bit of customization, which is to be expected from a software-driven device. Those preferences can include the information displayed, which can be the current input, custom named, or a pair of small VU meters. Inside, the M10 is built around a “HybridDigital” nCore amplifier from Hypex and the well-regarded ESS 9028 Sabre DAC.
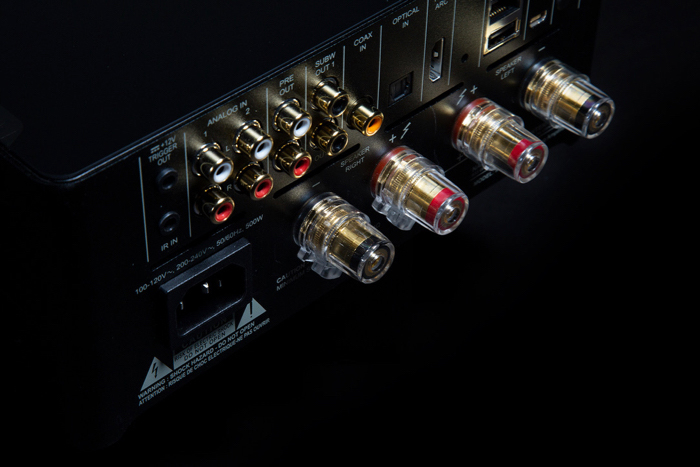
The M10 is not supplied with a traditional remote control handset. Instead, it is controlled via the front touch screen or through the BlueOS app available for smartphones, tablets, and computers. While I did not do so, some functions can also be controlled via some smart home systems as well as Alexa and Siri. The M10 supports AirPlay 2 and has the ability to stream from what feels like zillions of free internet radio stations as well as paid services such as Spotify and Tidal. While the M10 does not include a headphone jack for a wired connection, it will connect to wireless headphones via aptX Bluetooth. Nor does the M10 have a built-in phono preamplifier, but one of the two analog inputs can be used to connect one and thus, a turntable. The M10’s three digital inputs consist of optical, coaxial, and HDMI ARC. There is also a USB input, which, in addition to supporting playback from storage devices, is how the supplied microphone connects to the M10 when conducting the Dirac Live’s room correction measurements. Finally, while there are two subwoofer outputs featuring active crossover control, the M10 curiously does not permit adjustment of the frequency response of the main speakers.
The M10 was placed in my usual system, which consists of a JL Audio E12 subwoofer, a pair of Focal Micro Utopia BE bookshelf speakers, the Rega Planar 6 turntable with Ania MC phono cartridge, a Sutherland 20/20 phono stage, and a Roku Streaming Stick connected to a now old-timey Panasonic THX-certified plasma.
Getting the M10 up and running is simple. The M10 boots up like a computer and since a lot of settings are really just personal preferences, you can connect your sources, establish the network connection (wired or wireless) and worry about things such as naming or hiding inputs and front display brightness at your leisure. What is required is downloading the BluOS app on one of your devices. That is unless you want to tap through the M10’s front display menus every time you want to do literally anything. Once you have the BluOS app up and running, it will automatically find the networked M10. Finding the network-attached storage (NAS) devices proved more elusive and to the extent the NAD does not find them automatically, as was the case with mine, you need to enter the path manually, which can involve some minor trial and error, but it will eventually work. As long as the NAS stays in the same place on the network, the app will remember it and you never have to deal with the process again.
I waited approximately a month before performing the Dirac Live room correction because I wanted to first become familiar with the basic sound of the M10. After feeling I had a handle on that, I downloaded the Dirac Live app on my phone, connected the microphone to the M10, and followed the on-screen instructions, which are fairly straightforward. In order to build the optimal filter, Dirac requires you to plug in a microphone and take measurements of test tones in a total of 13 positions, 12 of which are located approximately 16–24 inches around your selected listening position in order to optimize the filter for that room position.
I did this by hand and sight and only once. In other words, I approximated rather than measured the placement of the microphone around my listening position. It stands to reason that utilizing a more rigorous approach, including a better microphone or a stand, could improve the measurements, and thus the results, but to what degree, I do not know. Dirac advises that the most critical measurement is the one that is ear level at the center of the listening position.
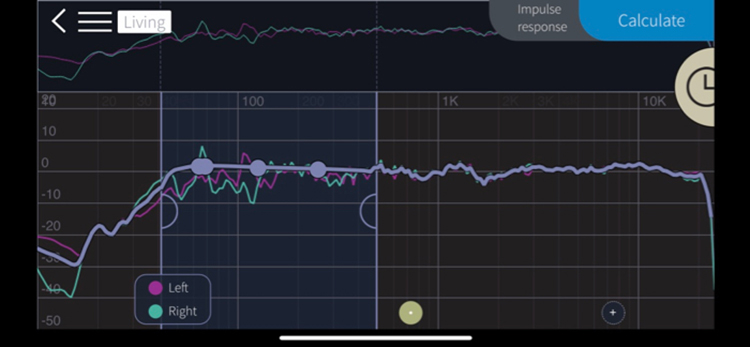
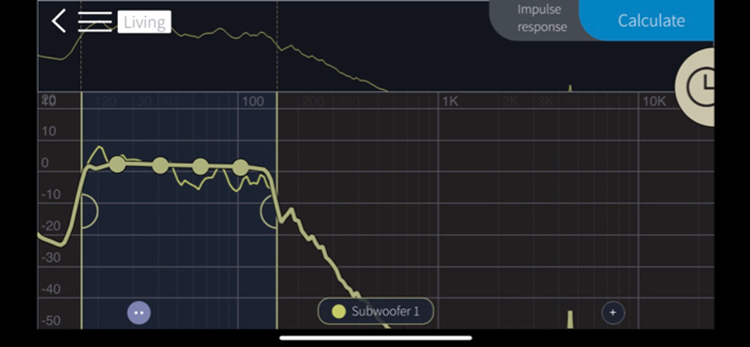
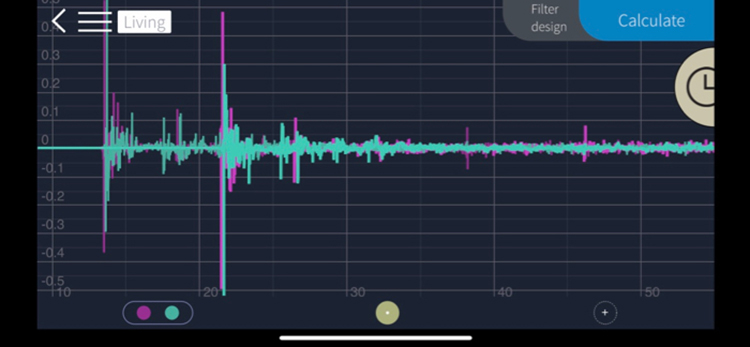
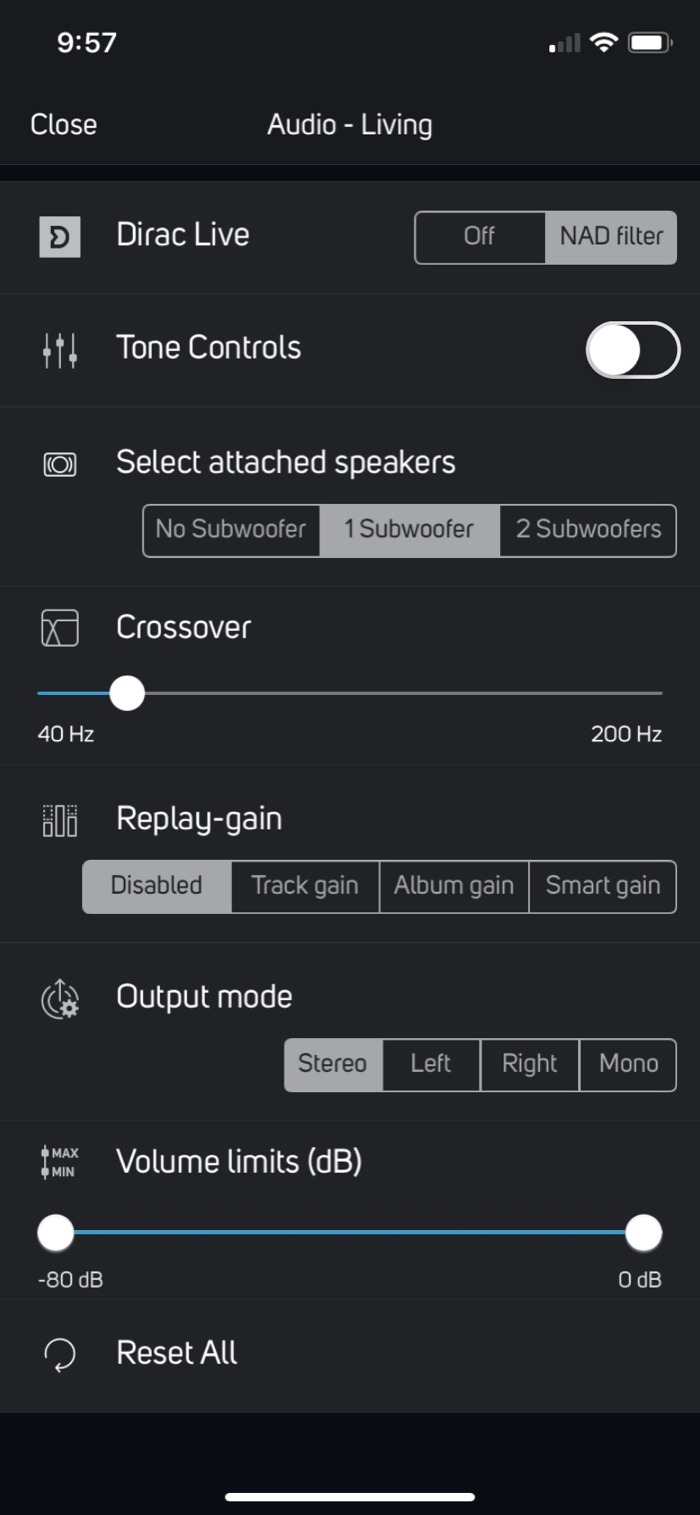
After Dirac takes its measurements, it calculates the optimal filters, which are then displayed graphically, and which you then name, save, and upload to the M10. While it was a bit unclear to me that the filter was uploaded and active while I was in the Dirac app, once I switched back to the BluOS app, I saw the function to turn Dirac Live on or off at the top of the M10 audio settings.
The Dirac Live version that is included with the M10 is not the full version, but rather, can act on frequencies up to 500Hz, which means the M10, absent a paid upgrade, offers correction to sub-bass, bass, and lower midrange frequencies. In other words, what you get for free is, by far, the frequency range where you will hear the real benefit to correcting for the room. At the time of this writing, the upgrade to Dirac Live “Full Frequency” is $99, but I did not utilize that version during my evaluation. While it did not bother me, some of the Dirac screens did experience a few anomalies switching from portrait to landscape mode on my iPhone XR.
Right out of the box, the sound of the M10 was far from compelling. It was not that the sound was bad in some obvious way, but most times it just sounded rather flat. I was bored. This was illustrated when I played a track with well-mixed drums. On “Hole in my Life” from Outlandos D’Amour, the debut album of The Police, the lack of vitality was easily discerned on the snare hits. What I had recalled as the memorable crack of a tight snare now sounded more like a lame thwack. To be sure, I’m oversimplifying, but the point is, once those snare hits soften, the energy of the song transforms. And once you change the energy of the song, the way your brain engages it changes. Oddly, on this same track, higher up in the frequency range, the cymbals sounded excellent, at times shimmering, at times crashing, just as I recalled. In sum, during this initial period, what I observed most overall was that the sound character of the M10 was much like its physical character – smooth.
After my initial listening, I decided that, as with most components, the M10 needed some time to run in before I approach it with an overly critical ear. I proceeded to watch a good amount of streaming TV and did so throughout the evaluation period. Of note, the M10 has a very valuable feature that allows it to learn IR codes. For example, the M10 can take your TV remote’s power signal so that when you turn your TV on with its remote, the M10 automatically switches to input you have for the audio portion of your TV (in my case, optical). I also programmed the M10’s volume to be controlled by the volume control on my Roku remote.
As far as the sound of audio-video material, watching all sorts proved a great experience. For example, I never struggled to understand dialogue, effects were always there, and it just seemed that the M10 had hit its proverbial stride. Dirac Live took this up to another level still. While it proved difficult to isolate exactly what Dirac Live changed, the overall impression was immediately apparent. Dirac Live gave the entire system more transparency. Imagine, for example, going from watching two people have a conversation to being in that conversation. That is, of course, somewhat of an exaggeration, but in the best sense, Dirac Live turns up the focus ever so slightly on everything you hear. Perhaps counterintuitively, it’s the restraint—not turning the focus up any more than necessary—wherein the genius and value of it lie. This is a classic less-is-more scenario.
One of the pleasant surprises with the M10 was the quality of analog playback. As mentioned above, there is no internal phono stage, but through my phono preamplifier and turntable, the sound was much better than I expected, given the analog signal is converted to digital by the M10. As might be expected, the most noticeable aspect of analog playback through the M10 was the reduction of background noise. What was unexpected was that the M10 was able to deliver a good dose of what my analog playback typically provides. Vinyl playback became an area where, much like Dirac Live’s seemingly incremental improvement, the sound took on a welcome uptick in both richness and dynamics.
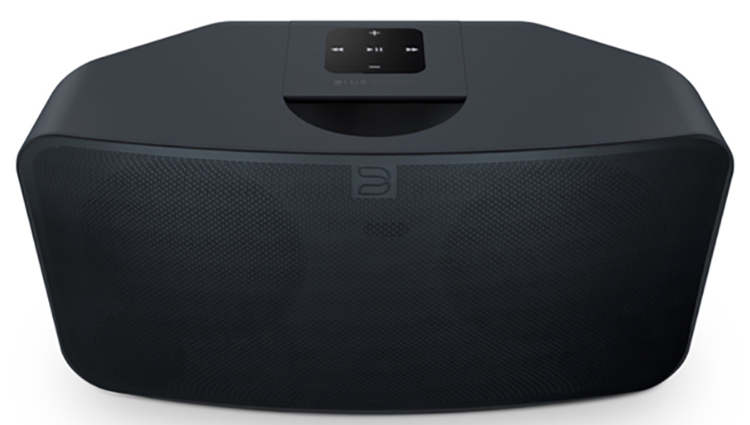
In connection with this review, I also had the opportunity to experience the multi-room capabilities of BluOS and the M10. I added the compact Bluesound Pulse Mini 2i ($499) wireless streaming speaker in my bedroom and it was a model of simplicity to set up. It found the network and connected instantly, updated itself and was ready to go in the BluOS app. This very small but solid-feeling unit sounds great. It has a surprisingly rich sound and can go very loud for such a small enclosure. The killer feature is found in the settings, which offer a ton of flexibility to tailor the sound to both placement and personal preferences. The only knock I could come up with was that the Pulse seemed less quick to react to song selection than the M10, but that is because the M10 pretty much responds instantaneously to those commands. Also, I won’t go into detail, but whoever was involved in designing the packaging of the Pulse Mini 2i—kudos for creative thinking and problem-solving.
Now for a bit of context and comparison. Naim’s Uniti series is considered by many, including me, to be the benchmark in the streaming amplifier space. I have owned the entry-level, 40-watts unit, the Naim Atom, for quite some time and enjoy swapping it into my system on occasion, where it then lives happily for months at a time. Why do this? Easy. For its price (MSRP $3,295), it is probably the single best piece of equipment I have ever owned. It really is that good and that special. I was very curious how the M10 compared.
The most obvious difference between them is the full-color displays—none of the Naim models have touch screens. However, while the M10 touch screen seemed to work flawlessly, touch was not the issue. I found that the bigger sacrifice was giving up a traditional remote volume control. It could just be me, but when watching TV or listening to music, I find myself adjusting volume quite a lot. With the Naim Atom, volume adjustment can either be really simple, simple or not simple. Really simple is using the included radio frequency remote control. You don’t even have to pick it up for it to work, but if you do, the internal sensor activates the LEDs which backlight the keys. It’s very elegant and very precise. With the M10, there is no remote, so you have to program it to accept another remote’s IR signal, which I did using the Roku remote. You can also go through the exercise of unlocking your phone or device, navigating to the BluOS app, and finding the volume sliderhl. The M10’s app-centric experience is similar to what you do in the Naim app to control volume, but I found the Naim app easier to use because you can set it up so that the volume control will appear on the bottom of every screen. This is different in BluOS where there are some screens where you sometimes need to navigate to a different screen to find the volume control. I did not find a way to change that. Using the volume control on the Roku remote to control the M10 did not eliminate my desire for a remote control, but it was far better than not having one at all. Using that remote resulted in either very slow changes or inconsistent jumps in level. In the end, controlling the M10’s volume through the BluOS app was an overly complicated experience, especially because my phone is not always right next to me. What I ended up doing more and more was to physically move to the front of the M10, tap the display to activate the small circular volume control, position my fingertip on it, and drag it in a circular motion to adjust volume. This too I felt was overly complicated. The issue of using the touch screen was not that the M10’s screen got covered in fingerprints (it was surprisingly good about that), but that I used this manual method of volume control so much, it started to feel, ironically, like the M10, which screams future-proof, was created before the era of remote control.
For manual volume control, nothing can beat the Atom’s massive, top-mounted wheel, which is derived from Naim’s flagship line of equipment. It spins freely, seemingly without any resistance, aand, while it does so, the large front display of the amplifier simultaneously displays the volume number full screen and, at the same time, thin LEDs on the outer edge of the volume control illuminate to let you know where you are in the range. This is because there are no stops in the volume wheel mechanismtl. Based solely on volume control usabilityr, which I realize may be of outsized importance to me, I preferred the Atom to the M10.
In terms of the sound character between the Atom and the M10, I initially noted that given the difference in rated power, I expected the M10 to sound and seem a lot more powerful at 100W than the Atom at 40W, but I found the opposite was true. I did not measure output, but subjectively speaking, it seemed the Atom was capable of higher volumes. This was readily apparent when Dirac was engaged, as the ultimate volume that could be achieved was lower still. While I pushed the M10 hard and had noted that the sides of the chassis were hot anytime I touched it, the M10 was unflappable and never shut down. Most importantly, the M10 had also managed to redeem itself with regards to the dynamic bite I had noted in the context of The Police track. All it took was bypassing my mains conditioner and plugging the M10 directly into the wall, as NAD recommends. This transformed it. The overall sound was more enjoyable immediately and put the M10 and Atom far closer than I would have thought possible. Ultimately, for my room, my system, and my ears, the Atom’s slightly more forward and/or lively presentation is the one I would pick, but I can easily imagine someone else preferring the M10, which seems to have better analog playback, greater access to internet radio stations (and better at searching for them), and a more neutral sound.
A fantastic product that delivers a ton of performance for the money.
- Smooth, neutral, articulate sound
- Access to content galore—if you can’t find a source you are not trying hard enough!
- Compact, all-in-one form factor reduces black box count to one
- Include at least a basic remote—this would be a game-changer
- Independent control over the frequency of the main speakers
- Phono stage
Rich in superlatives, NAD’s first entry into the world of streaming amplifiers has proven to be among the best in the world.
For more information on the NAD Masters Series M10 Streaming Amplifier, go to https://nadelectronics.com/product/m10-bluos-streaming-amplifier


