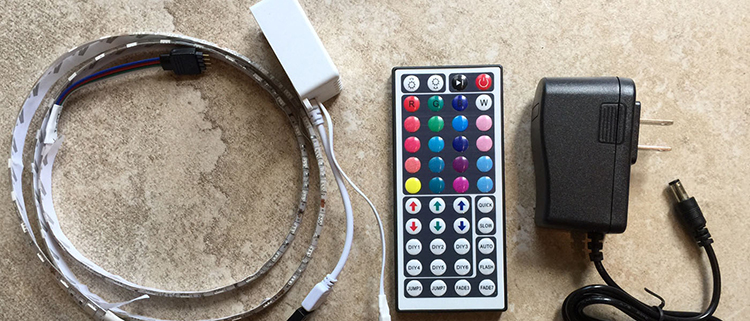
I went online and purchased three different kits from Amazon to complete three separate projects in my home. Each kit cost less than $25, one was only $15! There are tons of these kits online but I like to look for ones that are waterproof, IR controlled, RGB and include everything I need (remote, power supply and strip).

A few tips for buying LED light strips
- Read user reviews before buying!
- RGB kits are often the same price or just a few bucks more, they are my go-to products.
- Look for the waterproof kits, even it not using them around water, they often are more durable and dust resistant.
- Make sure you are buying a complete kit that includes the LED strip, power supply and remote.
My first two projects were to mount them under a bed as a night-light and around my desk as a background light. These are very easy to do and can add some style and flare to your personal space. And they can be easily controlled with the included remote.
- Project cost – $15-$100
- Project Difficulty – Very Easy
- Time Required – 1 Hour
Tools you will need
- Double sided tape or super glue for attaching the LED strip (don’t trust the adhesive backing on the strip)
- Tape measure
Steps to install
- Before buying an LED kit, measure around the bed frame or desk area you wish to light. It’s never a bad idea to buy more length than you think is necessary. You can always cut the LED tape in certain marked spots as you install it. As always, measure twice and cut once!
- Use super glue (permanent) or double-sided tape (temporary) to mount the LED strip to the underside of the bed or desk. Make sure to place the end that hooks up to the power supply near a point on the bed frame that’s by the outlet to hide the wall-wart.
- Continue to install the LED tape, ensuring it stays out of sight and is properly attached.
- When you reach the end of the area you wish to install it, if needed, cut the LED tape along a spot marked for cutting (see the instructions of the LED kit you purchased).
- Make sure to put the IR sensor in a place where it has line-of-sight for the remote.
My last project was to install strips behind my TV, then use IR control to integrate them with a Control4 system. (I am certified Control4 installer and programmer.) They are fully controllable via a living room touch panel with unique macros to do things like turning the LEDs red when switching to Netflix or flashing them blue when my Nest thermostat turns on to cool. I can also vary the color depending on the time of day. This is a more advanced project and is not DIY-friendly. However, they can still be used with your TV using the IR remote that is often included with the kits. As we see more and more home automation products hit the market, I am excited to see what the future holds for LED lighting! Post below in the comments if you have any cool LED-strip projects that you’ve done and would like to share!


