Introduction
When Sony introduced the first high definition video camera a couple of
years ago, it was 1080i rather than 720p. Actually, the format of this and
most such video cameras is called HDV, which means 1,440x1,080i. It requires
recording 1,555,200 pixels per frame, while 720p needs 921,600 pixels.
HDV is an intermediate step to full
1,920x1,080i (1080i), and eventually, we will have 1080p30 in consumer video
cameras (already present in some professional cameras) and maybe 1080p60 at
some point.
The HDV format is very close to full 1080i,
and in fact, many television studios use HDV cameras because they are about
1/5th the price of the professional 1,920x1,080 cameras.
You can buy an HDV camera for less than $1,000
now, but you really get what you pay for. Although the chips are 1,920x1,080
the lens is not as fine a quality as the ones on the higher priced models.
It is because of the important lens factor, which includes sharpness but
also contrast, that we have gone to the MTF50 criterion for measuring
resolution.
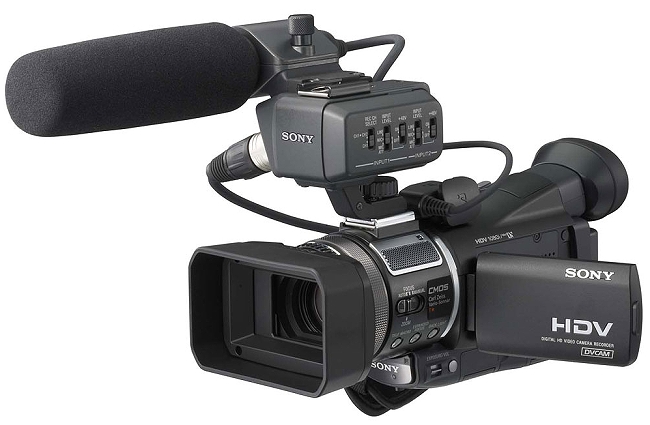
The Design
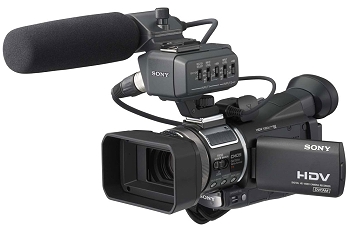
Sony's HVR-A1U is a one-chip HDV camera, with
a gross resolution of 2,969,000 pixels. The HD recording uses 1,983,000
pixels, and the SD recording mode uses 1,486,000 pixels. The chip is a CMOS
design rather than CCD.
The recording format is MPEG-2 onto DV tape
(Sony suggests using official DVCAM tape, which is a higher quality, but
standard DV tape works fine).
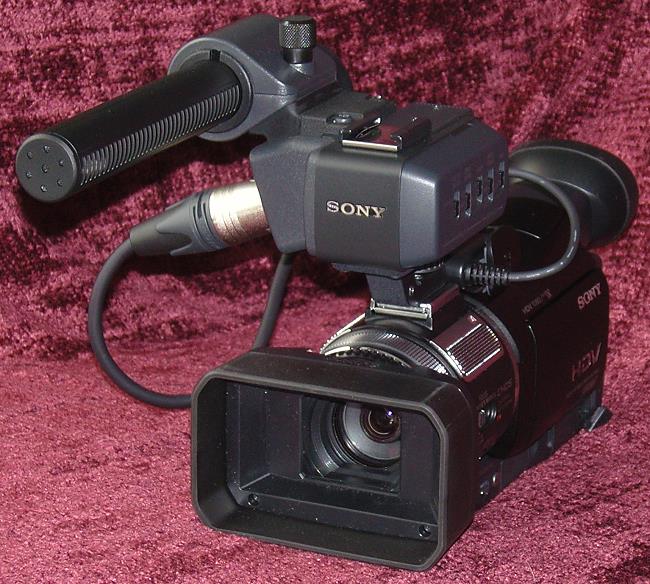
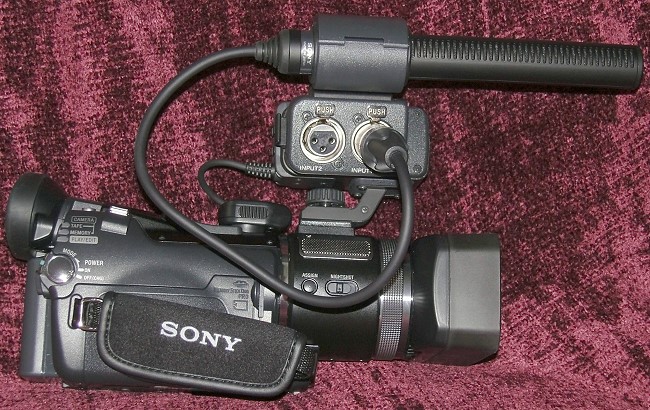
You can use the standard quality stereo
microphones that are mounted on the top front of the camera, or you can use
the included external stereo microphone that looks like a shotgun mike and
points forward. This is a condenser microphone that requires 48v power,
which is supplied by the camera. It comes with a foam wind screen (shown in
the photo above), but that does reduce the sensitivity a bit, so I did not
use it in my recording tests.
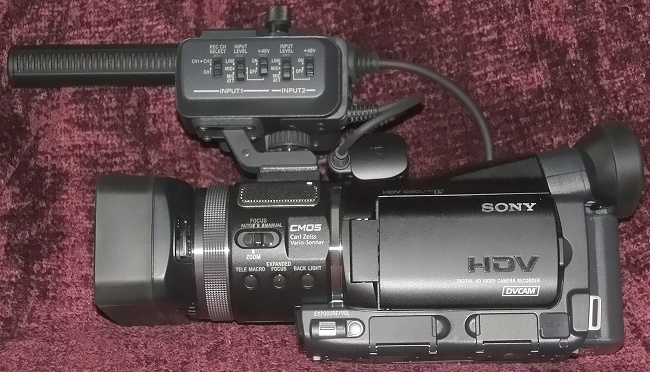
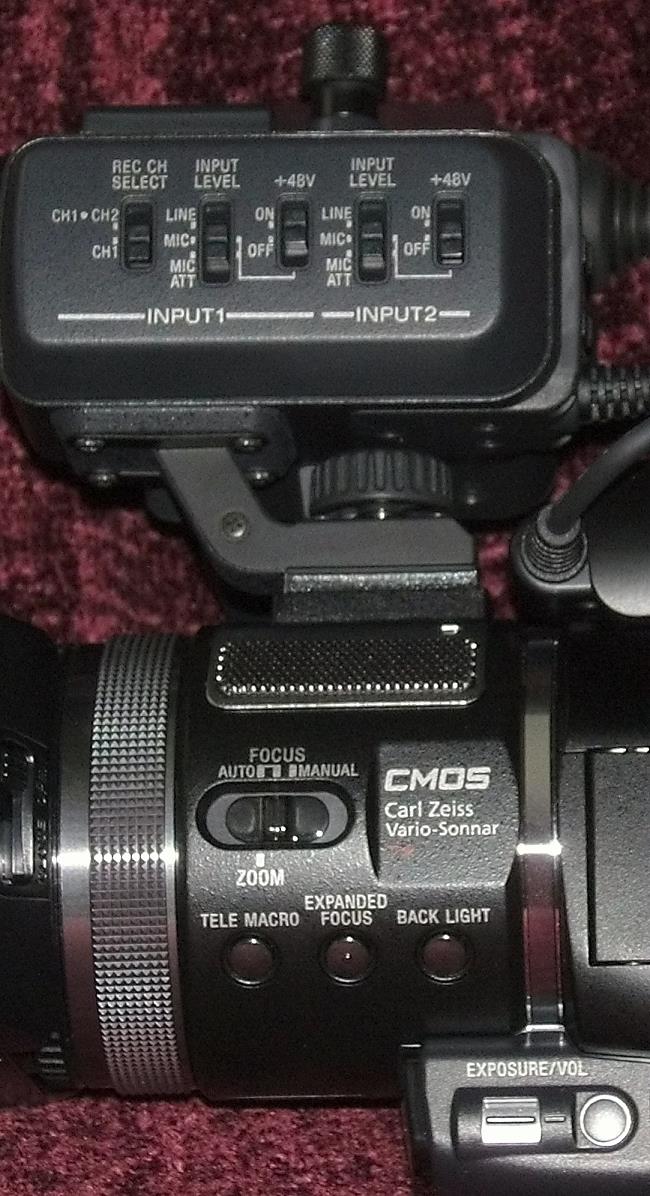
The condenser microphone has a mounting
bracket and XLR balanced cable that plugs into the camera. On the side of
the bracket are switches to turn on or off the 48v supply (in case you want
to use your own XLR microphone that does not require 48v). There are two XLR
input jacks.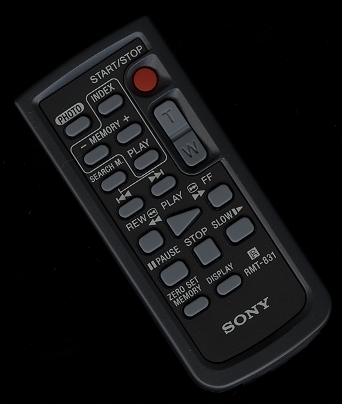
Behind the lens is an Auto/Manual focus slider
switch that also lets you zoom manually. Below that are Tele Macro, Expanded
Focus (enlarges the image so you can focus with better accuracy), and a Back
Light button (for shots where the sun is behind the subject).
Below the Back Light button is a Manual
Exposure slider and a button to manually adjust playback volume.
The included lens shade has a slider on it to
cover the lens in between use.
A small remote control is included, which lets
you operate most functions of the camera.
To the right of the Manual Exposure slider are
three fold-down flaps that open up when you want to connect the Firewire
cable (for uploading taped videos to your PC), video outputs to play tapes
on your TV and also a jack for recharging the battery (one full charge lasts
for about 1.5 hours of recording and playback).
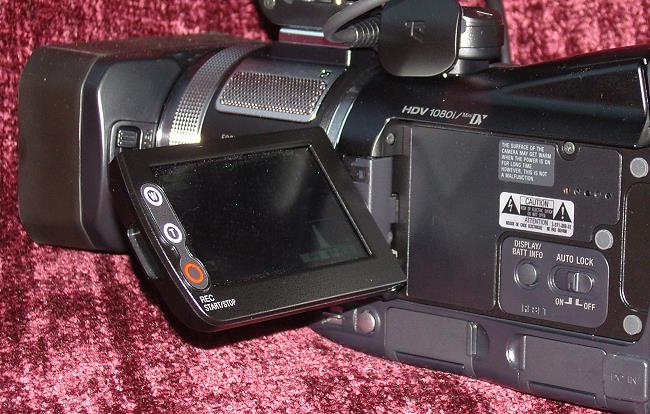
You can also see the LCD screen in the closed position. It folds out for
taping or viewing playback and is 2.7" diagonal. It flips over if you want
to be in the picture and see what is being taped. To view the status
indicators, you press the Display button on the camera body. The Auto Lock
slider locks all the settings so you can't accidentally change them. If you
want to go manual, you slide it to Off. You can start a recording and use
the zoom by pressing the buttons on the display. For playback, controls are
displayed on the screen itself.
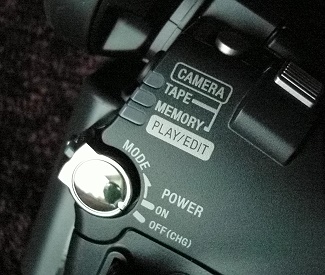
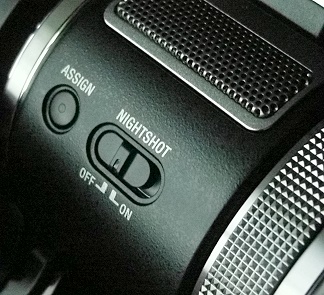
The right side of the camera has the On/Off
dial, indicators for the camera mode (recording, playback, still
photography), and buttons up near the lens for Nightshot (changes the
shutter speed for night time videography) and Assign (lets you choose a
favorite function, like White Balance or Steady Shot to be activated when
you press this button).
You can also see the button for starting a
recording, a LANC socket (for connection to other devices like a video tape
recorder), the Photo button for taking still shots, and the Zoom slider.
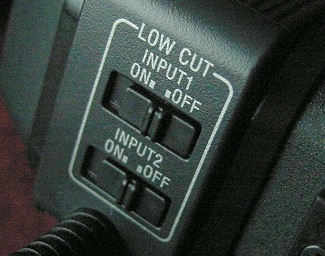
On the rear of the XLR microphone bracket,
there is a Low Cut function for when the wind is blowing hard.
Go to Part II.