MPA-502 and PF-2502 Power
Amplifiers
Impressively, ADA wouldn't manufacturer a superlative controller without the
best possible amplifiers. The MPA-502 five-channel power amplifier has a
separate power supply chassis, and this compliments the aggressiveness of the Mach III.
Ruggedly simple in design, the face is dominated by five LED displays which
dance up and down as each independent amplifier module is called to duty.
The display can be turned off if too distracting. The only front-mounted
switch you'll find is an On/Off toggle. It's hardly a light-weight at 46
pounds,
considering the power supply is independent in the complimentary MPS-502
which weighs a hefty 52 pounds. Of course this is aids in moving the units
around, thankfully.
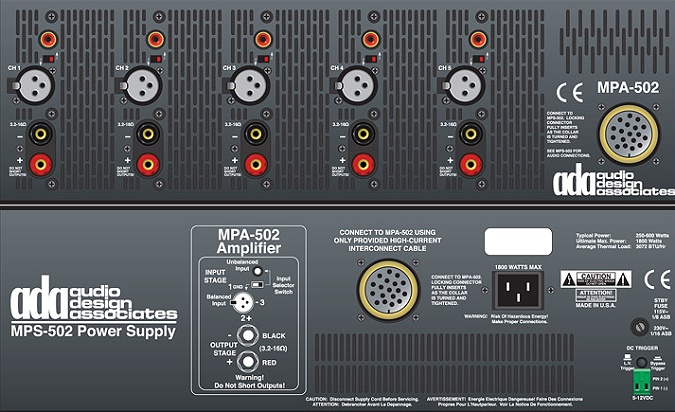
The MPA-502 has a massive 2,500 watt toroidal power supply with a 500,000 µF
capacitance. With the MPA-502, ADA assisted THX with their original
specifications for amplifiers. In other words, this would serve most home
theaters easily and with confidence.

With the flick of a switch at each connection,
either balanced or unbalanced audio inputs are available. The MPA-502 will
deliver 600 watts per channel @ 2 Ohms, and
those with 8 Ohm speakers will get a solid 250 watts per channel.
ADA proudly boasts clipping is virtually impossible with the power reserve: "When operating on a standard 115V AC outlet, you cannot even force the
amplifier into clipping because to do so requires 28 amperes of wall
current."
Like all ADA equipment, the solid MPA-502 is built for rack mounting, and as such,
the units can be stacked directly onto each other. Just as the Mach III
controller, fans push air from right to left with dual fans. Although a bit
noisy when combined with all four components trying to dissipate heat, the
sound is not offensive when sitting about 8 feet away.
The connection between the amplifier and the power supply is in the form of
a "military grade" cable, thus insuring a solid feed. I found the rigid
line between the two a bit cumbersome especially around the speaker-wire
posts. Firing up both units and hearing them power up you want to step back,
it's that intimidating.
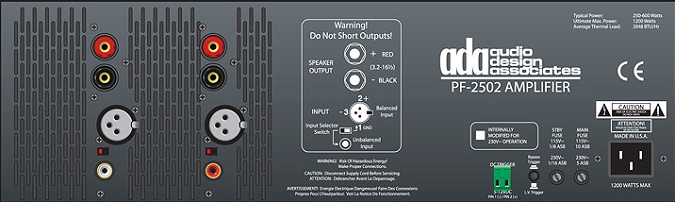
As I requested a seven-channel setup, ADA
supplied an additional amplifier in the form of the PF-2502. Virtually identical in
specifications to the MPA, other than an integrated power source and the
fact that it is two-channels instead of five, the 65 pound
amplifier is audiophile grade, and I used it in reviewing two-channel gear
while I had it.

Setup
Configuring the Mach III doesn't have to be the arduous process it seems to
be. In fact, out of the box, the twenty inputs are completely ready, in both
digital and analog, depending on the input. The manual gives you a nice
spreadsheet to follow and away you go!
Frankly I'm not sure how many people
actually have twenty sources, so with a feature called "Final Input", you may remove
the un-used sources from the OSD so you don't have to scroll
through them.

As good as it is out of the box, still the best
way to configure the Mach III controller is by downloading the software and
establishing profiles and saving them - customizing the countless processing
options. ADA feels this best reserved for dealers. However, since most
Secrets readers are hard core users, you certainly are welcome to try it
out.
I was able to play with the software via my laptop and a RS-232 connection
to an optional Iso-Cat II (photo below right) which also boasts a "Cat Link"
for connection to an ADA multi-room system keypad wiring harness. The Cinema
Reference Mach III features an onboard back panel Ethernet RJ-45 jack for
connection to a home network.
For the casual user, however, mos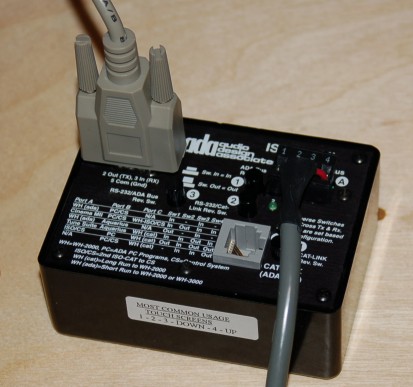 t
will do fine making some minor adjustments to the factory set configuration,
so let me describe it thus.
t
will do fine making some minor adjustments to the factory set configuration,
so let me describe it thus.
Pressing the Mode button for a few seconds brings up the Setup menu, and I
soon discovered merely touching the volume control dumps you out.
Turn
the Mode button until you reach Audio Inputs, and another push of the button
reveals the Digital/Analog inputs with the current input shown. An Analog In
gain feature allows you to adjust from -10 dB to +10 dB.
You then assign the video source to the input by selecting one of the three;
Composite, S-Video or Component. As I mentioned, the Mach III does not have
HDMI inputs.
Default modes for audio can be set for both two-channel and multi-channel.
Two-channel gives you a plethora of options from stereo and mono
configurations (enhanced, direct, etc.), but also all the Pro Logic and DPLII,
Neo:6, and THX as well. Multi-channel will scroll through
options from Direct 5.1,7.1, to Cinema and THX.
In addition to setting up the LCD contrast, volume maximums, and the ability
to re-label inputs, the setup menu will then take you to a Pro Setup menu.
Pro Setup is a series of steps that take you through the usual: Step 1 is
the number of speakers and subwoofer crossover; Step 2 has channel levels; Step 3 are
delays for each channel; Step 4 is a bass manager with limiter from -24 dB
to OFF; Step 5 is the THX setup which has Boundary Gain and Rear Speaker
Spacing. Also in the Pro Setup are Auto Detect modes for EX, ES, and DTS LFE
levels down to -20 dB.
If you're unhappy with it all and wish to start from the factory settings
again, press the Default. If you've had it custom installed, there is also
an Installer Default that you can restore to as well.
The Mach III gives you tone controls for both bass and treble, but
impressively, at the frequencies you wish. Further, tone controls can be set
for two speaker groups, A and B, allowing adjustments to those speakers in
your system you feel need the adjustments, or all. And like other setup
issues, tone controls also come preset out of the box.
The Mach III allows you to store four balance presets for multiple choices
from an individual knob on the front. Presets allow for some selection based
on speaker size and driver types as well as speaker matching. By assigning the tone
controls to either group A or B, you can make the necessary choices for your
room.
Of course, you determine yourself which speakers belong to which group, or any
individual speaker can be omitted from either group as related to tone
control.
Finally, for setup, ADA provides a solo mono feature that allows you to turn
off all but one speaker for specific control. Typically you'd have to unplug
all speakers except the one you're attending to before hand. This feature
allows you to identify a bad driver, or determine if a speaker is out of
phase.
Go to Part IV.

