Introduction
Once in a while a product comes along that is so
innovative and well designed that it separates itself from the crowd. The
Sonos Digital Music System (Media Server) is one such product.
This system is not the first
to use digital media at its foundation. It is not the first to use wireless
technology to distribute the media (although they did design their own
implementation of a wireless mesh network). It is certainly not the first to
offer a whole-house audio distribution system. However, what the folks at Sonos have done is to take those technically advanced components, and turn
them into a consumer-friendly, highly functional, and fun system to have.
Read that again. How often can you use the terms consumer-friendly, and
highly technical to describe the same product? The answer is not often
enough, which is one thing that makes this system so unique in its field. As
you will see, the Sonos system may be the product to finally bridge the gap
between geek and non-geek, between parents and their kids, between rich and
not so rich by making available to everyone the wonders of distributed music
throughout your entire home.
Set-up and Configuration
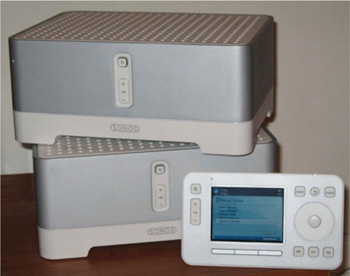
My review system matched the Sonos introductory system (as depicted on their
website http://www.sonos.com) which includes two Sonos ZonePlayers and a
Sonos Controller. Right from the moment I first unpacked the Sonos
ZonePlayer I saw how streamlined the installation process would be. I am
technically inclined, so when I set up a system such as this, I always
wonder what it would be like for a newbie.
Let’s just say that anyone who sets one of these systems up probably already
have far more challenging pieces of technology installed in their home (a
network, digital music library, etc.), so it should be a breeze.
The
documentation is quite easy to follow. Sonos includes both a quick start
diagram as well as full documentation for those that have the discipline to
read before setting it up. The first steps are wire it in
to your Ethernet network, and connect it to either a preamp/receiver or
direct to your speakers. For my initial player installation, I connected the
standard L/R RCA jacks to my receiver. With the second ZonePlayer, I hooked
up my Boston Acoustics reference speakers to the unit’s 50 watts-per-channel
internal digital amplifier. I was impressed with the clarity and power of
the sound given the small power rating on the amp. This was my first
experience using a digital amplifier in my home system, and I liked what I
heard.
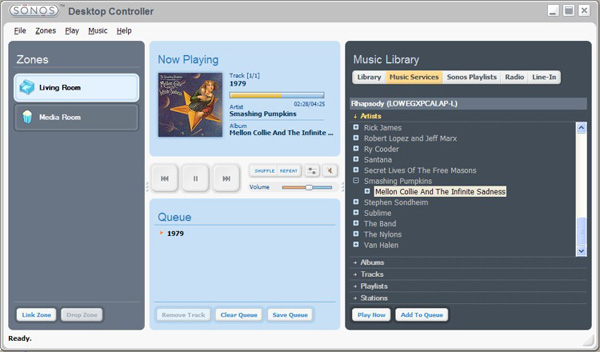
At this point, there are two ways to proceed. You
can configure everything directly from the dedicated CR100 controller, or,
if you have a Windows or Macintosh computer, you can install the Sonos
Desktop Controller software. The latter is preferable and easier in my
opinion. The software basically looks a like the physical controller in a
software format.
The wizard-driven installation was a cinch. At its conclusion, the system
automatically checks the Internet for updates, and if there are any, it will
download them. You then register your system, which allows you to receive
online documentation, updates, new downloads, etc. The final step before you
can begin listening to music is to add the paths to your music files into
the software so it can begin indexing all your music.
Your digital music
library can be located on a networked computer, a Network Attached Storage
(NAS) device, or any combination of those places. This actually was a quick
process. As a point of reference, I have around 40GB of music, and indexing
only took about a minute.
The next step is to have the Sonos software find the initial ZonePlayer. The
software should automatically locate the player, and ask you to press the
mute and volume up buttons at the same time in order to verify that it is
the right player. It will then ask you to give it a logical name. There are
quite a few preconfigured names that make sense for most households, such as
living room, master bedroom, and patio, but you can enter your own as well.
Subsequent ZonePlayers are added the same way, although you can add them
wirelessly instead of having to plug them into your router.
 Setting
up the controller is quite simple as well. The first time you power it on,
it asks you if you already have installed the desktop software and
configured your ZonePlayers. Since I had already done this, all I had to do
was go to one of my ZonePlayers, press the mute and volume up keys at the
same time (as I had with the software), and voila, the controller integrated
itself into the system.
Setting
up the controller is quite simple as well. The first time you power it on,
it asks you if you already have installed the desktop software and
configured your ZonePlayers. Since I had already done this, all I had to do
was go to one of my ZonePlayers, press the mute and volume up keys at the
same time (as I had with the software), and voila, the controller integrated
itself into the system.
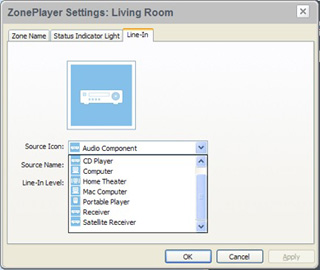
You also have the ability to connect an external source using a standard set
of RCA cables. Since the Sonos ZonePlayer has its own amplifier, this can be
quite handy. Additionally, in the configuration menu you can choose an icon
for the source, and an input level. This is also a nice touch since you
don’t have to worry about the volume being overly loud or quiet when you
switch to the line in source.
Click
Here to Go to Part II.