|
|||||||||
|
Introduction Over the past few years Denon, has been an industry leader in DVD performance. They have incorporated state of the art features and unsurpassed flexibility.
The
DVD-5910 ushers in a new level of performance for traditional DVD players by
incorporating top of the line video processing with some of the most advanced
audio processing on the market. But with the impending arrival of HD-DVD and Blu-Ray, is this new flagship player too much too late? The DVD-5910, despite its namesake, is not the successor to the popular DVD-5900. Denon continues to say that the DVD-3910 fits that role. The DVD-5910 is the successor to Denon's previous flagship player, the DVD-9000 that we reviewed a few years back. The DVD-5910's build quality and features are far more in line with the DVD-9000 and are a big step up from the already outstanding DVD-5900.
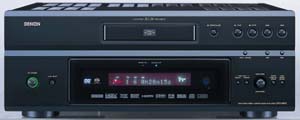
The new chassis is basically an expansion of the one that the DVD-3910 uses, but at a larger scale. The front panel has a very clean look to it and has enough logos on it to fit right in at a NASCAR race. The 5910 also incorporates the light-up function logos for SACD and DVD-V that I liked so much on the 3910. Some of the new features that Denon fans have been asking for are the inclusion of a separate standby power switch along with the hard power switch. The 5900 would only allow for a soft power down via the remote which many found aggravating. On the other side of the front panel, you'll find a selection knob that allows for adjustment of Pure Direct functions, SACD modes, and HDMI/DVI settings. I will go more into these later. The back panel of the chassis has enough hook ups that one may almost confuse this player with an A/V processor. On the video side, Denon has included a pair of composite video connections and a pair of S-Video connectors. There are two component video outputs, one using standard RCA connectors and the other using high quality BNC connections. This was a feature of the DVD-5900 that I was happy to see again, because BNC is definitely the preferred connection for analog video.
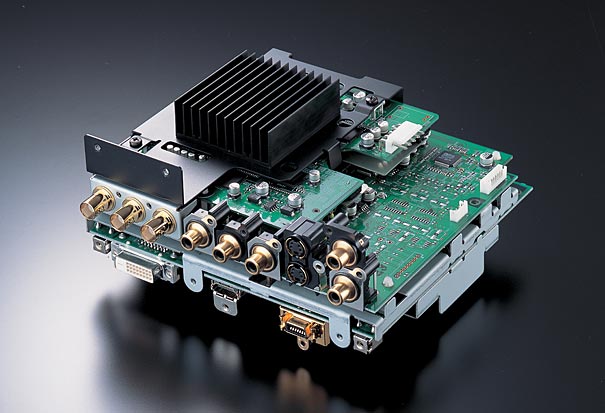
For digital video, Denon has included both an HDMI and DVI output. Denon is the only manufacturer on the market doing this right now, and I have to applaud them on it. There are a lot of players out there that are having issues with HDMI outputs linking up to DVI inputs on monitors. Since there is a fair share of displays on the market using either HDMI or DVI, Denon has taken the guess work out of it and included both which can also be used simultaneously for multi-room connections! The video board is shown in the photo above. On the audio side, the 5910 also has quite a few options for both digital and analog. For analog, there is a standard stereo option and a six channel option. All of these connectors are extremely high grade RCA plugs that are reminiscent of the DVD-9000 and a big step up from the more typical pressed connectors on the DVD-5900 and 3910. For digital audio you have lots of options at your disposal. The 5910 includes the standard optical and RCA Toslink connections typically found on most DVD players. But you also get Firewire, HDMI, and their proprietary Denon Link. The HDMI output of the 5910 is compliant with the new HDMI 1.1 spec. This allows for the standard two-channel PCM found on CDs, Dolby Digital, and DTS soundtracks from DVDs and now high resolution 5.1 PCM tracks that are found on DVD-Audio discs. Previous Denon HDMI players would not allow for high resolution PCM. At this time HDMI does not support Sony and Phillips SACD format. The 5910 also supports IEEE1394 or “Firewire” for all audio flavors including DVD-A and SACD. This is the only digital audio transmission system on the market right now that is specified for all the different audio formats. The 5910 has two Firewire hook-ups to allow for networking. The last option is the proprietary Denon Link. Similar to HDMI, this connection allows for all audio formats except SACD. Denon has recently announced that Sony and Phillips have approved the Denon link for the upcoming SACD 2.0 standard. What that will entail has not been made completely clear yet, but hopes are it will allow all current SACD releases to be transmitted digitally to an outboard receiver or processor similar to Firewire. We will have more information at Secrets about this as it becomes available. Rounding out the back panel is a RS-232 connector for remote control systems and a room-to-room remote hook-up for tying into other Denon products in a whole house network. From a build standpoint, this is the best DVD player that Denon has released since the DVD-9000. The design is sleek and nice looking, and I love that they added the robust RCA jacks on the back panel. The 5900's were just a bit too flimsy and started to get loose with repeated cable change-outs. I hope Denon continues to offer both HDMI and DVI outputs to give the end user a bit more flexibility and not have to resort to high priced adapters. This is a feature I wish more player manufacturers would incorporate, especially with higher end units.
Remote Control The next big improvement is the remote control. I liked the remote for the 5900, but it was a bit skimpy in terms of what it could do. This new remote is a bit on the big side, but it has all the features I thought were missing from the last one. The entire remote is backlit by the push of a button and has the ability to control the HDMI/DVI output formats and resolutions. It also has full control over the SACD functions including which sound option you want to use. This was a pain with the 5900 which required you to set up the SACD output in the user setup menus, thereby requiring a display. Interface and Set-up Not much has changed over the years when it comes to Denon's interface and on-screen menus. Not that this is a bad thing. Like they say, “If it ain't broke, don't fix it!” The on-screen setup menus are tabular and divided into the separate major sub-menus, including digital setup for HDMI/DVI, video set-up, audio set-up, and player set-up. The digital set-up is another place to tweak in your DVI and HDMI configuration. This is where you'll find the RGC mode set-up for DVI and HDMI which is very important. There are two settings for this, Normal and Enhanced. Normal sets the RBG of HDMI and DVI to Studio RGB levels (16-235). This allows for head and toe room in the digital gray scale, which gives you below-black and above-white data. Video is referenced to a specific color balance when it is recorded. That reference happens to be an analog-based monitor made by Sony. Since the monitor is analog, it doesn't have a hard clip point at pure black and white, so setting a hard clip point in the digital video domain won't preserve the qualities of the reference. Studio RGB levels allow for this by setting black at digital 16 and white at digital 235 within the 0-255 digital spectrum. Enhanced mode uses PC RGB levels and moves the level of black to 0 and white to 255 and does not allow head or toe room for above white and below black information. This can easily be verified using test patterns on the Digital Video Essentials or AVIA Pro DVDs. We recommend always using the Studio RGB levels for video playback. That was how DVD was encoded and is the only way to properly display the material. However, there are some displays and projectors out there that are expecting PC RGB levels (Enhanced). Consult your owner's manual or contact the manufacturing company for more information about your display's setup. The 5910 also has a video output mode for HDMI called HDMI Y Cb Cr. This allows for the original color space of DVD to be passed without conversion to RGB. This also allows for a full 10-bit video output. The DVI and HDMI RGB mode outputs are limited to 8-bit despite the full 10-bit internal processing. Also, 8-bit video has limitations that tend to result in banding or gradations in colors. A good example of this can be seen with skylines or underwater footage. Since the level of light may have infinite values that constantly change with depth in the water or altitude in the sky, you may notice what looks like bands where there should be a smooth transition. In other words, dark blue will abruptly change to a lighter blue rather than a gradual change. I usually test for this with a gray ramp. With 8-bit processing or an 8-bit output on a digital display, I can usually see a slight amount of banding in a gray ramp. With a 10-bit output there is no banding at all, and the ramp is completely smooth from black to white. Some CRT displays may not show this as much because of the properties of an analog display. Transitions tend to be smoother than with a digital display, so some of that banding disappears. But with the rise of digital displays on the market and the clearly impending demise of analog displays, higher bit processing is becoming a necessity. Another selection in the Digital Setup menu is the HDMI Auto Format. HDMI is a two way communication standard, and if implemented correctly, the devices that are connected to this network should communicate with each other. This allows the DVD player to query the monitor to find out what resolution it should output. The 5910 allows for three different output resolutions via DVI and HDMI: 480p, 720p, and 1080i. If the monitor tells the player its native resolution, the player can automatically send that resolution by default. Unfortunately, it has been our experience that most TVs don't send the right resolution to the player. We recommend setting the resolution yourself using the remote or front panel setups. This way your can be sure that you are sending the right resolution to your display. The last selection for HDMI is for audio. As I mentioned earlier, the HDMI output of the 5910 will pass a multitude of different formats, including PCM, Dolby Digital, and DTS. There are three output selections in this menu: 2-Ch, Multi-Normal, and Multi-LPCM. 2- Ch is the default setting and will only pass stereo data. Multi-Normal will pass Dolby Digital and DTS information along with stereo signals; however, this will also defeat any internal processing by the player, so the multi-channel analog outputs will no longer pass surround sound information. If you plan on using the analog multi-channel outputs, set the HDMI audio to 2-Ch. Multi-LPCM allows for high resolution PCM information to be passed, as well as all the other formats mentioned before. It also leads to more menus to take advantage of the audio processing in the 5910. This processing includes bass management, time alignment, and channel level control. These are absolutely critical to get the best presentation possible from multi-channel recordings, regardless of format. I was unable to test the HDMI audio, Firewire or Denon Link outputs, because my reference system does not use any of these formats at this time. My processor is being upgraded to HDMI 1.1 and Firewire in the near future, so I will try and follow up on those features at a later date. The Video Setup menu is the next tab and is the main setup for the component video outputs and setting up the HQV de-interlacer. This menu has all the settings for your monitor, including aspect ratio, TV Type (PAL/NTSC/AUTO) and system (Progressive, Interlaced, HDMI/DVI). The 5910 supports both PAL and NTSC output formats with full progressive support. It will also convert PAL to NTSC on the fly, a feature that previous Denon players were lacking. The 5910 has a squeeze mode for widescreen monitors. This can be set to On, Off, or Auto. When On, any 4x3 material will be presented with pillar boxes on the sides of the image to preserve the native aspect ratio on a widescreen monitor. When Off, the 4x3 material will be stretched to fit and images will appear a bit wide. In the Auto mode, the player will automatically detect and format the display accordingly. These features only work with a 480p or higher video output (not with 480i). Also of note, this feature does work with a 720p or 1080i output. This was not the case with some of the older Denon players. Next up is the Progressive Mode setup for the HQV de-interlacing engine. There are three modes to choose from: Auto, Video 1, and Video 2. Why they included Video 1 and Video 2, I may never know, but they are not needed at all. The HQV chip does a superb job at cadence and flag detection and handles all material properly in the Auto mode. We suggest setting the player to Auto and leaving it at that. The next setup menu is for audio. This menu is similar to what we saw with the DVD-5900 before. Here you can set up the analog outputs for either Multi-Channel, 2-Channel with Circle Surround Off, or 2-Channel with Circle Surround On. Circle Surround is a DSP-driven surround processor that will take two-channel information and make a 5.1 signal from it similar to Dolby Pro Logic II. By selecting the Multi-Channel option, you are taken to a new menu screen that allows for a setup similar to what we talked about with the HDMI setup. This includes full bass management, time alignment, and channel level. The 5910 uses two DSPs to achieve a remarkable amount of flexibility with its audio setup, and in my opinion is the industry leader in this regard. The 5910 offers all of these features for any sound format, including SACD. For bass management, the player offers a variety of crossover points starting as low as 40 Hz and moving up in 20 Hz increments to 120 Hz. No other player I've seen on the market today offers this many crossover points. For channel levels, the 5910 allows you to tailor the level of each channel individually, with no grouped levels. A lot of players that I've tested have group levels for the front mains or surround speakers. This is very inconvenient for people whose setups don't allow for perfect placement or equidistant placement. The channel levels worked in a attenuation form and start from 0db (no attenuation) and go down to -10db in 1db increments. The only exception is the subwoofer channel. This channel has an increased level of setting and ranges from -10 to +10db. Those of you who may have had trouble dialing in your subwoofer with some of the older Denon models won't have that problem here.
|
|||||||||


Magazine Publishing Solutions by