|
|
 |
Specifications ● Codecs:
Dolby Digital, Dolby EX, Dolby
Pro Logic II, DTS, DTS ES, DTS ES
Discrete, DTS Neo:6, DTS 24/96,
HDCD
● Digital Audio Inputs: 6 S/PDIF RCA, 6
S/PDIF Toslink, 1 XLR
● Audio Outputs: 12 RCA, 12 XLR,
Including 2 for Future Use
● 8 Analog Devices SHARC® 32-bit DSP
Engines
● THX® Ultra Certified
● Cirrus Logic's Crystal®
CS49326 DSP
decoder
● Input Impedance: 100 kOhms
● MFR: 10 Hz - 40 kHz - 0.75 dB
● THD: 0.003%
● 24/96 A/D, 24/192 D/A Differential
Balanced in All Main Channels
● Zone 2 Operation
● Video Switching: Component Video at
300 MHz
● Size: 6.6" H x 17.3" W x 14.8" D
● Weight: 45 Pounds
● MSRP: $12,995 USA for MC-12 V4
Balanced Version, $11,995 for
Unbalanced; Upgrade Card for
Converting V3 to
V4 is $2,995 USA;
Calibrated Microphone Package
Option $795 USA
Lexicon, Inc.
www.lexicon.com
|
Introduction
Launched almost two years ago, the
Lexicon MC-12 Surround Sound Processor (SSP) has gone through a steady stream of
upgrades. With each upgrade, the MC-12 has kept pace with the latest format(s)
that required decoding.
Version 3 brought with it the ability to set
loudspeaker distances and levels automatically using a set of microphones.
Version 4 (V4), the latest offering, adds Automatic Room
Equalization (ARE) which aims to address a serious problem that afflicts our
listening environments: room resonance. This is manifest by peaks and
valleys in the frequency response that are caused by the environment, rather
than the hi-fi equipment.
Needless to say, the processing requirements for automating the ARE
technology
are high. Correspondingly, the processing requirements for the accompanying
algorithms are high, requiring the addition of significant horsepower.
Prior to this upgrade, the MC-12 already possessed some serious DSP
horsepower. There were four Analog Devices ADSP-21065L SHARC® DSP engines,
each DSP capable of 198 MFLOPS. These DSPs did all the data crunching, sans
decoding compressed audio data sources. That task was relegated to a fifth
processor, the Cirrus Logic Crystal 49326 Audio DSP.
The V4 upgrade card adds
four more SHARC® processors to serve the processing needs of the power-hungry ARE algorithms. These algorithms employ seven filters for each of
the seven main channels and three subwoofer outputs. This gives
you a total of 70 filters. Each filter has adjustable depth, Q, and
frequency.
So, the MC-12 V4 has a total of eight SHARC®
processors. That is a huge amount of processing power! As you will
see, they are all utiized to provide an unprecedented amount of automated
adjustment for room characteristics.
Resonance, EQ, and V4
One problem that plagues all listening environments is room resonance. Resonance
colors the sound by emphasizing certain frequencies over others. Strong
resonances have an additional property: they have long decay times; once
excited, they linger on. Detail can get obscured, and bass can sound boomy.
One might incorrectly attribute this to flaws in the subwoofer even though
the source of the problem is room resonance. [See sidebar below for a formula to
compute room modes.]

Judicious placement of the loudspeaker and the listening position can be
employed to mitigate this effect, but that may not be enough. In some cases,
household factors may prevent loudspeaker placement from even being an
option. In such cases, the use of parametric equalization can be used to tame
room modes.
Parametric equalizers are not a new breed, and their use to address the
problems associated with room modes is not new either. The appearance of
single and multi- band parametric equalizers is starting to become common on
subwoofers. Some subwoofers, such as the Revel B15, come with PC software
that assists you in choosing the filter parameters on the subwoofer using
in-room measurements with an SPL meter. In most cases, the underlying
optimization process targets a flat-frequency response.
In creating the V4 algorithms, Lexicon has taken a different approach.
Instead of optimizing for a flat-frequency response, the focus is on
addressing the long decay time of room modes. [Incidentally, Meridian is the
only other company I am aware of that has taken a similar approach. Most
other solutions take the traditional approach of attempting to flatten the
low-frequency response.]
V4 measures and analyzes the room response. Problem
frequencies are identified and filter parameters (frequency, depth, and Q)
are automatically computed that would result in minimizing the decay time.
V4 uses four microphones to gather room data. The microphones can either be
grouped together at a single location or distributed across several seating
locations. The accompanying manual has good guidelines for microphone
placement. Data correlation is performed on data measured by each
microphone. This allows for identification of problem frequencies that
affect multiple locations. According to Lexicon, room modes with long decay
times can typically be identified at multiple locations. In addition, peaks
that show up in two or more microphones may not line up at the same
frequency. (According to Jim Muller, measurement errors are on the order of
a fraction of an Hz.) Measurements from multiple microphones can be used to
come up with a good estimate of the center frequency. Note that the
measurements from the different microphones are never averaged. The averaged
response, particularly for the case where the microphones are spread out, is
not what you want to use. For example, if one microphone was positioned at a
null and another at a peak, the average would cancel the null and the peak.
|
Calculating Room Modes:
Resonant frequencies are a property of the room
dimensions. For a rectangular room, the resonant frequencies are
predictable. For such rooms, the following formula can be used to
compute the resonant frequency: 1130/2L. In this formula, 1130
is the speed of sound in air in feet/second, and L is the room length
in feet. What you get here is the fundamental resonant frequency (or
mode). Room modes also occur at integer multiples of this frequency
(harmonics). Since a room has three dimensions, the modes
corresponding to the room width and height can be computed similarly.
The union of these modes is called axial modes.
You can also download a room mode calculator by visiting the Harman
website.
http://www.harman.com/wp/index.jsp?articleId=131 |
V4 Algorithm
V4 correction is not limited to attenuating peaks. Some controlled boosting
of broad dips is performed as well. A two-pass approach is used to identify
and correct the peaks and dips.
The first-pass identifies room modes with a long decay time. Appropriate
correction filters that would minimize the decay time are computed. The
second-pass starts by applying the computed filters to the data. A smoothing
filter is then applied to the data. The smoothing (a low-pass filtering
step) removes small fluctuations (narrow peaks/dips which manifest as
high-frequencies). Broad dips or a peak that is unrelated to a resonance, if
present, escape this filtering, and they can still be identified and
corrected for.
Two types of response dips are corrected for. A dip could result from the
overlap of two filters in the case where two room modes are in close
proximity. Applying a boost here simply corrects the hole created by the
overlap of these filters. A second type of dip is one that actually exists
at the seating location(s). In this case, some controlled boosting, up to a
limit of 6 dB, is applied. Note that the algorithm does not know if it is
boosting a NULL. This should not be a problem however, since a narrowband
dip will disappear after applying smoothing to the data.
The correctable frequency range for both “peak” and “dip” correction spans
from 20 Hz -250 Hz. The upper limit of 250 Hz was picked because of its
wavelength. (The wavelengths at 20 Hz and 250 Hz are 56.5 feet and 4.5 feet
respectively.) According to Jim Muller, above 250 Hz the wavelengths become
so short that room resonance modes merge together to be indistinguishable.
The short wavelength would also require a different correction from seat to
seat. If you were to correct for frequencies that are in the 5 kHz - 10 kHz
region, the wavelength is so short (on the order of inches) that even head
movement in a given seat would yield response fluctuations! Frequencies
above 250 Hz are best dealt with through the use of acoustic absorption
materials like foam or fiberglass. V4 wisely leaves this range untouched.
The notch filters used to minimize the decay time of room modes take bass
energy out of the system. The filter cuts vary as a function of the Room EQ
setting; the more aggressive the setting, the greater the cut. To keep the
perception of the amount of bass constant despite changing Room EQ settings,
V4 applies a “Bass boost” using a 120 Hz low-pass shelf filter. The computed
boost value is a function of the amount of bass energy taken out by all the
notch filters, and it scales with the Room EQ setting. The boost is applied
to all the channels, and one of the seven available filters is reserved for
this.
An interesting tidbit I learned while talking to Jim Muller is that a
mechanism intended to add bass when Room EQ was on was un-intentionally left
on when it was turned off. The effect is that when Room EQ is turned off,
one might feel that there is more bass with V4 than with previous versions.
If you perceive this to be the case, now you know why. Lexicon will probably
fix this in a future firmware update.
Bass Management – A Side Note
The MC-12 has some unique bass management capabilities. It is different
enough from other SSPs that I thought it might be useful to go into some of
the details.
The MC-12 has three subwoofer output jacks: LFE, and Subwoofer Left/Right. The
distinction between the LFE and the Subwoofer L/R outputs is that former
output is strictly a pass-through of the LFE channel in the source data.
This output has no bass management. If the LFE track is absent in the source
data, nothing is routed to this output.
If any bass management is enabled, then the Subwoofer L/R outputs are what
you want to use. These outputs can be configured in either mono or stereo
mode. In mono mode, these outputs behave like the subwoofer output(s) on
other SSPs. The LFE channel, if present, is combined with the output from
the other channels, and the sum is low-passed at the lowest crossover
frequency that is set for the main, center, and surrounds. In stereo mode,
however, the left subwoofer receives low-frequencies from the center and
front/surround left channels. The right subwoofer similarly receives its low
frequencies from the center and front/surround right channels. The LFE
channel is directed to both subwoofers, and the sum is low-passed in the same
manner as the mono configuration.
Confusing? Perhaps, so let us consider an example where the center and
surround speakers use a crossover setting of 60 Hz and the front L/R
speakers use a crossover setting of 40 Hz. The subwoofers are configured for
mono operation. Incidentally, these are the MC-12's factory-default crossover
settings. What happens in this case? Frequencies between 40 Hz - 60 Hz from the
surround and center speakers are routed to the L/R speakers. The lower
frequencies are combined with the LFE channel, and the sum is low-passed at
40 Hz; this is what gets directed to the Subwoofer L/R outputs.
What happens
to any LFE content above 40 Hz? It gets truncated! The MC-12 manual
recommends that, “For each output, select the crossover setting closest to
the low-frequency rating of the corresponding speaker. For SUBWOOFER L/R
output, select the crossover setting that matches the lowest setting of the
other speakers in the system.” As you can see from the example above,
setting the crossover too low will result in the loss of information that
may be present in the LFE channel. When I talked to Jim Muller about this, he
told me that prior to V3, the LFE channel was added to the subwoofer L/R
output downstream of the crossover. In the earlier versions, there would have
been no truncation in the LFE channel (this may explain the choice of the
factory-default settings). Note that this was against the Dolby
specification, so it has been changed. In case you are wondering about the
reasoning behind Dolby's specification, read the following feature article
published in Secrets:
Miscellaneous Ramblings on Subwoofer Crossover Frequencies. My
recommendation would be to use a crossover setting of 80 Hz for all the
loudspeakers, relegating sub-80Hz reproduction to the subwoofer(s).
“Modes.exe”
V4 will correct for problems that it can measure no matter where your seat
or loudspeakers are located. However, if you are seated in a null, or the
subwoofer's location is such that it produces a fairly uneven frequency
response at the listening position, you will certainly limit the
effectiveness of V4. Multiplying by zero, for example, always results in
zero! It is imperative, therefore, that the “initial condition” be good
before you try running V4. Finding good loudspeaker/listening positions is a
non-trivial task, and given the weight of subwoofers, trying several
different locations can be a back-breaking exercise. This is where a program
that can predict in-room frequency response can be handy.
During the course of this review, I was having a conversation with Jim Muller
about how certain subwoofer locations were not working well with V4. He
offered to send me a program that he had written that predicted in-room
frequency response. Unlike some other programs I had used previously, this
one predicted a response that correlated very well with in-room steady state
measurements.
Below is the program's result for when the subwoofers are located at each
end of the front-wall. As can be seen, there is a big hole between 32 and 80
Hz. V4 will correct the peaks that result in large decay times (the big peak
at 32 Hz, for example, corresponds to a room mode, and it will get notched)
and fill in a few holes, but the imbalance in the frequency response will
remain.

Predicted room response when subwoofers are located in the
front corner
Moving the subwoofers along the side wall by about 10 feet yields the
response shown below. Now this is a whole lot better, and the big hole is
filled. This is a position that V4 can be far more effective with.

Predicted room response when subwoofer are located along
the side wall
Jim Muller has allowed us to post this program for
download. If you are looking to find a good location for your subwoofer or
full-range loudspeakers,
download the program and give it a try. It only works for
rectangular rooms though.
Installation
The V4 upgrade kit comes with a card and a CD containing new firmware.
Installing the card is no different from installing a PCI card in a
computer: opening the unit, sliding the card into the empty slot indicated
in the instructions, tightening a screw, and then closing the unit.
Similarly, installing the firmware is much like installing a driver from a
CD that accompanied the newly installed hardware. Only for the MC-12, the
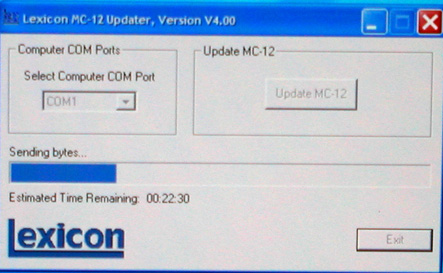
firmware is downloaded from a computer over a serial cable.


The firmware update takes about 30+ minutes. Make sure that if you are using
a laptop, that the batteries are charged or that it is plugged into an AC
outlet. I used my laptop, and somewhere along the way the batteries died.
Luckily this did not leave the MC-12 in an unrecoverable state. Power cycling
the unit placed it in a “Waiting for Download” state and allowed the data
transfer to restart.
I have read some reports where people had trouble updating the firmware. I
did not run into this issue. The only problem I ran into was that after the
update completed, the MC-12 rebooted after which it went into a hung state.
Remedying this situation required resetting the unit. If you have not reset
the unit before, here is what you need to do: push the Standby button
before turning the power on, and hold it down for a few seconds after
turning the power on. Note that this step erases all the settings in the
MC-12, so back up your settings using the MC-12 configuration
tool before starting the upgrade. Here is a tool that you can use to save
the settings:
http://www.lexicon.com/products/download-details.asp?ID=1&FileID=80.
User Interface
The design of the MC-12's user interface has been exceptionally intuitive
from the very beginning. One might expect that upgrading to a complex new
version such as V4 would introduce some wrinkles in its simplicity, but this
is not so. The user interface masks the complexities of the V4 algorithms
with simplicity. All that is required (in addition to the MC-12 V4 upgrade
card) is the microphone kit. You select “Room EQ” from the menu, and the
MC-12 cycles through test tones for the configured speakers and computes the
corrections, and then you are done. The whole process is self-contained,
requiring no interaction with a PC. You even get 10 seconds to leave the
room if you want to escape before the test tones begin. The correction
process takes about 10 minutes.
Once the corrections have been computed, there are several options that
control the amount of correction that is applied. The options are: LOW,
MEDIUM, HIGH, or MAXIMUM, with MEDIUM being the default. In addition, Room EQ
can be turned on or off to judge its effect. Simple!
Impressions
The Blue Man Group DVD was the first disc I used to test the V4 upgrade.
There is ample low-bass content in this composition to excite the room
modes, which always make their presence felt (“Rods and Cones”, “Club
Nowhere”, and “Drumbone” are some of my favorite tracks). Bass notes prior to
the upgrade sounded somewhat muddy or bloated; a note would linger long
enough to blend with a subsequent note, resulting in overlap where none
should have existed. Following the upgrade, this overhang was largely
reduced, resulting in bass that was taut and punchy.
Cycling through the various Room EQ settings, I found the Medium (the
default setting) and High settings to produce the best results. The “Low”
setting did not go far enough, while the “Max” setting went too far. With
the “Medium” setting, some residual boom was still audible. With some
recordings, the “Medium” setting only produced a subtle improvement. Bass
articulation was best with the “High” setting engaged, and this is what I
tended to use most of the time.
Included with the upgrade is a CD containing various thump tones and sweep
tones. There is a nice insert that describes each track on the CD and what
improvements one might hear by turning Room EQ on and off and varying the
Room EQ level. I did find these tracks to be useful in demonstrating the
effectiveness of V4. Listening to the sweep tones for example, I could hear
the effect of the notch filters on the frequency response.
Some selections that I used to judge the effect of V4 were: The DTS releases
of The Complex by the Blue Man Group and Volume Two of their music
sampler. Other samples included Telarc's The Big Picture, The Great
Fantasy-Adventure Album, and Tchaikovsky: 1812 Overture, all featuring
Erich Kunzel and the Cincinnati Symphony Orchestra. With these and other
selections, I felt that V4 added a level of sophistication to the
low-frequencies that was consistent with my initial perception. Furthermore,
the improvements in the bass resulted in a perceived improvement in the
clarity of the midrange as well. The system as a whole sounded more refined
and detailed.
I ran into an operational quirk while listening to The Complex disc. I had
the “Audio Controls” menu open, so that I could turn Room EQ on and off. If
I skipped forward to the next track, several seconds would transpire before
I would hear any sound. If I toggled between the on/off settings or exited
the menu, the sound returned. I ran across the same issue when listening to
a DTS sampler. What was common between both discs was the playback format:
DTS 96/24. I did not run into this issue if the menu was not open.
With V4 I found an elevation in the mid-bass. Drums, for example, tended to
have a bit more punch with Room EQ. The elevation either came from a filter
correcting a dip, or it came from the application of bass boost. My guess is
that it was the latter. In any case, the reproduction with Room EQ turned on
had fuller bass, and it sounded better.
The amount of elevation changed with
the Room EQ setting – the depth of the correction filters and the amount of
bass boost change as a function of the Room EQ setting. At times where I
wished to lower this elevation, I switched over to using the “Medium”
setting. If the elevation did indeed come from the application of bass
boost, then it would have been nice if there were a knob to control the bass
boost level independent of the Room EQ setting.
RFEs'
The first release of Room EQ certainly meets it goals of correcting the
problem with room modes while keeping the process involved simple. What I
missed was the ability to tinker with some of the settings, and as such
would have liked to see some kind of advanced menu that would make this
possible. I certainly hope that something along these lines is in the works
for a future release. In-room measurements are indispensable, and I feel
that there is potential in extending the use of this system to determine
optimized locations for the loudspeaker and listener. So here is a wish list
of some future improvements that come to mind:
1. Multiple EQ configurations
a. Allow Room EQ optimization for a single seat versus multiple seats and be
able to switch between them. This can be done right now by saving different
configurations on the PC and downloading them over the serial port. This
process is a little cumbersome, however.
b. Determine some evaluation criteria that could be used to rate two
different Room EQ settings. This could be useful when trying to determine
loudspeaker/seating locations. One could try several different positions and
then pick the one with the best rating.
2. Bass Boost
a. The boost level is tied to the aggressiveness of the correction setting
(Low, Medium, etc.). The higher the correction, the higher the boost. It
might be nice to have boost settings that are independent of the Room EQ
setting.
b. A low-pass shelf filter set at 120 Hz is applied to all channels. The
frequency corresponds to the upper-limit of the LFE channel, which is
probably why it was picked. It would be interesting to see the effect of
lowering this to match the subwoofer crossover frequency.
3. Broad dips can be boosted by up to 6 dB. Depending on competency of the
partnering amplifier, this may or may not present a problem. In the event
that boosting a broad dip drives the amplifier into clipping, the ability to
limit the boost would be useful.
4. The “Modes” program
a. Allow a bounding box within which the program searches to find the
optimal subwoofer location.
b. Apply a simulation of V4 to the predicted response and display before and
after results.
Conclusions
Audiophiles are always looking for ways to improve the sound of their
system. In the realm of improvements to low-frequency reproduction, one might
buy one or more subwoofers; one might then optimize the subwoofer location.
At some point, one has to counter the residual effect of room modes, and this
is where V4 shines. V4 allows you to take the low-frequency performance of
your system to the next level, and it does so with a setup process that is
both quick and simple.
The only downside of this upgrade is its cost. Several receivers offering
room equalization are now on the market, some costing less than the price of
this upgrade alone. I doubt, however, that many will offer the
sophistication, precision and ease-of-use like the MC-12, which is what you
are paying for. The high price of admission will limit its reach, however. I
hope we will see this technology trickle down to the other Lexicon
processors over time. Certainly, cost will be an issue, but it might be
possible to have a less “grand” implementation that at least tames the
sub-80 Hz response on the subwoofer output, which is where the worst
offenders are likely to be.
I have really enjoyed music and movies with the V4 upgrade for some time
now. When I turn Room EQ off, I miss the refinements that it provides. V4
makes notable improvements to the low-frequency response of a system, adding
to what was already an outstanding processor. For the individual whose
budget can accommodate the price, the MC-12 V4 makes for an easy
recommendation.
[I would like to thank Jim Muller for taking the time to answer my
questions and to give me an overview of the V4 algorithm. Here is his bio:
Senior Software Engineer at Lexicon, been here for 8
years, developed the self-calibration features of MC12 V3, prior to that
worked on reverb and other music effects products. Academic credentials:
Ph.D Geophysics MIT 1983, BS Physics VaTech 1971. taught public school prior
to grad school. Since grad school have worked in sonar, mini-super
computers, taught programming (mostly C, C++) and computer management
(mostly UNIX) to businesses. Also working musician since 1979.]
- Sumit Chawla -
Associated Equipment:
DVD/CD playback: Panasonic RP-91
Amplifier: Proceed AMP5
Loudspeakers: Revel Ultima Studio/Voice, Performa S30; Canton CD 300, CD
360F
Subwoofers: SVS CS-Ultra pair; Canton ASD 250 SC pair
Cables: BetterCables/Monster interconnects/speaker cables
Power: P600 Power Plant
Room: ASC Cinema Panels, ASC Iso-Wall
Terms and Conditions of Use
|

