Introduction
When I bought my Sony 10HT projector, which boasted
three 16:9 LCD panels and 1366x768 resolution, it had already come down in
price from about $7,000 to $5,000.
That was a few years ago. Since then, many
three-panel LCD digital projectors have come and gone from the market. They
have had all sorts of problems: not enough contrast, not enough brightness,
screen door effect (SDE), etc. All of the problems have been mitigated to
varying degrees over the years.
Sanyo has had their share of projectors on the
market, including the
PLV-70 and
Z1, which we reviewed.
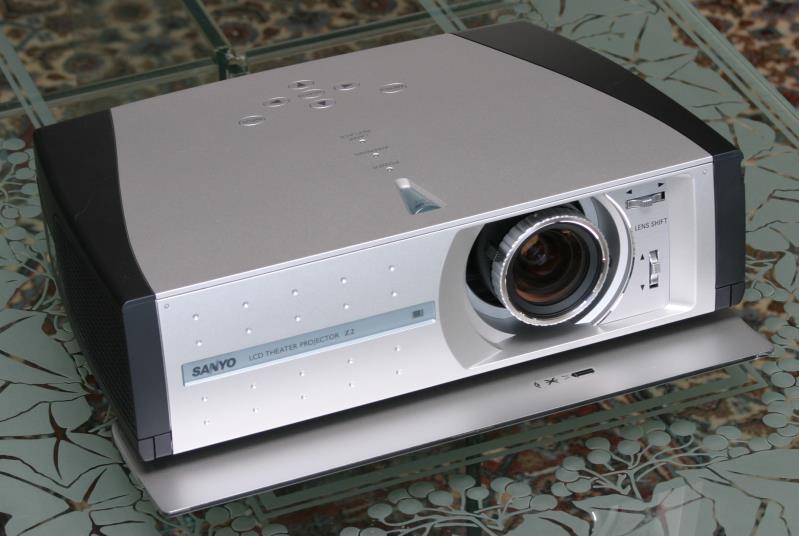
The new Sanyo Z2 differs from the Z1 in that it has
higher resolution, capable of full 720p. Like its brother, the Z2 has
lens shift, which means you can move the image up or down, or left and
right, without moving the projector itself. This works by moving the lens
horizontally in relation to the LCD panels (different from focus where the
lens moves away from or towards the panels). We have tested several
projectors with lens shift, and I am now sold on this feature, as it makes
it so much easier to get the image in just the right spot on the screen
without having to move the body of the projector just a little bit. It also
makes it easier to center the image if you have to put the projector off to
one side of the screen axis.
The Z2, although having high resolution, lens shift,
and good brightness, is less than 10 pounds in weight, and is very compact. It
lists for $2,999 but can be had for less than $2,000. It has more features
and is less than half the price of my Sony 10HT.
Does it perform? Read on.
Features
The Z2 has a plethora of features. I have already
mentioned the lens shift. A photo of the lens is shown below. Focus is
accomplished by rotating the outer silver ring. It can be zoomed by moving the slider pointed out
by the yellow arrow. There is also an iris control slider at the right edge
of the lens. This can be used to lower the brightness without changing the
brightness of the bulb. Iris controls do not significantly affect contrast
on LCD projectors, but will affect it with DLP projectors. To the right of the lens are the lens shift controls.

But there's more.
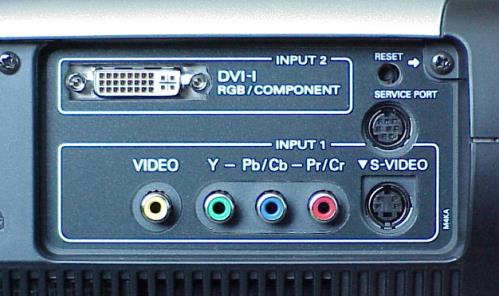
Besides the requisite composite video and component
video inputs, there is DVI-I with HDCP. This is very important since sources
are now arriving with DVI output jacks. Without that DVI input, you could
not send a digital video signal to the projector. HDMI will soon overtake
DVI, but you can get DVI-HDMI adapters. There is no adapter to get the
digital video signal into the projector without at least a DVI jack. The Z2
has one. The VGA computer jack that is on the Z1, has been eliminated from
the Z2. The DVI jack is the replacement.
Remote Control
The remote control is full featured, and is backlit
using a button on the side. The Lamp Mode button on the remote alters the
bulb output. If you tweak the projector using a CC red filter, you will want
to use the projector in its brightest setting.
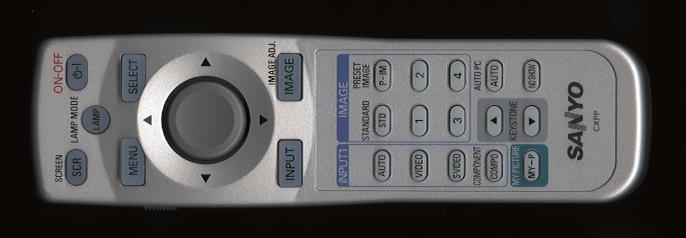
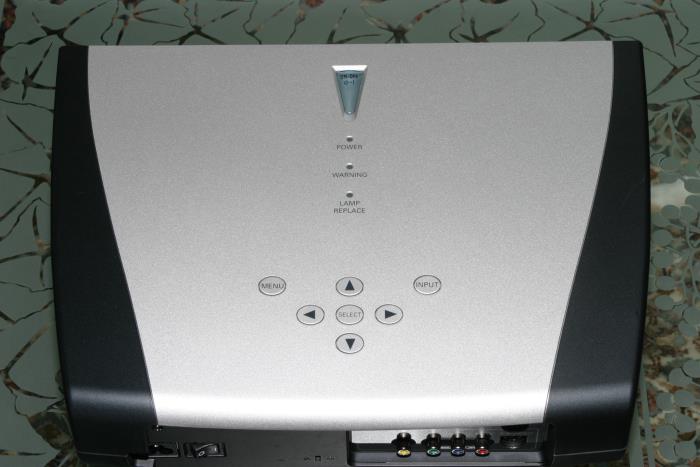
Many of the controls on the remote are duplicated on
the top of the projector.
User Menu System
The menu system of the Z2 is easy to use. Pressing
the Menu button on the remote sends you to several menus. The first one,
shown below, lets you assign the inputs.

Pressing the right arrow on the circular
dial of the remote, takes you to the page where you can select the type of
source you want assigned to that input. In this case, it is assigned to RGB(AV HDCP) which could be a DVD player with DVI output.

There is also S-Video, which we used for the bench
tests, and composite video. In this case, we selected S-Video for the other
input.

The next menu lets you choose some basic parameters,
such as the language of the on-screen display, background color, keystone,
etc.

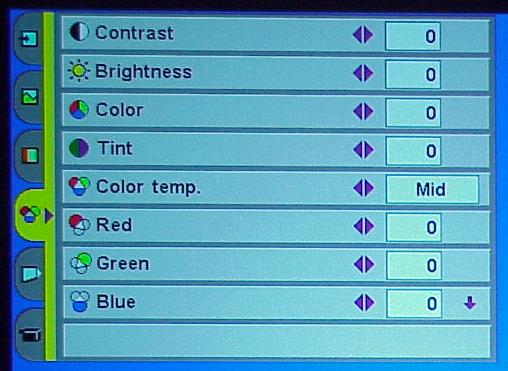
In this menu, you can change the contrast, brightness, color temperature,
and the primary colors.
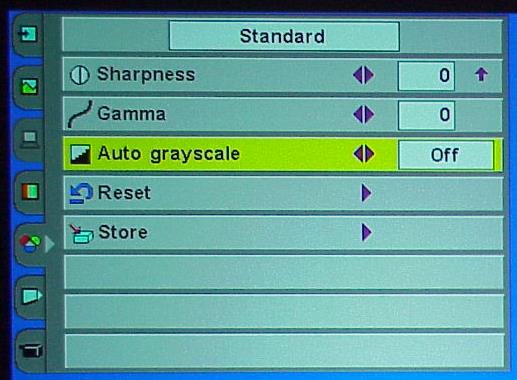
Then comes the menu for sharpness, gamma, grayscale,
etc.
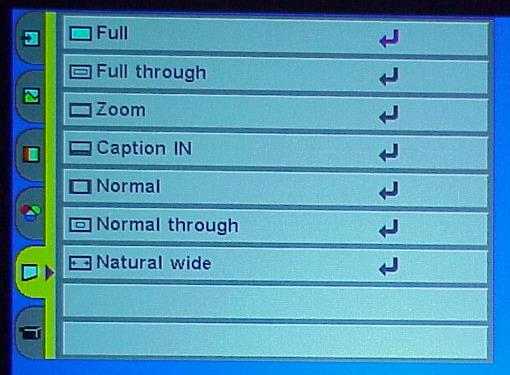
You can choose from various formats to display the
image. Sometimes it is hard to tell just by looking at the names which one
works best. You just have to try them out.
Here is where you can store settings for the image
parameters depending on what you are watching.

Click Here to Go to
Part II - Measurements and Viewing