
Most cinema-oriented models have too much input lag making fast-paced games difficult to play. But BenQ’s HT2150ST fixes that issue and offers cinema-quality images thanks to an accurate sRGB color gamut, ISF modes, 3D and bright output making it suitable for multi-use rooms with some ambient light or a dedicated theater with full darkness control.

BenQ HT2150ST DLP Projector
- Single-chip DLP projector with short-throw lens
- Low input lag for gaming
- ISF Day & Night modes
- Accurate color without calibration
- 3D support
- Bright 2200-lumen output
- Built-in stereo speakers
- Includes carry bag
Today I’ll be using a word for the first time in a projector review, “gaming.” BenQ markets the HT2150ST as a gaming projector even though its HT designation stands for home theater. In that vein it is closely related to the HT6050 I reviewed recently. This projector is smaller in size, gives up THX-certification, lens shift and is designed for a short-throw setup.
Light engine:
Single-chip DLP
Color wheel:
RGBRGB, 6x @ 50Hz, 4x @ 60Hz
Native aspect ratio:
16:9
Native resolution:
1920 x 1080
3D:
yes, frame-sequential, top/bottom, side-by-side
Throw ratio:
.69-.83
Anamorphic lens support:
No
Image size:
60-180”
Lens shift:
No
Lens offset:
102.5%
Light output (mfr):
2200 lumens
Inputs:
1 x HDMI 1.4, 1 x HDMI 1.4 w/MHL, 1 x VGA
Audio:
Speakers – 2 x 10w, 3.5mm in/out jacks
Control:
1 x RS-232, 1 x 12v trigger
Lamp power:
240w
Rated lamp life:
3500hrs Normal, 5000hrs Eco, 7000hrs SmartEco
Dimensions:
4.8” H x 14.9” W x 10.9" D
Weight:
7.9lbs
Warranty:
1 year / 180 days lamp
MSRP:
$999
Company:
SECRETS Tags:
BenQ, BenQ HT2150ST DLP Gaming Projector, DLP, DLP Projector, ISF, 3D Projector, Projector Reviews, Projector 2016 Reviews
Performance-wise, the HT2150ST offers the same accurate color, ISF modes and supreme calibration flexibility of its more-expensive stablemate. The ST in its name indicates that it can project a large image from a short distance, say from a coffee table to a wall in the typical living room. While not strictly a portable model, it does ship with a nice soft carry bag and it sports built-in stereo speakers.
Secrets Sponsor
Gamers and home theater enthusiasts will want to check out this DLP which costs a mere $999. Considering what’s in the package, this price borders on astounding. Knowing what I do of BenQ’s quality, this might be one of the best projector values going. The spec sheet is certainly impressive. Will it measure up to its claims? Let’s take a look.
The HT2150ST uses a single Texas Instruments DLP chip with a native resolution of 1920×1080 pixels. The color wheel spins at 4x speed at 60Hz and 6x at 50Hz. It has six segments in a RGBRGB configuration. That should make it nearly immune to the rainbow effect seen by a small percentage of users. I saw not the slightest hint of this artifact during my testing and viewing.

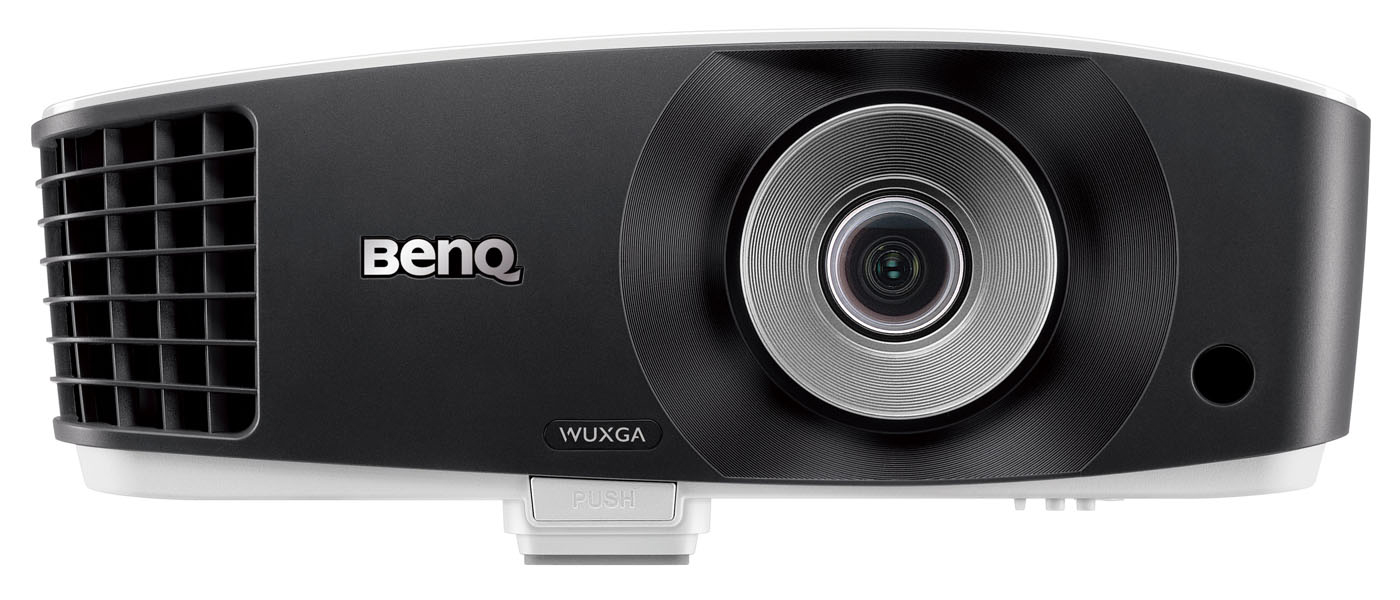
The lens is mounted a little off-center and surrounded by a red trim ring. This styling cue suggests its gaming focus and it’s something you’ll see on BenQ’s computer monitors as well. Upon closer inspection, you’ll notice the lens’ front element is spherical. That is what allows it to throw such a large image from a short distance. In my theater, I filled a 92-inch diagonal screen from only 66-inches away. There is a slight barrel distortion on all sides but this is easily hidden by zooming the image into the screen frame. Even if you use a wall, it’s barely noticeable. I saw a bit of light leakage from the front vent as well as the side grills. The image offset is 102.5% which means you’ll have to place the HT2150ST slightly below or slightly above the edge plane of your screen.

Just atop the lens, behind a small sliding door, are the focus and zoom adjustments. They are mechanical and move with high-end precision. The zoom range is small but useful and I was able to achieve excellent focus from edge-to-edge. The door is necessary because light is purposely leaked into the cavity to illuminate the controls. That makes it easy to adjust image geometry in the dark. The optics are far better than one would expect in such an inexpensive projector. Also here are basic menu controls for easy installation without the remote.


The input panel is simple and efficient. Two HDMI inputs are provided, one of which supports MHL for mobile devices. This port can charge your phone or tablet and connects with a HDMI-to-micro-USB cable which is not included. Analog video is supported with a VGA input. If you need RCA component, a breakout cable will be required. An RS-232 port and a 12v trigger provide control system options. On the right are two 3.5mm audio jacks, one in and one out. Inputs feed the internal 10-watt stereo speakers and the output takes the sound from your HDMI feed and sends it to an external system.
At first glance one might think the remote is too small but it’s actually an ideal size and it sports a backlight and just the right array of keys to make setup and operation a snap. At the top are discrete power keys and a backlight activator. 3D controls are next followed by menu navigation. Next are transport keys for HDMI-CEC-compatible devices. Below that are direct-access buttons for color management and color temp fine tuning. You also get gamma, picture mode, brightness and contrast making it possible to calibrate the HT2150ST without using the OSD at all! The wand is super-responsive and the buttons click like a much more expensive unit. I’m starting to wonder if the $1000 price-tag is a typo.
The projector also includes 3D compatibility for frame-pack, top/bottom and side-by-side formats. 2D to 3D conversion is not supported. Glasses are not included but you can use any DLP-Link-compatible units. I used a pair from XpanD for this review. BenQ offers a trim-looking pair for $59 online. BenQ also offers a wireless box that allows cable-free installations up to 100 feet from the video source.
Secrets Sponsor
The OSD starts out in Basic mode which features two screens, a side-bar style window and a larger section with more options.

Here you can change picture modes, control audio and 3D options and toggle the Fast Mode which reduces input lag for gaming. Selecting Settings at the bottom takes you to more features like wall color compensation, audio source, projector position, HDMI range, test patterns and signal info. You can also reset all options to their defaults. The important feature here is right in the middle, Menu Type. That will take you to the HT2150ST’s full menu.

The full OSD is a tabbed window just like the one I saw on the HT6050. The first screen has all the calibration controls. Two-point grayscale, gamma and color management are found in the Advanced section. Lamp Power can be Normal (brightest), Eco and SmartEco. In the latter mode, brightness is varied according to content. It provides a little more peak output than Eco, greater contrast and longer lamp life.
I measured the different image presets and settled on Cinema as the best one to use without calibration and the best starting point for adjustment. Any mode can be calibrated and there is a user memory that can use one of the presets as a basis. There are also ISF Day and Night modes but you’ll need to hire a certified calibrator to unlock them. They don’t offer additional performance, only extra settings memories. It should be noted that RGB and YPbPr signals must be calibrated separately. You can also set up a custom 3D calibration if you have a 3D pattern source.
Other menu items you’ll need are found in the Display and System Setup sections. There is a wall color compensator that has four options, light yellow, pink(!), light green or blue. I couldn’t test them but if you’re forced to watch a movie in a pink room (shudder), BenQ has you covered.
In System Setup: Advanced section, you’ll find an HDMI Range control. Auto is the default and will clip below-black and above-white information with RGB signals and show the full range with YPbPr formats. If you want to see all levels in RGB mode, choose Full here. I preferred to clip and use the projector’s full dynamic range. Out-of-bounds content will show some loss of detail but ultimately, the greater contrast is a plus.
I often start my viewing commentary with a short comparison between DLP and LCD/LCoS technologies. Both achieve the same goals and both can look amazing. But I am often asked how they are different in appearance. And I usually come up with some sort of esoteric explanation. When watching Blu-rays on the HT2150ST however, a couple of terms popped into my head that more clearly explain what I see when I compare the two.
My reference projector is an LCoS model, the Anthem LTX-500 which is a re-badged JVC RS20 from 2009. It has tremendous native contrast and a super-tight pixel gap. It gives the image an organic look that is completely film-like. And when I say that, I mean film – as in shot on. I realize most modern movies are captured digitally and that’s where DLP has an advantage. If you watch enough Blu-rays on a good projector, you’ll be able to tell the difference between digital and film elements. Sometimes both are used in the same title. DLP is inherently sharper, assuming the lens is of sufficient quality, but has a slightly larger pixel gap. Hence to me, it looks more digital. The representation is true and accurate but doesn’t always offer the tactility I see on the best LCoS displays.
Among all the DLPs I’ve watched, the HT2150ST is one of the best. It has a superb lens and a clear bright picture, and more than enough output to work equally well in a completely dark room or one with some ambient lighting.

To test its prowess with classic film content, I went all the way back to 1962’s To Kill A Mockingbird. This film is the pinnacle of the black & white art form with a depth and warmth that reminds me of an Ansel Adams photograph. Imagine if it could be converted for HDR?! There is a bit of grain but it wouldn’t be the same without that element. The BenQ had no trouble showing me deep contrast and superb clarity.
I experimented a bit with the lamp options and settled on SmartEco as my favorite. It bumps output somewhat and initially I thought it was clipping whites but clicking the gamma preset from 2.3 to 2.4 took care of that and made the blacks richer and more detailed in the process.
Moving on to Gravity, I wanted to see how it handled the darkness of space. Thanks to the HT2150ST’s superb intra-image contrast, stars and objects popped against a very black-looking background. The extra picture brightness delivered the perception of high contrast even though the projector is not capable of the super-low black levels seen in many LCoS and LCD displays. I enjoyed this film every bit as much here as on my reference setup.

Mockingjay uses lots of monochromatic tints to achieve its cold dreary atmosphere. There are some warmer colors seen in the sewer scenes which held up nicely despite the not-quite-black background. Outdoor content looked amazing with plenty of depth and detail despite an overall green or blue hue. The image never went flat or drab. Highlights popped nicely and were never obscured. Here the gamma worked better at its 2.3 setting. It’s fortunate that there is a gamma key on the remote, it makes changes easy.
I recently reviewed the Blu-ray of X-Men: Apocalypse so in the player it went for a second viewing. Though shot entirely on digital cameras, the film-makers manage to retain a more organic look that brings extra life and interest to the image. Color is used without restraint at times and it looked fantastic here. The projector’s high brightness once again made it a joy to watch.

By the time I get to my viewing tests, I’ve completed the benchmark tests and calibration of every display I review. I therefore had low expectations for the HT2150ST’s 3D performance given that I only measured 5fL peak output in the 3D mode. Luckily, watching actual content turned into a happy surprise. Going through both Star Trek Into Darkness and Avatar proved that you don’t always need high output for good 3D. While a brighter picture would certainly be welcome, the projector had no trouble producing a superb effect with plenty of detail, rich color and excellent contrast. It also provides enough clarity to tell the difference between a film that’ been converted to 3D (Star Trek) versus one that’s been shot in the format (Avatar).
I was pleased to see that additional calibration was not necessary in the 3D mode. Although you can create custom settings, the adjustments I made in 2D Cinema worked just fine. The only change I made was to dial the gamma preset back to 2.2. The extra brightness definitely helped. Color however is spot-on. Though 3D has become something of a passing fad, most projectors still include the feature. I think if it’s there, it should be done well. Obviously BenQ agrees.
All grayscale, gamma and chroma readings are taken from the projector’s lens using an X-Rite i1Pro with the diffuser attachment. Contrast tests are performed with a Spectracal C6 tri-stimulus meter pointed at the center of the screen from 12 feet away. This method provides an accurate picture of the contrast performance seen in a typical viewing environment.
My reference screen is a Stewart Filmscreen LuminEsse fixed-frame system configured with StudioTek 130 material. It has a gain of 1.3 and is 92 inches diagonal in size. Patterns come from an Accupel DVG-5000 signal generator and the whole procedure is controlled by CalMAN version 5. Color standards are Rec.709 and Rec.2020, both with a white point of 6500 Kelvins. Gamma is compared to the BT.1886 spec or the 2.2 power function where appropriate.
The HT2150ST ships in its Game picture mode which looks good to the eye but after making a few measurements, Cinema emerged as the best starting point for calibration. And it’ll work well for those who don’t choose to or have the means to make instrumented adjustments.

Aside from a barely-perceptible green tint, this is a pretty good chart. Gamma runs a tad light with a dip at 90-percent brightness, but that a minor flaw. Remember, this is a $1000 projector. Yet its out-of-box performance exceeds that of many more expensive displays. Since a full suite of calibration controls are available, let’s see how much improvement is possible.

My favorite thing here is the precise gamma control. Most projectors have presets in .2 increments which means it’s hard to hit 2.2 exactly. The HT2150ST offers .1 resolution between 2.0 and 2.4 which is the most-commonly seen range in the vast majority of content, both gaming and video. It allowed me to nail 2.2 almost right on the nose. This helps with color saturation tracking as you’ll see below. Grayscale is now completely below the visible error threshold. I’ve never seen performance this good in a $1000 projector.
Regardless of picture mode or calibration status, the HT2150ST has slightly under-saturated red and green primaries. The error is very small but it can’t be corrected with the display’s color management system. Let’s see how the tests shake out.

Like the grayscale result, this chart shows a projector that can be enjoyed without calibration. But you’ll want those adjustments to unlock its full potential. Under-saturated primaries track properly thanks to gamma that is very linear from bottom to top. Gamut luminance falls off as the image brightens but that’s something we can fix in the CMS. Overall errors aren’t too visible but there is room for improvement.

The 100-percent saturation points are unchanged but now, the 20-80% targets show a little over-saturation which is a good thing. That makes the picture more vivid and bright despite the HT2150ST’s relatively moderate contrast. After working with the CMS, luminance levels are almost perfect which translates to a natural and accurate color balance.
The HT2150ST qualifies as a high-output projector. Gamers won’t necessarily want to play in total darkness and this display can throw a good image with moderate lighting present.
In the calibrated Cinema mode, with the bulb set to its Eco power level, I recorded 46.2315fL peak, .0216 black and a contrast ratio of 2144.6. This is a native measurement though there is no auto-iris to increase perceived dynamic range here.
The highest output is found in the Bright mode which also displays a distinct green cast. On the surface this might be interpreted as a bad thing but in a room with lots of harsh lighting like a bar, this color cast can be offset by the environment. Here the max white level is 89.6586fL, the black level is .0061 and the contrast ratio is 14,779.3:1. That extra range is due to gamma manipulation which is unsuitable for home theater applications but just fine when you want to leave the lights on.
The SmartEco bulb mode throttles output to extend contrast and bulb life simultaneously. In calibrated Cinema mode I measured 65.1874fL peak, .0198fL black and 3294.1:1 contrast. This mode works reasonably well in the dark though extended viewing might cause some fatigue. Ultimately, I settled on Cinema/Eco for my viewing tests.

With the proliferation of streamed content and Ultra HD Blu-ray players that only output component video, a display’s video processing quality is more important today than ever. The HT2150ST showed a distinct roll-off in resolution when fed 4:4:4 and 4:2:2 signals. For the best possible image, the RGB format should be used.
In the interlaced content benchmarks, the projector failed the 2:2 pulldown test but passed the others easily. It correctly handles 24p content from Blu-ray disc as well. It will only pass below-black and above-white content when HDMI Range is set to Full in the on-screen menu. At the Auto setting, it clipped those levels but if you want maximum contrast, you should leave it set to the default.
To test input lag, I used my pattern generator’s mute function to alternately flash a full-field, 100%-white pattern on and off. I filmed this action using a Casio Exilim camera which has a 1000fps video mode. When viewing the clip, I can step through frame-by-frame to determine when the pattern first appears after pressing the button on the generator’s remote. I can also count the number of frames it takes for the pattern to fill the screen. This tells us the actual input lag and the time it takes to fully draw a single frame. Obviously, each frame represents one millisecond.
I flashed the pattern five times and averaged the results. In the HT2150ST’s normal mode, I measured the screen draw time at 5ms and the total input lag at 64ms. The latter value represents the time from when the command is initiated until the first frame fully appears. Turning on the Fast Mode decreased lag to 41ms while the draw time remained at 5ms. Obviously the option makes a difference and seems to extract no sacrifice in brightness or image quality. Furthermore, these results are a bit faster than the average 60Hz computer monitor running at FHD resolution. They also handily beat any flat panel HDTV I’ve measured; impressive!
This test is somewhat unique and should not be compared to those conducted by other publications. It’s a more real-world example than other methods I’ve tried because it includes the effects of input devices like the mouse and keyboard, or a game controller.

THE BENQ HT2150ST DLP PROJECTOR Has Wrapped Serious Home Theater And Gaming Chops In A Portable-sized Package For Only $1000. This Is One Of The Best Values In Front Projection I’ve Seen To-date.
- Bright sharp picture
- Great lens
- Accurate color, grayscale and gamma
- Quiet fan
- Low input lag for gaming
- Great remote
- For a thousand bucks, I have no complaints
I’ve reviewed a fair number of projectors that boast superb price/performance ratios. There are plenty of portables and low-priced home theater models that will give more-expensive displays a run for their money. And even output is no longer a differentiator. It used to be that 40 or 50 foot-Lamberts would cost you five figures and require a projector the size of an economy car. Now one can spend $1000 and get that same performance in a projector small enough to fit in a shoulder bag.
The HT2150ST is billed as a gaming projector and obviously BenQ has taken the time and effort to reduce input lag and make it into a viable gaming display. I am now inspired to include input lag measurements in future reviews. But this projector truly shines as a home theater model. Where many portables cut a few corners, this one seems to have it all.
OK, there’s no lens shift. But performance-wise, there isn’t much difference between it and its more-expensive stablemate, the HT6050. If you need the flexibility of interchangeable lenses and THX certification, that flagship is a great choice. But for those just looking for the best possible portable projector, it’s hard to imagine something better than the HT2150ST. Accurate color, high output, low input lag, 3D and an included carry bag? How can BenQ sell it for only $999? At this price point, it receives my highest recommendation.