Introduction to the Affordable Anamorphic System
When I finally took the plunge into a projection setup in my home theater, the hardest decision I had to make was what aspect ratio to get for my screen. Everything that came after that, from the screen material to the projector, was dependent on that decision. For most people it is simple and they go with a standard 1.78:1, or 16:9, ratio for their screen, as that is the HDTV standard. Years of going to CEDIA and seeing these setups with massive anamorphic screens where cinemascope films fill the whole screen had led me to go down that road. Most films that I watched seemed to be 2.35:1 or greater, and I didn’t want the possibility of black bars to distract me.
All of the anamorphic setups at CEDIA are often incredibly expensive. They use automated masking screens from Stewart that can cost up to $50,000 alone, lenses from Panamorph and ISCO that also approach $10,000, and expensive projectors to drive those screens. None of this was close to falling inside my budget. Recently JVC and others had started to demo their projectors with lens memory on a Screen Innovations Black Diamond screen, which allowed them to fill the full 2.40:1 area of the screen automatically, but also hide the sides of the screen when watching 16:9 content. These worked well, but lens memory from the projectors can often be hard to setup, misalign, and requires a specific throw distance.
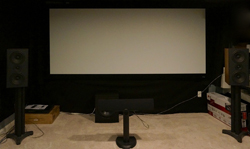
This year Panamorph announced their least expensive anamorphic lens, the CineVista. Now for $1,200 you can have an anamorphic lens for your system, and so the pieces for an affordable system had fallen into place. For this review I used a 122″, 2.40 Black Diamond 1.4 screen, the Panamorph CineVista lens, and the Sony VPL-HW50ES projector that won our award for the Best Projector of 2012. Would I finally be able to assemble the anamorphic system I wanted, and keep both kidneys?
AFFORDABLE ANAMORPHIC SYSTEM SPECIFICATIONS
Screen Innovations Black Diamond 4K Screen
- 2.40 Aspect Ratio
- 1.4 Gain
- 122″ Diagonal
- $3,699 MSRP
Screen Innovations Solar HD 4K Screen
- 2.40 Aspect Ratio
- 1.3 Gain
- 122″ Diagonal
- $2,349 MSRP
Panamorph CineVista Anamorphic Lens
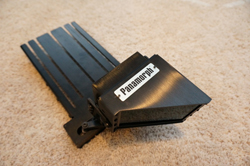
- Dimensions: 5.4″ L x 5″ W x 3.9″ H, 4.2 lbs.
- $1,195 for Lens with Bracket
- $1,494 for Lens with Mount
- Sony VPL-HW50ES
- $3,999
- Secrets Review: Sony VPL-HW50ES Projector
- SECRETS Tags: Sony, Projector, Anamorphic, System, Affordable, Video
Design and Setup of the Affordable Anamorphic System
For this review, all of the components play a specific role that is essential to the system, and all of them have their own set of benefits that are important to understand. The first item to look at is the Black Diamond screen. Known for its ambient light rejection, in the past four years Screen Innovations has gone from a company you saw at a couple booths at CEDIA to one that rivals Stewart in how many rooms they can fill. The BD 1.4 is a very dark screen, but still amplifies light coming from the projector while rejecting that from other directions. This makes it ideal for a room without perfect light control, or for throwing into a multi-purpose room where you may want a movie with the lights on. The dark surface is also ideal for our task here, as it virtually disappears in a dark room.
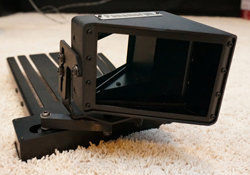
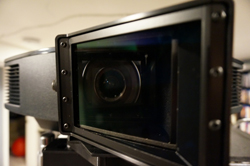
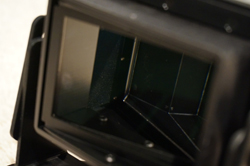
The CineVista from Panamorph is the least expensive anamorphic lens that they have offered, and the most affordable that I can recall seeing. Using a multi-optic lens, the CineVista horizontally expands the image 33%, taking what was a 16:9 image and turning it into just over a 21:9 image. Where the more expensive lens systems have motorized systems to move them in front of the projector and then out of the way, those mechanisms typically cost more themselves than the CineVista lens does. It is designed to be in place the whole time, using technology found in our projector, the Sony VPL-HW50ES.
The image quality of the Sony VPL-HW50ES is well documented from my prior review of it, but it has a few features that make it an ideal choice here as well. The first is that is has the two necessary anamorphic modes for the CineVista lens. There is a vertical stretch, where all the content is expanded to fill the letterboxing area. This would make people traditionally look very skinny, but our lens is going to stretch them out horizontally by 33% to correct for this. It also has a horizontal squeeze mode, to use with 16:9 content that has no letterboxing to correct for the anamorphic lens expansion.
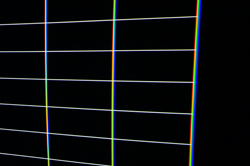
It also has the new electronic color correction (ECC) technology. One downside to the CineVista lens, and how they can his that price point, is that it introduces some color fringing at the extremes of the lens. Just like less expensive lenses on your DSLR camera have more chromatic aberration than the $25,000 Zeiss lenses do; a less expensive anamorphic lens will have more fringing than a top of the line model does. The ECC technology allows you to digitally correct for the color issues at dozens of points across the screen, virtually eliminating it. Here you see images with and without ECC configured.

Now with all of these pieces ready to go, it was time to assemble the system. The Black Diamond screen is unlike anything I had built before. My normal screen is a Screen Innovations SolarHD, which is very color neutral and designed for a totally dark room. The Black Diamond came sized for the same frame, but requires different connectors and so I had to start from scratch. The BD material is very heavy and is actually rigid, coming on a very large cylinder designed to enable shipping while preventing it from developing a kink. Your standard screen material this certainly is not.
Installing it required carefully laying it out and attaching a series of a few dozen bungee cords to the frame fasteners. Done slowly, with gloves, and taking care to not damage the material, this was done in just over an hour. Once it was attached, there was a protective layer to remove from the front, and then the Black Diamond screen was up on the wall. The dark color was certainly different than the stark white of the SolarHD.
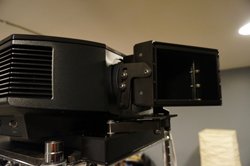
Attaching the Panamorph lens to the Sony projector was a much faster, 15-minute job. Once it was attached and positioned correctly, I turned on the electronic color control system to see how the image was. The center of the screen was very sharp, but the edges had a lot of chromatic fringing that got worse the closer you were to the edge. Using the pixel adjustments, in around 30 minutes I was able to clean up the grid to the point that only the very edges were noticeably fringing, but only if you were up close. As the Panamorph CineVista is designed to stay in place the whole time, once it was aligned correctly, I was done with the adjustment on it.
The Affordable Anamorphic System In Use
Once everything was in position, the last film left in my Blu-ray player was the reboot of Star Trek, which was as good a place to start as any. Starting it up, I set the projector into anamorphic stretch mode, and I was off. Quickly the whole screen was filled without needing to adjust the zoom and focus on the projector, and I started looking for issues. Geometric distortions might have been there but I couldn’t see them, and the scaling done inside the projector was handled very well. The image was much brighter than when I manually zoomed, as the lens was allowing the projector to use the full SXRD panels and not just a fraction, increasing light output. Overall, this is a very good start for the anamorphic system.
For more worrisome to me is watching 16:9 content on the lens. Because of how it has to scale the image to work with the horizontal expansion, the 1920×1080 content was going to be scaled down to 144×1080. Throwing on The Art of Flight, I was prepared to see artifacts around the screen, and notice the lack of resolution in comparison to without the lens. Sitting around 10′ away from the 96″ 16:9 image, I didn’t notice any of that. The image was clear and detailed, and still very bright. A shot of a runway, with diagonal markings that I was certain would show aliasing, were clear and as detailed as I could remember. I didn’t see anything that would make me think this was losing resolution, or that took me out of the moment.
With the Black Diamond screen, the main benefit is you can watch movies with the lights on as well as off. The light rejection properties of the screen make it so your regular lights won’t reflect while your projector image does. Testing this out I threw on Chunking Express and left the lights on in my room. Not once did the in-ceiling lights distract from the image, or take me out of the movie. Throwing on The Fifth Element I would switch the lights on and off and am still able to see the image without it being washed out. I found the experience with the lights off to be more immersive, as it replicates the movie theater experience more, but I enjoyed the flexibility of having the lights on. Being able to have friends over without needing total darkness to watch a movie was a welcome change.
After I had used the Black Diamond screen for a few weeks, I swapped it out for the Screen Innovations SolarHD 4K material. Unlike the Black Diamond screen, this is designed only for rooms with total light control, as it will reflect all light. Turning the lights on with this screen will result in a washed-out image unless you have a projector putting out thousands of lumens at once. Since my prior screen material is the previous generation of SI SolarHD, I had a good idea of what to expect from this material.
Watching Looper, the SolarHD material looked wonderful. It was a very neutral image, free of any sort of sparkles or hot spotting, and with a very smooth texture. It gave me the image that I expect to see in a movie theater, but because of that it expects a movie theater environment. If I switched to a 1.85 or 1.78 film, the image was still wonderful but the sidebars were more visible than they were with the Black Diamond, where its color and light rejection help to hide the screen. For the video purist, the image on the Solar 4K material was hard to beat, but it isn’t nearly as flexible as the Black Diamond screen is.
Conclusion about the Affordable Anamorphic System
With an anamorphic setup there are a few choices to make, and each has their own side effect. One might wonder why we would use an anamorphic lens over a projector with lens memory now. After all, lens memory comes built into many projectors, and can do many different positions including one for 70mm films and their 2.20:1 ratio. It also keeps you with perfect 1:1 pixel mapping and avoids the stretching and scaling that the lens requires.
Using lens memory has a few side effects as well. It can be slower and sometimes won’t line up perfectly. It also has light spill-over on top and bottom of the screen so that you will see reflections above and below the screen. This isn’t as bad with newer projectors and their lower black levels, but you can still see it. The largest side effect that I find is that zooming from 1.78:1 to 2.40:1 drops your light output by 30-40%. If you have your 1.78:1 image set to 16 fL, then your zoomed image will only be 10-12 fL at most. This means you either have to run the projector on high lamp mode and shorten its life, or continually adjust the iris as you watch different films.
One downside of the anamorphic lens, beyond the already discussed issues, is that it is designed for content to be either 1.85:1 or 2.40:1, but not ratios in-between. 70mm films are a 2.20 ratio, and when viewed using an anamorphic lens you lose a bit of the top and bottom of the film. This could be fixed using an external processor like a Lumagen Radiance, but then you need to scale the film in two directions to make it fit correctly, possibly leading to more image issues. With 70mm films and an anamorphic lens you lose around 7% of the vertical content due to the 1.33x expansion. For some this won’t be acceptable, but if you only have a few 70mm films, or none, it may not be a factor at all.
The Black Diamond screen also has its trade-offs depending on your environment. Compared to the SolarHD 4K material, it has a hot spot that you might notice, and large patches of color can make sparkles from the high-gain material visible. As soon as you turn a light on these issues are forgotten, as the Black Diamond puts out a picture in a room with light that no one can touch. It is like having a giant LCD screen in my room; only I don’t need to have a reinforced wall to support it. If you have a pitch-black room and never want to watch with the lights on, then the SolarHD is going to be your ideal choice, but the Black Diamond lets me do things with my theater I didn’t think possible before.
Coming into this review, I was a bit indecisive about the anamorphic lens. I worried about the loss of resolution for 16:9 content, and about the lack of 1:1 pixel mapping. I thought the scaling might look bad, and that geometry issues would drive me away. Having had the lens around for a few weeks now, I want to keep it here for good. The cinemascope image is brighter, I don’t notice any flaws unless I’m looking at a test pattern, and switching between 1.78 and 2.40 content takes only a couple button presses on the remote. All the things I worried about don’t bother me a bit, and the obsessive purist in me goes away as soon as a movie begins to play.
For less than a lens cost just a few years ago, you can now put a full cinemascope experience into your house. Then you can sit back, throw on Star Wars, and relive it like it was the first time you saw it. Now you really do have the full movie theater experience at home, and at a price that wasn’t possible before.


