Introduction to the Anthem MRX 710 A/V Receiver
At CEDIA 2013 this past September, Anthem announced a refresh of their very popular MRX line of A/V receivers. The MRX receivers were introduced in 2010 and they were Anthem’s first entry into the receiver market. The MRX receivers offered a tremendous blend of price and performance thanks to the inclusion of the Anthem Room Correction (ARC) system. The second-generation MRX receivers include a new version of Anthem Room Correction called ARC 1M. The ARC 1M system boasts an entirely new user interface and greater precision due to more advanced digital signal processing in the MRX. The best news of all is that ARC 1M eliminates the old serial interface and connects with an MRX receiver using a network cable.
The second-generation MRX receivers now offer more HDMI inputs, dual HDMI outputs, 4K upscaling and pass-through, faster HDMI switching and come in three models with the primary difference being the amount of amplification and number of channels. The entry level receiver is the MRX 310, which offers 80 watts per channel for 5.1 channels. The MRX 510 is the middle receiver in the MRX lineup and offers 100 watts per channel for 7.1 channels. The flagship model is the MRX 710, reviewed here, which offers 120 watts per channel for 7.1 channels. As for other differences between models, the MRX 710 and MRX 510 allow the front left and right speakers to be bi-amped. The MRX 710 and MRX 510 have seven rear and one front-panel HDMI input, while the MRX 310 has seven rear HDMI inputs. All three models support software updates via USB.
I reviewed the first-generation MRX 700, so I was looking forward to seeing the changes in the MRX 710. I also could not wait to play with the updated ARC 1M system. Let’s take a closer look at what Anthem has done with the second-generation MRX receivers.
ANTHEM MRX 710 A/V RECEIVER SPECIFICATIONS
- Design: 7.1 A/V Receiver
- Codecs: Dolby Digital, Dolby Digital Plus, Dolby TrueHD, DTS, DTS-HD Master Audio, DTS-HD High Resolution Audio
- Precision: 24-Bit/192kHz A/D
- 2-Zone Operation
- AM/FM Radio Tuner
- Anthem Room Correction Gen 2 (ARC 1M)
- Power Output: 2 x 120 watts RMS – Two Channels Driven @ 0.1% THD+N into 8 Ohms; 5 x 90 Watts RMS – Five Channels Driven @ 0.1% THD+N into 8 Ohms
- Dimensions: 6.5″ H x 17.25″ W x 15.6″ D
- Weight: 30.8 Pounds
- MSRP: $1,999 USD
- Anthem
- SECRETS Tags: Anthem, MRX, Receivers, Audio, 7.1
The Design of the Anthem MRX 710 A/V Receiver
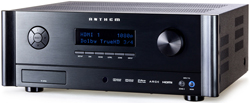
The first thing I noticed about the MRX 710 was the simplicity of the front panel. The tiny buttons from the first-generation MRX series are gone and the MRX 710 no longer looks like a distant cousin of the Anthem processors. The MRX 710 has very clean lines and maintains a compact form factor for an A/V receiver. It is slightly deeper than the MRX 700 at 15-5/8″ deep, and it weighs a little less at 30.8 pounds. The front panel is made from brushed aluminum. The bright blue LED display is flanked by a large volume knob and a standard set of cursor buttons that allow for easy navigation of the MRX 710 setup menus. Directly under the display are six control buttons for setup, display brightness, sound mode, level, zone control and input selection. The second-generation MRX receivers support up to 20 virtual inputs. Rather than clutter the front panel with 20 tiny buttons that might never be used, Anthem kept the design simple. Inputs can be selected from an onscreen menu or by using the front display and the cursor buttons. In the bottom-right corner of the MRX 710 are power buttons for the main and secondary zones. The front HDMI input and a headphone jack are hidden on the bottom-left behind a small door. The exterior case of the MRX 710 has a textured black finish.
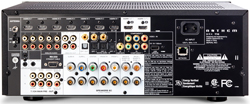
The rear panel of the MRX 710 is well organized and is color coded to help distinguish inputs from outputs. Inputs have a black background while outputs have a white background. This same scheme is used on the Anthem A/V processors and I was glad to see it continued.
The MRX 710 receiver supports eight HDMI 1.4a inputs and two HDMI 1.4a outputs. The HDMI outputs support Audio Return Channel (ARC), which allows you to listen to audio from your television without the need for an additional cable. As we continue to migrate away from analog video, Anthem has reduced the number of analog video inputs on the MRX 710 and completely eliminated analog video output. The receiver supports two component video inputs and just one composite video input. The MRX 710 supports five sets of stereo analog RCA inputs and five digital audio inputs (2 coaxial and 3 optical).
The MRX 710 includes a USB input on the rear panel that is only used for firmware updates. The second-generation MRX receivers no longer support direct connection of external USB devices and there is no longer a dedicated iPod MDX 1 dock connector on the MRX 710. Accordingly, Anthem has eliminated the multimedia application from the MRX receiver line. I think this is a good move since the built-in media player applications included in so many receiver and processor products these days are simply inferior to dedicated media players like an Apple TV or Roku. Anthem has also dropped support for the vTuner Internet Radio application. This is functionality which is easily provided by an external media player.
The Ethernet connector on the MRX 710 rear panel allows you to use the new ARC 1M system and it supports IP control of the MRX 710 which will come in very handy for custom installers and home theater enthusiasts who use control products like iRule. Anthem has announced that MRX remote control applications for Android and Apple iOS will be coming in the future. Since the MRX no longer has a built-in multimedia application, the network connection is technically not required once ARC 1M has been configured.
Anthem includes a complete set of 7.1 channel pre-outs should you want to use the MRX 710 with an external amplifier. The speaker jacks on the MRX 710 support a full complement of seven speakers. The sixth and seventh amplifier channels are assigned to the main surround-back channels by default. If you don’t need surround-back channels in your system, then the extra channels can be used to power speakers in Zone 2 or they can be used to bi-amp the front speakers. On the previous generation MRX 700, these extra channels were available as front-height speakers but Anthem has dropped support for Dolby PLIIz on the MRX 710 and now allows for bi-amping, which was not available on the previous generation MRX receivers.
The remaining connections on the MRX 710 back panel allow for antenna connections for the AM/FM tuners. Anthem is not including an HD Radio tuner on the MRX 710 since their research indicated that most people just used AM/FM tuners as background music for a secondary zone. The MRX 710 includes an IR input and one IR output as well as an RS-232 jack that can be used to control the MRX 710 with an external control system. The RS-232 jack is no longer used when configuring ARC or when upgrading the MRX 710 software. A 12 Volt DC Trigger is also included which allows you to turn on another device, such as an external amplifier for zone two.
The MRX 710 comes with just one basic remote that does not control other devices. The first-generation MRX receivers came with a secondary remote that was used for zone two operations.
From a technology perspective, the second-generation MRX receivers have evolved quite a bit from their predecessors. The second-generation MRX receivers have a more capable DSP which allows ARC 1M to have more filters and ultimately a room-correction curve that is closer to target. The processing in the second-generation MRX receivers approaches that of the AVM/D series Anthem processors, but the processing in the AVM/D series is still the most powerful that Anthem offers to date. On the video side of things, the second-generation MRX receivers offer 4K upscaling and pass-through and they support 3D. Anthem has also incorporated Advanced Load Monitoring into the MRX receiver which constantly monitors voltage and current to ensure that the output transistors in the amplifier are kept within safe operating limits. Amplifier temperature is controlled with a 2-speed fan inside a heat sink tunnel and this allows the MRX receiver to protect itself from damage in situations where speaker impedance is low and volume is high.
Setup of the Anthem MRX 710 A/V Receiver
From a setup perspective, the MRX 710 is pretty simple. The speaker binding posts on the MRX 710 are three-way posts that allow cable to be inserted from the top, bottom, or directly into the post via banana connectors. The MRX 710 speaker binding posts don’t accept spade connectors so I would recommend banana connectors to keep things simple.
I connected a DirecTV DVR, an Oppo BDP-105 and a third-generation Apple TV to the MRX 710 via HDMI and I ran a single HDMI output cable from the MRX 710 to my HDTV. I also connected my first-generation Apple TV to the MRX 710 via component video and optical digital. The MRX 710 is able to up-convert the video signal from composite video and component video to HDMI, so this really simplifies system configuration and minimizes your video cables. I was pleasantly surprised to see that Anthem now includes support for digital sources (two-channel PCM only) in zone two. This means that you don’t have to worry about having analog audio connections on your devices in order to listen to them in zone two. This came in really handy with my third-generation Apple TV which only supports HDMI and optical digital. While HDMI is not supported for zone two audio, I simply connected an optical digital cable to my third-generation Apple TV and I was good to go. I also connected the MRX 710 to my home network with an Ethernet cable so I could configure ARC 1M.
With the connections out of the way, it was time to explore the menu system on the MRX 710. The menus are well organized and are so much larger and easier to read than the first-generation MRX menus, which were sized for a minimum display size of 480p. Anthem eliminated the “Quick Setup” menu and now provides five default inputs for HDMI 1 through 3 and for the FM and AM tuners. Since I connected my DirecTV DVR to HDMI 1, I was pleasantly surprised to have picture and sound immediately after powering on the MRX 710. It doesn’t get any easier than that.
As for setup, the first thing I tackled was input. The MRX 710 allows you to create from one to twenty inputs to suit your needs. Inputs can be easily named and you can delete inputs so that you can build your perfect configuration. Each input allows for separate audio and video assignments and I was especially happy to see that HDMI sources could be reused across inputs. This allowed me to create one input for watching movies from my Oppo BDP-105 and another input for listening to music using the dedicated analog outputs on the BDP-105. Both inputs could share the same HDMI source for video. Anthem also includes listening mode menus so you can set the preferred listening mode for 2.0 and 5.1 channel sources. I really appreciated the flexibility and found input setup to be very intuitive.
With the inputs configured, I entered the distance between my primary listening position and each speaker in my room. Distances are entered in the “Listener Position” menu and can be entered in feet or meters in increments of 1 foot or .3 meters respectively. I was now ready to run Anthem Room Correction, but before I did that, I verified that I was running the latest version of the MRX 710 software. This is easily accomplished by comparing the version number shown in the “System Information” menu against the version number shown on the Anthem web site. In my case, I was not running the latest software so I needed to perform an update. I downloaded the latest version of the MRX 710 software from the Anthem site. Compared to the first-generation MRX receivers that required a PC to perform an update, updating the MRX 710 was a breeze. Just extract the firmware file to a USB stick and follow the simple directions that come with the download. The entire process takes less than ten minutes and helps to ensure that you have the latest functionality and the latest software corrections for the MRX receiver.
For anyone that has used the Anthem Room Correction software on the first-generation MRX receivers, the biggest barrier to setup was often the serial interface that was required for communication. It’s not just that serial communication is slow, but it is quite rare to find serial interfaces on modern laptops. The workaround was always to use a USB to serial adapter but oftentimes those would cause problems if the adapter’s driver was not Windows-certified. With the introduction of ARC 1M, Anthem has finally eliminated the serial cable once and for all. ARC 1M refers to the hardware implementation of Anthem Room Correction in the second-generation MRX receivers. It is fundamentally the same as the prior generation of ARC except that it runs on the new MRX DSP hardware and it supports Ethernet as its communication interface. To go along with the updated hardware implementation, Anthem has introduced a new version of the ARC software called Anthem Room Correction 2 or ARC-2 for short.
ARC-2 is an extremely sophisticated software program that analyzes each speaker’s in-room response and makes the appropriate corrections to each channel to ensure optimal performance in the listening room. The ARC-2 software is a Windows application that comes on a CD with the MRX receiver. In addition to the software, a calibrated microphone and tripod stand are included in the ARC 1M kit. The installation CD that comes with the MRX 710 includes a special microphone calibration file that is tied specifically to the microphone in the ARC 1M kit. If you install from the CD, the calibration file is automatically copied to the ARC-2 installation folder. If you install from a downloaded version of ARC-2, you must manually copy the calibration file from the root of the installation CD to the install directory. If you do install from the CD, then you need to make sure that you have the latest version of the ARC-2 software by checking the Anthem support site. Fortunately, a reinstall of ARC-2 leaves the microphone calibration file in place which simplifies the process.
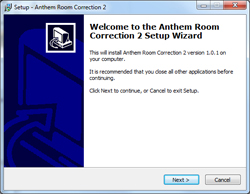
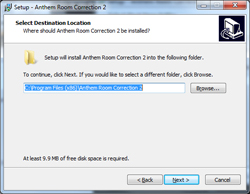
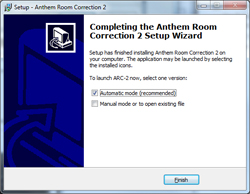
The installation of the ARC-2 program is very straightforward and uses a typical Windows installation wizard.
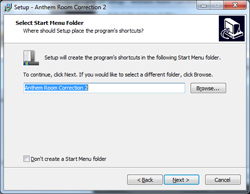
The installation wizard prompts for installation folder and Start Menu folder.
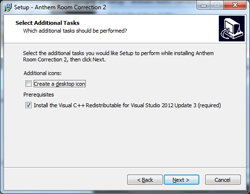
The ARC-2 software requires the Microsoft .NET 4.0 framework and support files for Visual C++. If either one of these components is not present on your PC, then the installation wizard will indicate that they are required prerequisites and install them for you automatically as part of the ARC-2 installation process.
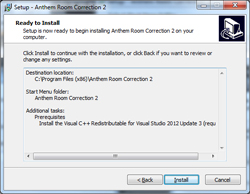
The last step in the ARC-2 installation wizard is a final summary of the steps that are going to be taken during the install.
Simply press “Install” and let the installer do its work. The entire installation process can take some time depending on the speed of your PC and if the .NET 4.0 Framework has to be installed. The installation may require a reboot to complete, normally the case when running Windows XP. If a reboot isn’t required, then the last step in the setup process prompts you to run ARC-2 in automatic or manual mode. The shortcuts to run ARC-2 in either automatic or manual mode can always be found in the ARC-2 Start Menu folder.
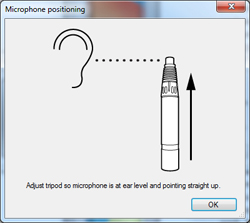
I connected the ARC 1M USB microphone to my Windows laptop which was connected wirelessly to my home network. I placed the microphone in the tripod and positioned the tripod at the primary listening position in my room, with the microphone pointing straight up. Proper microphone height is critical to measurement with ARC 1M and the microphone should be positioned at ear level.
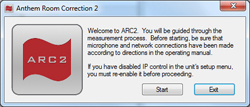
I launched the ARC-2 program in automatic mode, which is what Anthem recommends for most users, and was greeted with a very simple connection reminder dialog.
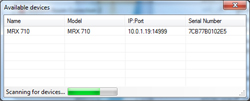
Pressing Start begins the process which looks for available MRX devices on your network.
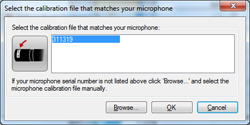
Once an MRX receiver is found, the ARC-2 program displays a list of microphone calibration files found in the ARC-2 installation directory. I checked that the serial number matched the tag on my microphone and pressed OK to continue.
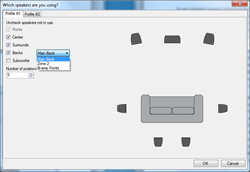
The next step in the process is the speaker selection dialog, which allowed me to pick which speakers I have in my room and also allowed me to measure two separate speaker profiles. Most people will use the same speaker configuration for both profiles, but different choices could be made for movies and music for example. ARC-2 requires a minimum of five measurement positions but you can also select up to ten if you wish. The speaker selection dialog allows you to designate whether the surround-back channels will be used for main back, zone 2, or for bi-amping the front channels.
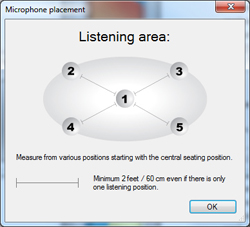
I pressed OK and was shown a reminder dialog about proper microphone placement during the measurement process.
I pressed OK and was shown another reminder dialog about placing the microphone at ear level.
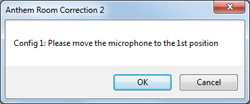
I pressed OK and ARC-2 prompted me to move the microphone to the first measurement position. Once I was ready, I pressed OK one last time and sat quietly.
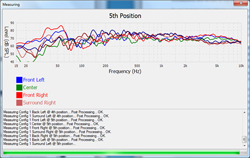
For each measurement position, ARC-2 produced a series of test tones from each speaker. ARC -2 shows a very nice measurement summary graph for each position and clearly indicates which speaker is being measured. Once the first set of measurements was complete, ARC-2 prompted me to move the microphone to the next position. This process continued until each position had been measured.
If you have a 7.1 system and use the default of 5 positions, ARC-2 takes 40 distinct measurements of the room. I chose to use the same configuration for both speaker profiles, so I was done with speaker measurements. If I had chosen to use a different configuration for the second profile, ARC-2 would have prompted me to move the microphone back to position one and then repeat the entire process for the speakers in that configuration. If the phone rings or a dog barks interrupting the process, ARC-2 is able to detect such a problem and prompts to repeat any questionable measurement.
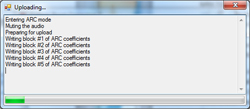
Once the measurement process was complete, the ARC-2 software processed the data and prompted me to save the results to my PC hard drive. Once that was completed, ARC-2 calculated the room-correction parameters based on the measurements and automatically uploaded the correction data along with the proper speaker levels to the MRX 710.
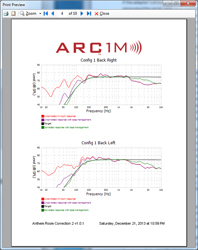
A final message informed me that the upload process was complete and offered me the option to preview the results. While I was expecting an onscreen summary, I was amazed to see that ARC-2 presented a preview window containing a ten-page in-room audio performance report documenting the before and after results. Graphs are provided for each configuration and measurement position, along with a summary of speaker levels and crossover targets, and the report can be printed for reference.
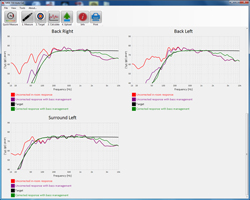
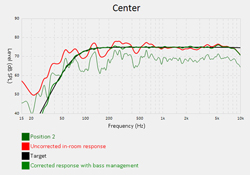
I was very eager to see what Anthem included in version two of the ARC software. The first thing I noticed was the speed of the measurement process. By using the network instead of the serial interface, I was able to measure my room in less than eight minutes. I could make tweaks to the ARC-2 configuration and simply upload a new configuration to the MRX 710, without leaving my couch, in about 30 seconds! If I didn’t like the change, I could revert to the prior configuration file with ease. The ARC-2 user interface has undergone a complete makeover. The application feels fresh and modern and each speaker graph is beautifully formatted. The measurement graphs now include a plot of the uncorrected response with bass management applied.
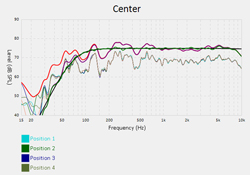
As if that weren’t enough, the ARC-2 software lets you view the measurement results at each individual measurement position. This can help in troubleshooting issues in the listening room.
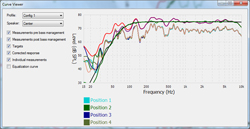
The measurement graphs can even be tailored to include only specific curves based on personal preference.
ARC-2 has an updated version of the Quick Measure tool which is very useful for making real time measurements of individual speakers and for adjusting subwoofer levels. Anthem also included a new tool called Curve Viewer which lets you view the plots for each individual speaker.
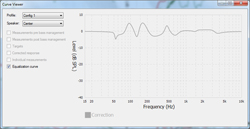
Curve Viewer also allows you to finally see the equalization curve that is being applied for each speaker by the DSP in the ARC-1M hardware.
The final touch is the ability to generate and print a custom in-room audio performance report. Anthem has even included an option to enter the name of the system owner, the system calibrator and any notes for the report. This is definitely a feature that will be appreciated by custom installers.
I won’t get into the details of the advanced ARC-2 options in this review, but the software allows the enthusiast or custom installer to adjust the correction response targets for each speaker and to tweak the computed room gain as well as to adjust the frequency limit for ARC 1M corrections. I have always loved the Anthem Room Correction system, but ARC-2 simply blew me away with its speed, ease of use and outstanding functionality. Best of all, it is included with every MRX receiver , you can run it as many times as you like, and you don’t have to pay extra for it!!
With the room correction out of the way, I took one last pass through the MRX 710 menu system. I checked each input to ensure that Anthem Room Correction was enabled and I was finally ready to start listening.
The Anthem MRX 710 A/V Receiver In Use
For my listening tests, I was using a 7.1 speaker configuration from Definitive Technology including a pair of BP-3000TL speakers with powered subwoofers for the front mains, a CLR 2002 speaker for the center channel, and four Definitive Technology UIW 94/A speakers for the surrounds and rear channels. My source devices included an Oppo BDP-105 and two Apple TVs. My normal reference processor is an Anthem Statement D2, and I’m typically listening in my room using Anthem’s ARC-1 Room Correction System. I was really looking forward to hearing how ARC-2 performed on the MRX 710.
For movies, I started listening with the new Star Trek: Into Darkness. The opening scenes with the shuttlecraft and Spock in the volcano were immersive. My listening room was filled with the thunderous roar of the bubbling volcano and I was immediately drawn into the unfolding drama. I laughed at the sound of the spears coming toward me as the planet’s inhabitants chase Kirk and McCoy through the jungle. The MRX 710 created a large, wonderful soundstage. The sound of the ships flying through the room during the firefight on the Klingon home world of Kronos made me feel like I was in the battle. The MRX 710 was adept at handling everything the movie’s Dolby TrueHD 7.1 sound track had to offer. From crisp clear dialog as Kirk enlists Kahn to cross over to the Dreadnought-class USS Vengeance, to the subtle echo of Kirk’s footsteps in the garbage chute, to the utter silence of space as the doors quickly close behind them as they enter the debris field, the MRX 710 handled all of it with ease. The final scenes as the Enterprise falls to earth were simply amazing. The spinning of the ship as it fell into my listening room was visceral. This was a testament as to how well ARC 1M managed the bass from my BP-3000TL towers. Needless to say, I was completely engrossed with the movie and I ended up watching all of it once again. I loved watching movies on the MRX 710, and my experience with other reference titles like Sky Fall and Tron: Legacy was just as excellent.

Given the time of year, I had the opportunity to listen to the MRX 710 with some of my favorite holiday albums. On Yo-Yo Ma & Friends Songs of Joy & Peace, track six is the beautiful “The Wassail Song / All Through the Night.” The MRX 710 created a deep soundstage blending the beautiful sounds of Yo-Yo Ma’s cello with Edgar Meyer’s acoustic bass and Chris Thile’s mandolin. The sound from the MRX 710 was incredibly detailed and each instrument was beautifully layered to create a gorgeous harmony. The MRX 710 easily transitioned from the commanding sound of the cello and acoustic bass to the delicate sounds of the strings on the mandolin. I just sat back and enjoyed the sumptuous sounds of the entire album.

On the 2012 remastered edition of the Vince Guaraldi Trio’s classic A Charlie Brown Christmas, the MRX 710 brought the sounds of this jazz classic to life. On the timeless “Linus and Lucy,” the piano was captivating and the accompanying bass and percussion were distinct but never overpowering. The choir on the vocal version of “Christmas Time is Here” blended seamlessly with the piano and I found myself marveling at the detail in the children’s voices. On “Skating,” the piano and percussion brought back fond memories of the Peanuts Christmas special and I could just imagine snowflakes falling as I listened to the MRX 710 recreate this beautiful piece of jazz in my room.

High-resolution audio on the MRX 710 was equally enjoyable. For something quite a bit different, I listened to the Blubell & Black Tie track “It’s Oh So Quiet” from their album Blubell & Black Tie. The emotion and humor in Isabel Garcia’s voice as she sang about love was palpable and intoxicating and the group’s harmonies and mix of Brazilian style was pure fun.

From a video perspective, the MRX 710 did not display any handshake problems when changing resolutions on my satellite box or when changing inputs to another HDMI source. Video output looked great on movie and television content and Blu-ray content was excellent. The MRX 710 supports video scaling or video pass-through depending on your needs. Anthem has taken the approach to deinterlace and scale video input based on the highest resolution supported by the attached display. This simplifies the overall video configuration since a lower resolution can’t be selected.
From an operational perspective, the MRX 710 was very simple to use. As I mentioned earlier, selecting inputs is done from the on-screen menu or from the front panel controls. The MRX series receivers have an extensive control interface. Individual inputs can be easily programmed if you happen to have an external control system or you can let a custom installer handle it. The remote was simple to use and super easy to see in a dark room thanks to its excellent backlighting.
I ran into one minor problem when using the MRX 710. When the receiver starts to process a digital signal, I would occasionally hear a very brief tick sound as the signal started to play. This was most noticeable when playing movies or extras on Blu-ray discs. I made Anthem aware of the issue and they are looking into it.
The Anthem MRX 710 A/V Receiver On The Bench
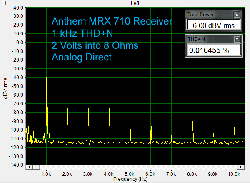
At 1 kHz with an analog input, THD+N was 0.016455%. We see a lot of even and odd harmonics as well, which average about 87 dB below 0 dBFS.
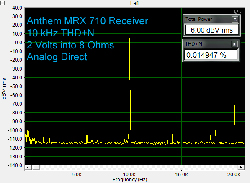
At 10 kHz with an analog input, THD+N was 0.014947%.
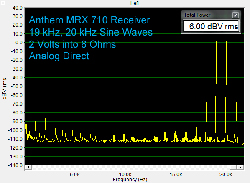
Here are the results for 19 kHz, 20 kHz combined test frequencies with an analog input. There is a small visible B-A peak at 1 kHz about 89 dB below 0 dBFS. We see distortion spurs at the higher frequencies with the largest peak being at 18 kHz and 68 dB below 0 dBFS.
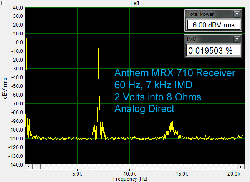
The IMD measurement with an analog input was 0.019503%. We have a second order harmonic out at 14 kHz that is 90 dB below 0 dBFS.
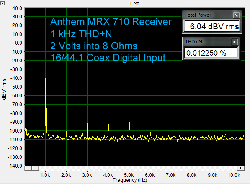
At 1 kHz with a digital input, THD+N was 0.012250%. We see fewer even and odd harmonics as well, which average about 87 dB below 0 dBFS.
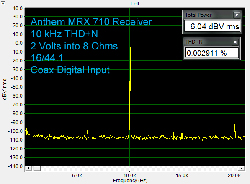
At 10 kHz with a digital input, THD+N was 0.002911%.
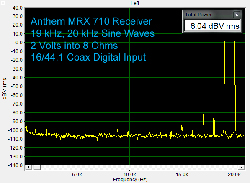
Here are the results for 19 kHz, 20 kHz combined test frequencies with a digital input. There is a small visible B-A peak at 1 kHz about 94 dB below 0 dBFS. We see distortion spurs at the higher frequencies with the largest peak being at 18 kHz and 68 dB below 0 dBFS.
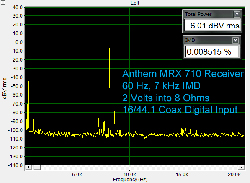
The IMD measurement with a digital input was 0.008515%. We see some distortion spurs in the spectrum with the spur at 15 kHz being 90 dB below 0 dBFS.
On the video side of things, the MRX 710 passed all of our standard deinterlacing and color space tests. I was not able to look at component video processing on the MRX 710 since I no longer have a reference player with component video output.
Conclusions about the Anthem MRX 710 A/V Receiver
Anthem continues their tradition of offering tremendous value for the dollar in their second-generation MRX A/V receivers. The MRX 710 sounds fantastic with both movies and music. The receiver is so much easier and faster to configure thanks to the network interface that Anthem has incorporated into the updated ARC 1M Room Correction System. The user interface redesign and enhanced features in the ARC-2 software are awesome and the software is included with every MRX receiver at no extra charge. If you are looking for a new receiver, make sure you visit an Anthem dealer and check out the second-generation MRX receivers. I give both the Anthem Room Correction system and the MRX 710 my highest recommendation.


